
Our meeting on Thursday 13th May 2021 was to be all about making wooden platters, the meeting was to be organised by myself (Alec Mutch) but due to the ongoing Covid-19 restrictions this meeting had to be changed to a virtual meeting. You were all invited to make a platter or two and send me the pictures of what you had made, the entries were thin on the ground with only 3 members putting forward their work, those were Dave Line, Nick Simpson, Geoff Potter and myself. Those are all regular contributors to the web site and we do appreciate their participation but we would really like to see lots more of you taking part in the online meetings.
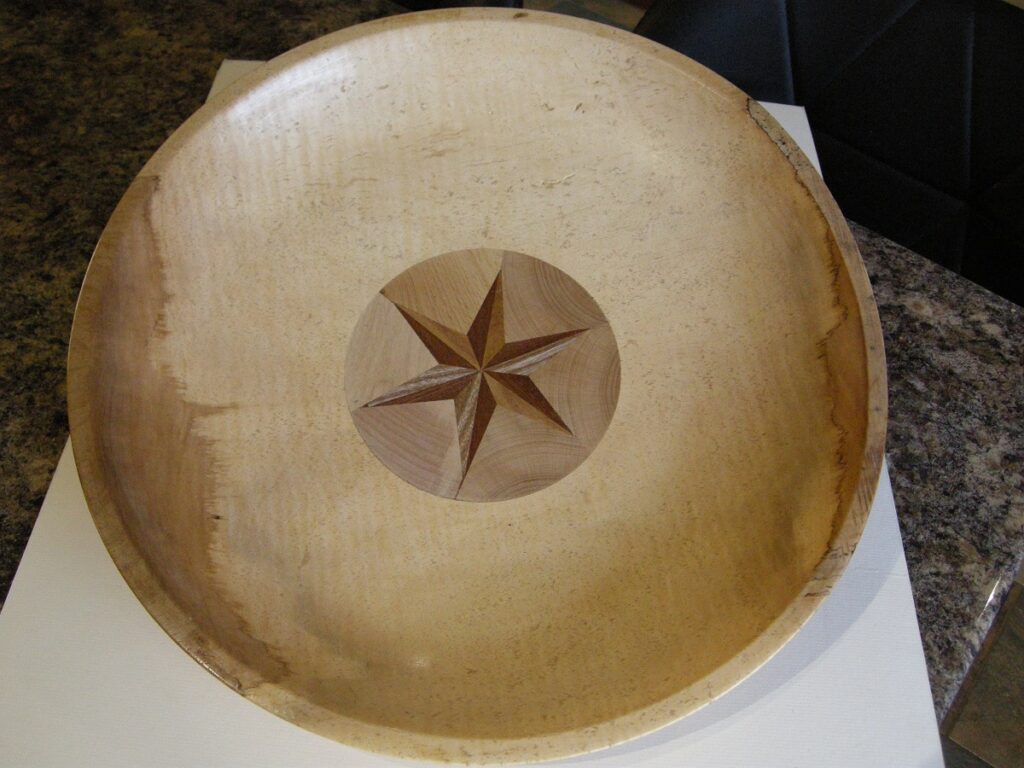
Our first entry is from Dave Line, this is what Dave had to say about his entry,
Hi Alec,
Please find attached a couple of photo’s of platters I have made. The first is 380mm dia and 50mm thick.
When I was turning this platter I went too deep so there was next to no wood at the recess (about 1mm) so I turned a hole (if you can turn a hole) 130mm dia in the middle of the base. I then turned the 5 pointed star and glued it in place in the base which I don’t think looks to bad. Wood not known. I think the wood is Black Walnut Sap wood.
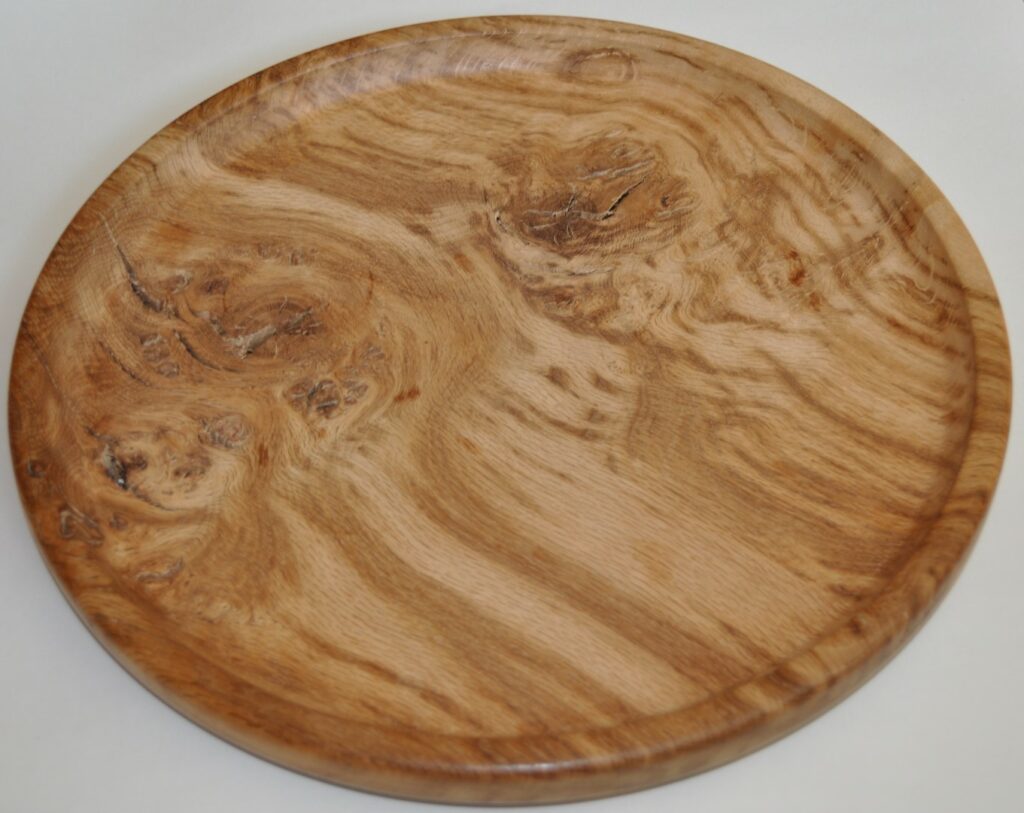
No expense was spared with the second piece. It is made out of a piece of old kitchen worktop, it is 240mm dia and 35 mm deep.
Stay safe, Dave Line.

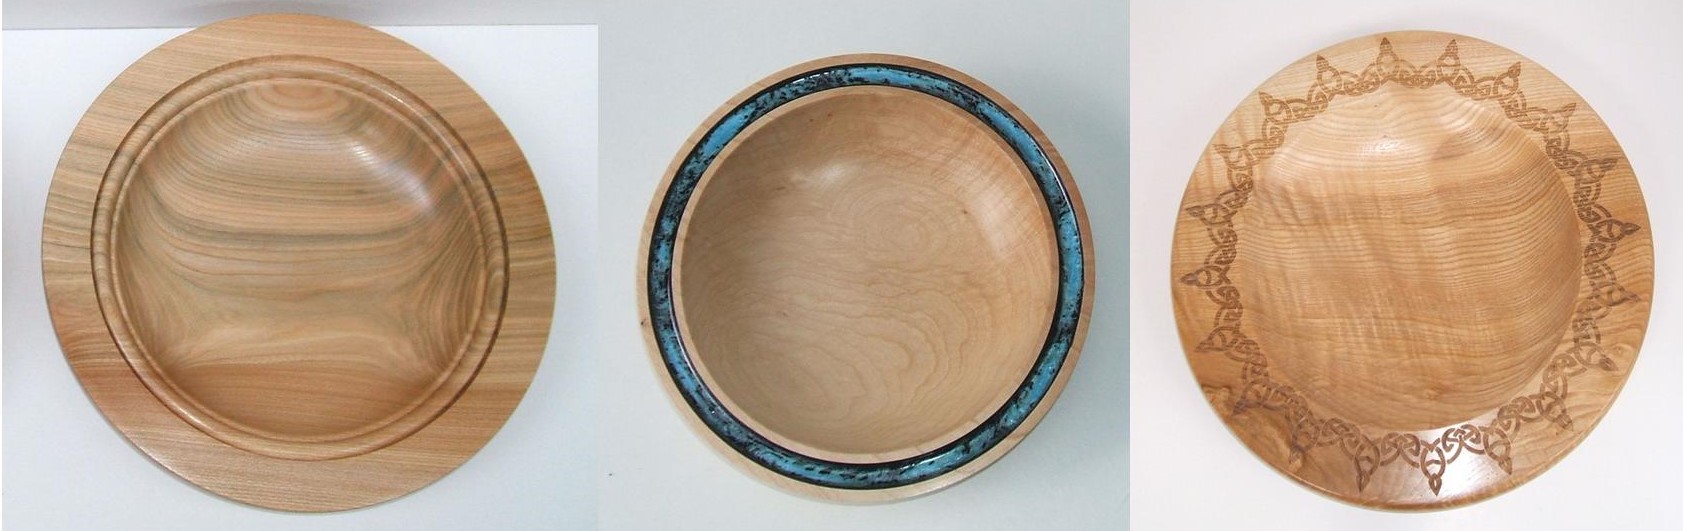
Now we have Nick Simpson’s entry, and here is what Nick had to say about his entry,
Hi Alec
Not platters but trays.
I think equally difficult to make well. The top and bottom have to be finished absolutely smooth and the edge should perform as a handle. These two are in what is called Tiger Oak. Both have burrs within them. The dark brown staining which makes Tiger oak so attractive is thought to be a chemical introduced into the trunk by bracket fungi. The trays are 420 mm and 470 mm diameter and the bases 12mm thick
Best wishes
Nick Simpson.
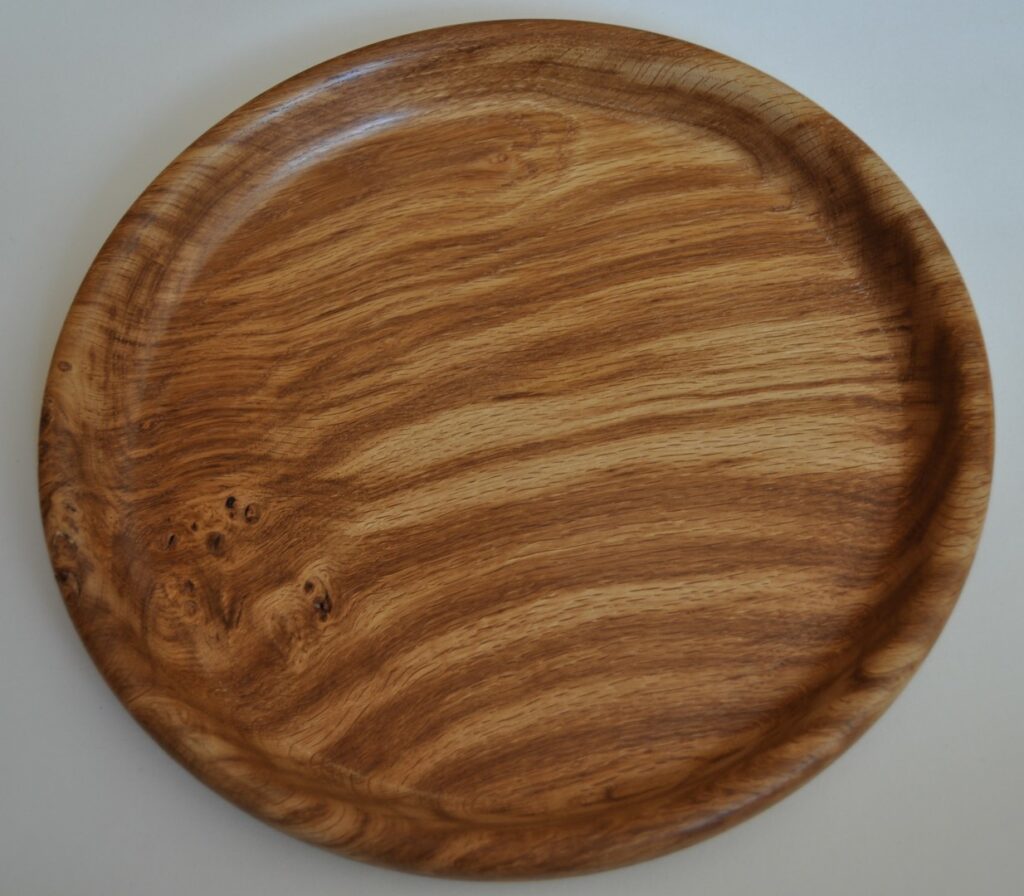
Now we have an entry from Geoff Potter, and this is what Geoff had to say about his entry.
Alec,
I made this platter as my first attempt of an experiment at inlaying. The turning of the platter was straight forward using a piece of oak. I dealt with the fine cracking by applying superglue which stabilised the cracks and knot. I cut the groove with my narrowest parting chisel. I had some of the cheap 2 part clear epoxy from Poundland. I mixed this with blue acrylic artists paint and trickled it into the groove. It sets in no time and I then cleaned it off with the bowl gouge. Sanded and polished. Melamine finish.
Points to bear in mind are….
Take care mixing the epoxy as air bubbles rise to the surface of the inlay forming cavities. Mix slowly in a stirring motion. Wear gloves. The epoxy is very runny. I took the platter off the lathe so that I could lay it flat to drop the epoxy into the groove. So that the platter did not wobble when remounted, I took it off the lathe together with the chuck and kept the platter on the chuck throughout. Any distortion after remounting will show up in variations of the fine groove.
One day I will get around to doing more of this – maybe buy some proper inlay material as demonstrated once at the Club.
Geoff Potter.
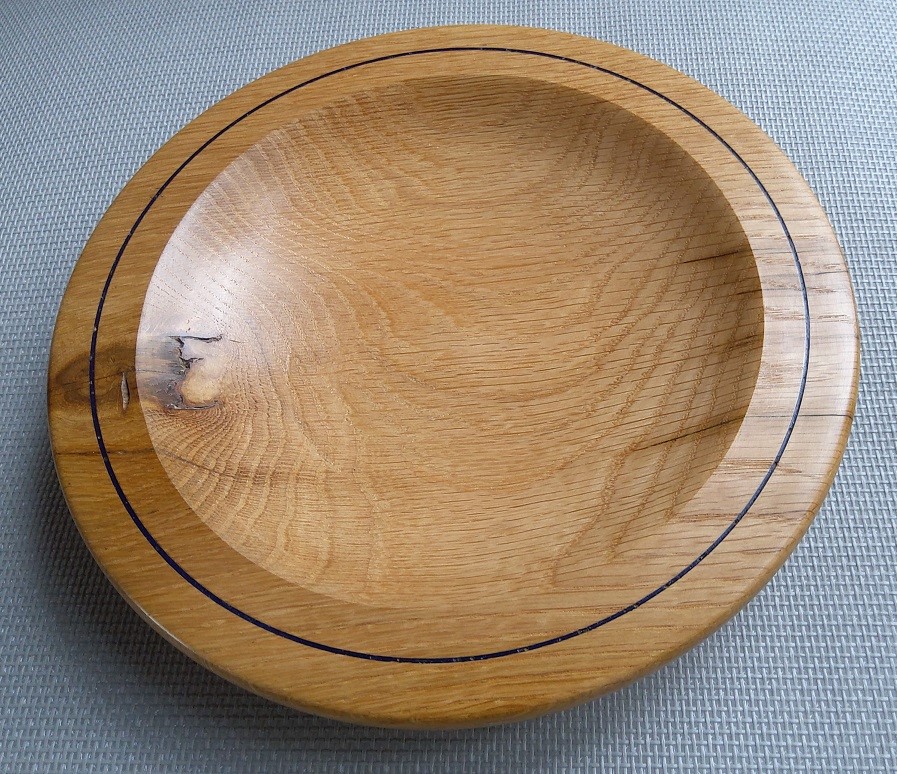
Now for a platter I made some time ago, I have presented this by way of a timeline entry so that you can all follow this if you wished to make something similar. It’s going to be a floral platter.
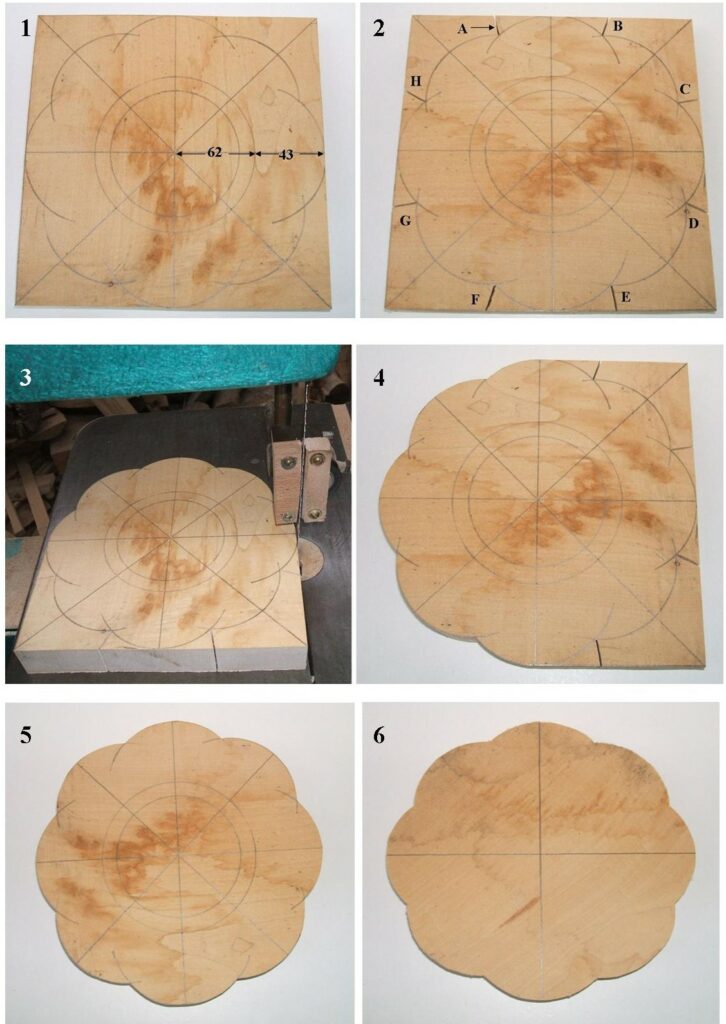
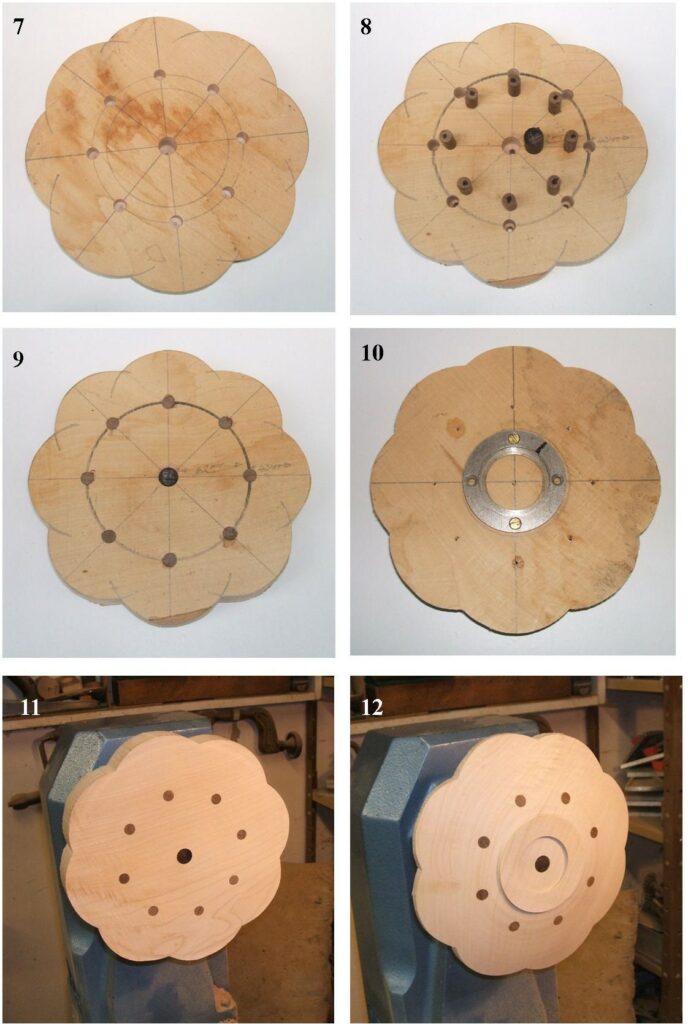
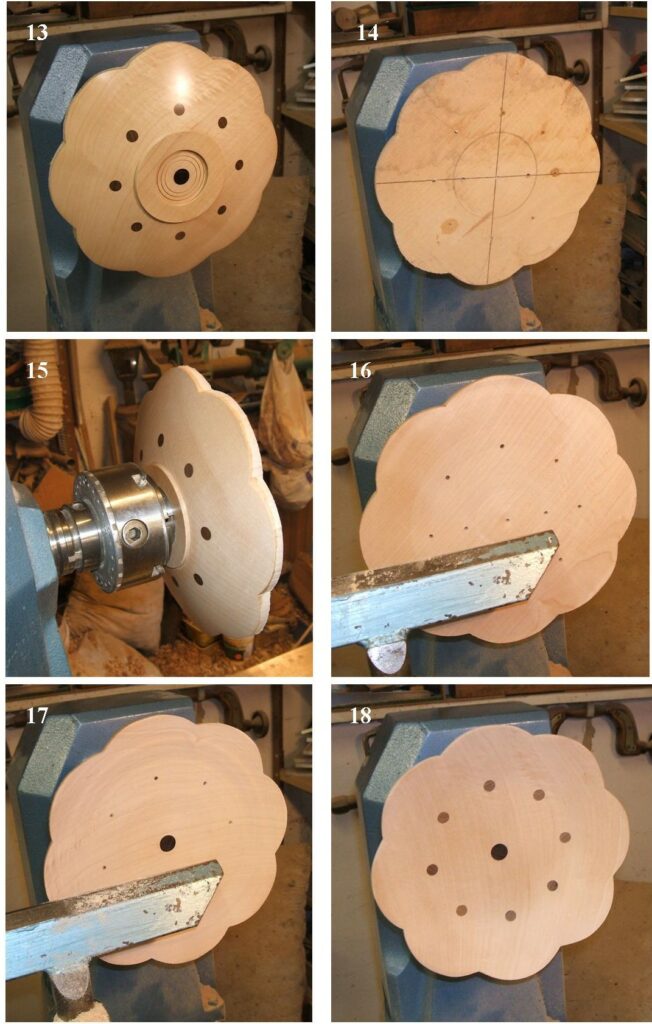
This timeline by Alec Mutch.
That concludes our entries for this meeting, we hope you can take something from them in your own woodturning.
Our next meeting is scheduled for the 27th May 2021 it was to be a demonstration by myself on Inside Out Turning, this meeting will also have to be a virtual meeting, but we do invite you all to have a go at an Inside Out Turning.
Do remember the clubhouse remains closed.