Showtime virtual meeting 30-04-2020

The showtime meeting scheduled for the 30th April 2020 has now become a virtual meeting, (it will not take place at the clubhouse) we will be treating this meeting on line. We need you all to send in your pictures and some text on the items you would have brought to the showtime meeting, you can send in more than one picture, in fact more the merrier. We had a reasonably good response to the last virtual meeting on Natural edged turnings, we had 44 pictures for that meeting, I want to see at least this amount, preferably more for this virtual meeting, remember it can be of anything you have made turned or otherwise, we are looking for a very good response so please send me your pictures along with a bit of information on each item.

Here are some of the items you brought in for the showtime meeting on 15-02-2018.
These are some of the items you brought in for the showtime meeting on 21-06-2018
Here are some of the item you brought in for our last showtime meeting on 05-09-2019

Get busy in your workshops and produce as many items that you can. we want to see lots of entries.

Send your pictures and text to me by email to a.j.mutch4321@btinternet.com

All entries to be received by Thursday 30th April 2020, and thank you for taking part.

Do remember the clubhouse remains closed.

Chuck maintenance while closed 25-04-2020

Although we have been closed for over a month now, we have still managed to get some useful work done with some of the equipment. Shortly after the lock down was announced Nick Simpson who is tasked with the maintenance brief offered to pick up all the lathe chucks and take them to his premises and do a full service on all of them. In addition to this John Ruickbie has been checking the premises regularily for security reasons.

Here is Nick Simpson’s report on the first of the chucks.

Nick’s News  – Week 2

Servicing HWC Chucks – #1. Nova G2

The Nova G2 chuck has an open back and is therefore certain to accumulate dust in all moving areas. This will lead to stiffness and potential jamming. It is important to clean the chuck regularly and re-lubricate. This is a simple process, which is illustrated in the accompanying photographs (G2. A-F).

Picture G2. A. shows the rear view of the chuck when removed from the lathe. There is a large amount of accumulated dust which partially obscures the teeth at the rear of the scroll plate which engage with the chuck key. The scroll is held in place by a circlip which must be exposed by removing the accumulated dust and debris. A simple way to do this is by compressed air jet as shown in G2. B.  PPE is essential with eye protection and a dust mask. The next step is to remove the circlip (G2.C). It is advisable to wear eye protection as the circlip is made of sprung steel and can ping off the pliers unpredictably. Having removed the scroll, the jaw the jaw carriers may be slid out of their corresponding slots in the chuck housing. Each carrier is stamped with a numbers 1-4 (see picture G2.E). For the Nova G2  chuck there is no need to record which slot the individual carrier came from. Now, in a well-ventilated area with nitrile gloves and eye protection, brush off all surfaces with a brass wire brush and then steep the parts in a de-greasing solvent (G2. D). I used paraffin but any solvent will do. Dry the parts on paper towel and leave to fully dry or to speed the process blow with compressed air using the above PPE.

Reassembly is the reverse process with certain caveats. Spray each part with lubricant prior to assembly. My preferred lubricant is PTFE spray, because it is a ‘dry’ lubricant, but any fine oil will do. Do NOT use grease of any grade. With the chuck on its back insert jaw carrier labelled 1 into any slot. (G2.E.). Now insert all the other carriers in order 2-4 into slots in a clockwise sequence. Bring the carriers together so that their inner edges form a square and turn the whole over (G2. F). You can now drop the lubricated scroll onto the jaws and with a little ‘jiggling’ it will engage with the carriers. Now replace the circlip and the job is complete.  JOB DONE.

Having now seen the pictures showing all the dust that has accumulated in the workings of the chuck, I think this servicing was long overdue, and I have to thank Nick on behalf of the whole club members for volunteering to do this work at this time. We will be looking at all the club equipment as soon as we get back to anything like normal to make sure the maintenance on all our equipment is carried out.

I will be doing a post shortly on the Showtime meeting that was due to take place on the 30th April, (that meeting will not happen, but hopefully we can have a virtual meeting). Watch this space.

Do remember the club remains closed.

Project for you all to make a wooden mushroom. 23-04-2020

Here is a little project for you all to have a go at, make a wooden mushroom, you don’t need a lot of timber for this project any bit of branch wood will do, even something out of your garden, don’t worry if it ‘s not quite dry or what shape it is, just use what you can. I have put together some pictures with a little text to guide you through the making of a wooden mushroom, I hope it will be helpful to some of you. The mushroom I have made did not require a lot of tools, a thin parting tool along with a couple of spindle gouges, the lathe chuck did have 2 sets of jaws, the standard dovetail jaws and a set of pin jaws, it also used a forstner drill bit and a morse taper drill chuck for the tailstock end.

Using a pin chuck means that you can hold the mushroom by this method to firstly remove the pip at the head of the mushroom without it causing any difficulties this would include the final sanding, sealing and polishing, and secondly there is no need to part the mushroom off when finished, just release the jaws and the mushroom comes off finished.

If you don’t have a pin chuck, a screw chuck will also do the same job, as indeed will a hot melt glue chucking system, I have the details of a mushroom made using the hot melt glue method on my web site along with a much more detailed account of how it’s made.

http://www.howtodowoodturning.com/mushrooms

Let me see any that you make. please send me the pictures.

a.j.mutch4321@btinternet.com

Alternative to woodturning 22-04-2020

I’m sure most of us are enjoying the nice weather we are having at the moment even in spite of the lockdown, that is those of us lucky enough to have a garden. I know I have been taking advantage of this fine spell to get my vegetable patch and tunnel greenhouse planted with this years seeds for the coming season. Now it’s on with cutting the grass, and I have a lot of it but the tractor mower makes light work of it. I have received some pictures and text from Nick Simpson that may just assist with your planting, it does also have an element of woodturning involved, so this post is not so much off the usual approach as may at first glance be thought, here is what nick had put through to me,

Nick’s News – Week 1

Seed Pot maker

This is a simple 2-part combination project which is useful and cost-saving for every gardener.

The principle is to produce seed pots from newspaper. These can then be planted directly into the ground and avoid the inevitable ‘check’ in growth that occurs with transfer from plastic pot to ground.

Picture 1 shows the two turned items and one newspaper seed pot. Pictures 2 and 3 show the dimensions of the 2 elements. I prefer to use Ash but any wood including pine will do. The potmaker tool is turned between centres and the base-forming tool is cross-grain. There is a 10mm deep recess with 5mm thick walls at the base of the potmaker tool. This recess and the dome on the base-forming tool form the firm base of the pot. It is important that the potmaker tool has a slight taper so that the pots can be slid off easily.

My version of the potmaker tool is marked with scorch lines at 1½ “, 2”,3”, 4” and 5” being the depth of the intended seed pot. The tool is placed on the newspaper as in picture 4. Decide the depth of pot you want and add 1½” inches to turn over to make the bottom of the pot. Draw a line and cut a full width of tabloid newspaper as a strip. Now, roll the strip around the tool as in picture 5 making sure you have the 1 ½” over at the base; a drop of paper glue will hold the flap in place but is not necessary. Fold over the newspaper at the base (picture 6). Now form the base by firmly rotating back and forth in the base-former (picture 7). Picture 8 shows the finished pot ready to be taken off the pot-making tool. The finished item is show in picture 1.

Now fill the pot with seed compost, sow your seed(s) and then water. Store in the normal way and plant out directly into the ground when growth and conditions are right. I like to cut off the base at planting out time but this is not strictly necessary.

I hope you enjoy this and find the tool useful. They make good birthday presents too.

I must add that this is not an original idea. I first saw this in a video by Steve Jones who is a production turner in the Midlands of England and whose wizardry with a skew chisel is a wonder to behold.

Regards to you all, and keep safe,

Nick Simpson.

Here are the pictures that accompany the text,

Read the text and follow the numbers.
Your seed pot should now be ready to be planted.

I thought I would show you what I have been doing over the past 10 days, my veg patch is almost complete, my small veg seed trays are in the greenhouse to germinate, I will harden them off prior to planting out.

Picture taken this morning, the sun is out, the temperature is good but you can still see the snow that remains on Sgurr Mor. My tunnel is 48 feet long by 18 feet wide, the veg plot being slightly bigger can be seen to the left of the tunnel.

If any of you want to use this space to get anything you are finding difficult to get during this shut down just email me with your request or question and I will post it on.

Regards to you all, and keep safe,

Alec Mutch.

HWC members pictures 19-04-2020

Here are some more of our members pictures that I recently received, they have come from Gordon Leitch and Jeff Buttress. I did receive some of Gordon’s pictures before the post on Natural edges went out, but as these pictures did not have any natural edge element in any of the items he sent me pictures of, I decided to do them as a separate post, and here they are now.

These were the first 2 pictures , the picture on the left has a bowl and a box both made from Walnut, the picture on the right has 2 goblets, both made from Native Yew.

A few days later I also received some more pictures from Gordon Leitch this time of a natural edged bowl, and Gordon had a couple of questions about the item he had made.

These are the 3 pictures of his Natural edged bowl, Gordon also went on to ask the following.
Evening Alex I am sending you 3 photos of a natural edge bowl I just finished for your thoughts. It is made from a misshapen piece of laburnum,
(A)  Would you have carried on or scrapped piece ?? 
( B) Do you think it looks odd with hole in side. 
 I would appreciate your thoughts.  
Regards Gordon 
Here’s what I think Gordon, I would most certainly have carried on, it would not have been scrapped, do I think it looks odd with the hole in the side? certainly not! I am always looking for odd things or odd shapes to turn into precious artefacts , you have done very well with this piece of work.
These next 5 pictures came in from Jeff Buttress.
Jeff you have done very well with all the items you have made, you would also appear to be very much better at the cleaning up than most of us are, I’ve never seen my workshop this tidy even when I was setting it up.
Here’s what Jeff had to say about his pictures,

Hi Alec
I enjoyed seeing the members work for the live edge bowl work, so much that I decided to have a go. Having had the beginners tuition postponed because of the closure I’ve been trawling you tube for guidance.
I usually only turn pens but with time on my hands I’m exploring further. My first turned bowl (pic 1) is from a mahogany blank 150 mm dia x 60 deep. I’m quite pleased with the resulting bowl even though the walls are on the thick side at 10mm.  The second piece I tried ( pic 2 )was from a Laburnum blank I prepared myself from a tree taken down about 4 years ago. It started life at 135 mm dia x 50 deep and I ended up with a bowl 128mm dia x 45 mm deep with wall thickness of 7 mm. Both bowls were finished with sanding sealer and Melamine lacquer. The main problem I had was dust instead of shavings with some of the cuts. Today after having been inspired by the club images I decided to have a go at a live edge bowl. I don’t have any seasoned wood suitable for a live edge bowl but I had a lime tree lopped a month ago so found a suitable bit of green wood. I started with a branch joint about 90mm diameter and 120 long. One of the bits in pic 3. I’m really pleased with the result (pic 4) although I have a few issues with it, There are a couple of areas of tear out that I couldn’t get rid of and sanding proved a bit difficult, just kept clogging up. I will see how well it dries and will possibly be able to remount it and sand it and add a finish coat. Pic 5 is a view of my woodturning shed with the 1960’s Tyme lathe I rebuilt.
Regards,
Jeff Buttress.

Thank’s to Gordon and Jeff for sharing their work and thoughts with us all I hope this will inspire some more of you to send in some pictures, but do remember to give me a few details along with them.

Also remember that our clubhouse remains closed, the situation will be reviewed after we see what the government does on the 7th May, in the meantime stay safe and avoid this virus.

Report on our virtual meeting 16-04-2020 working with natural edges.

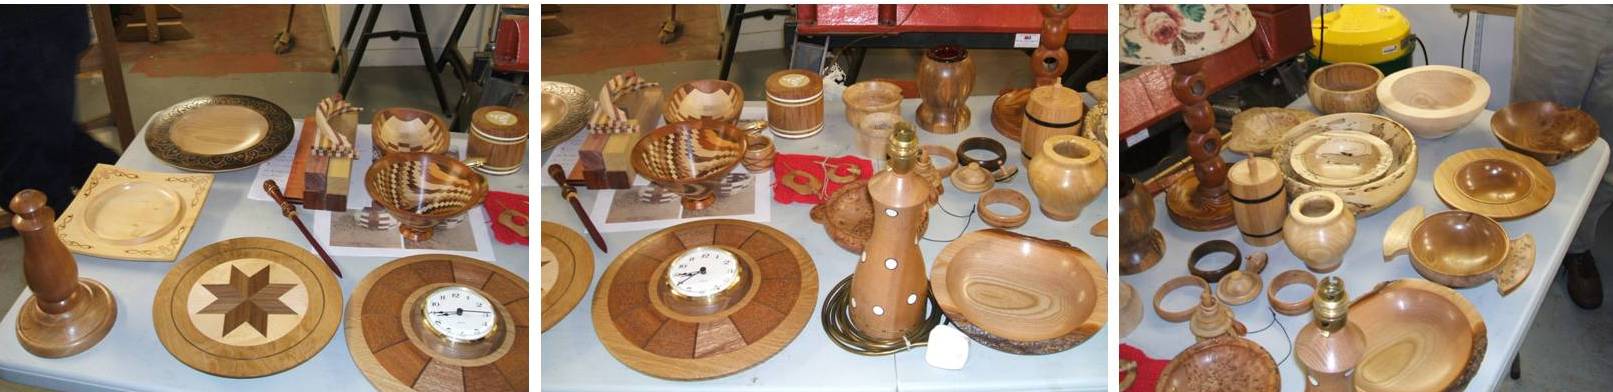
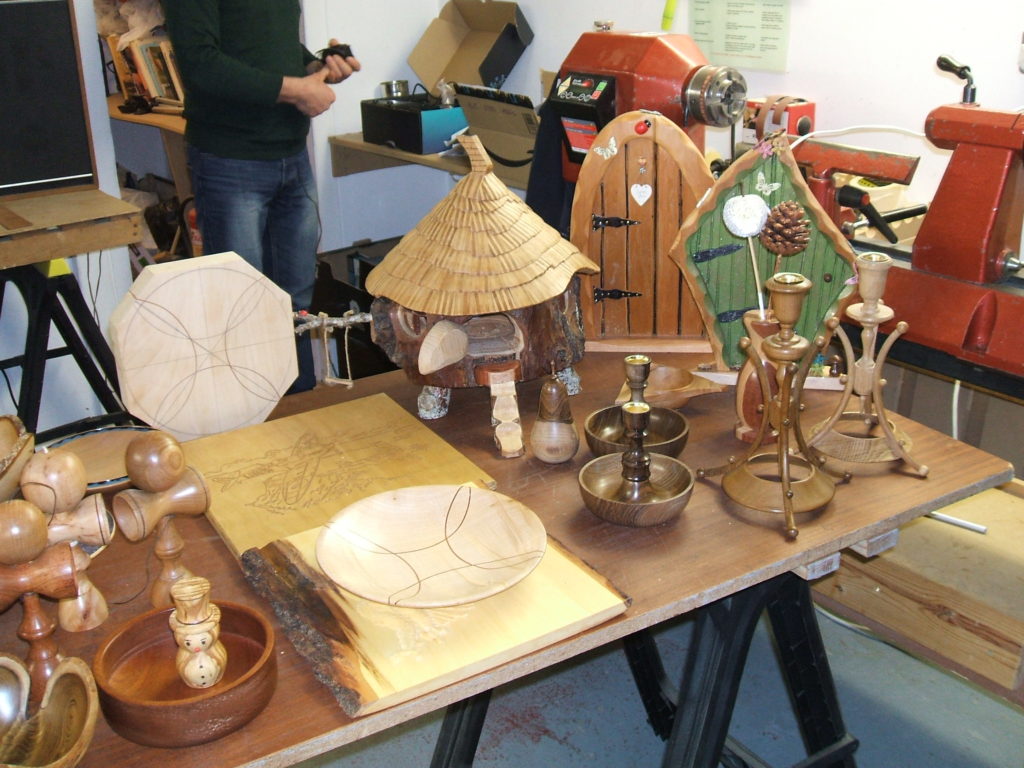
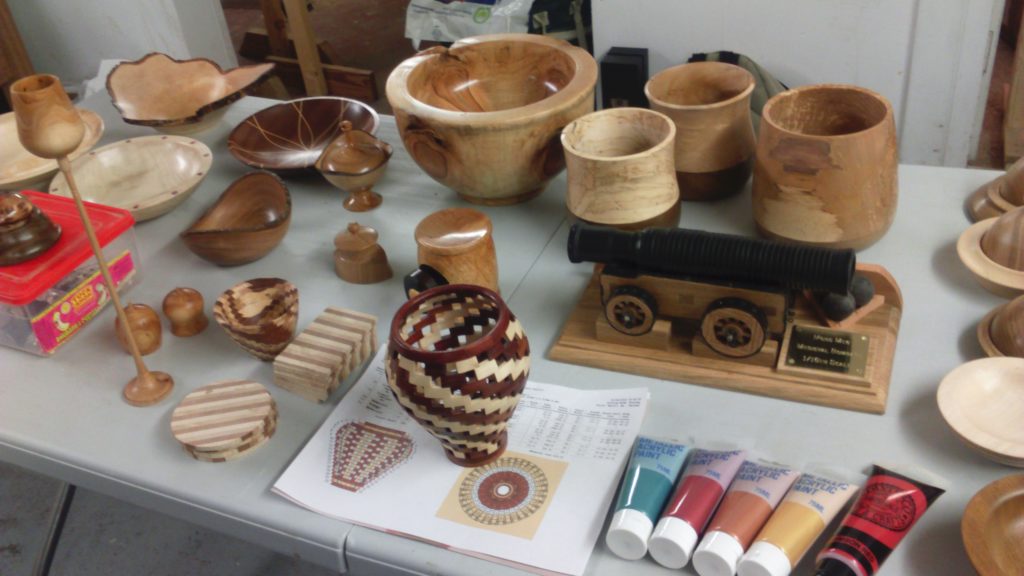
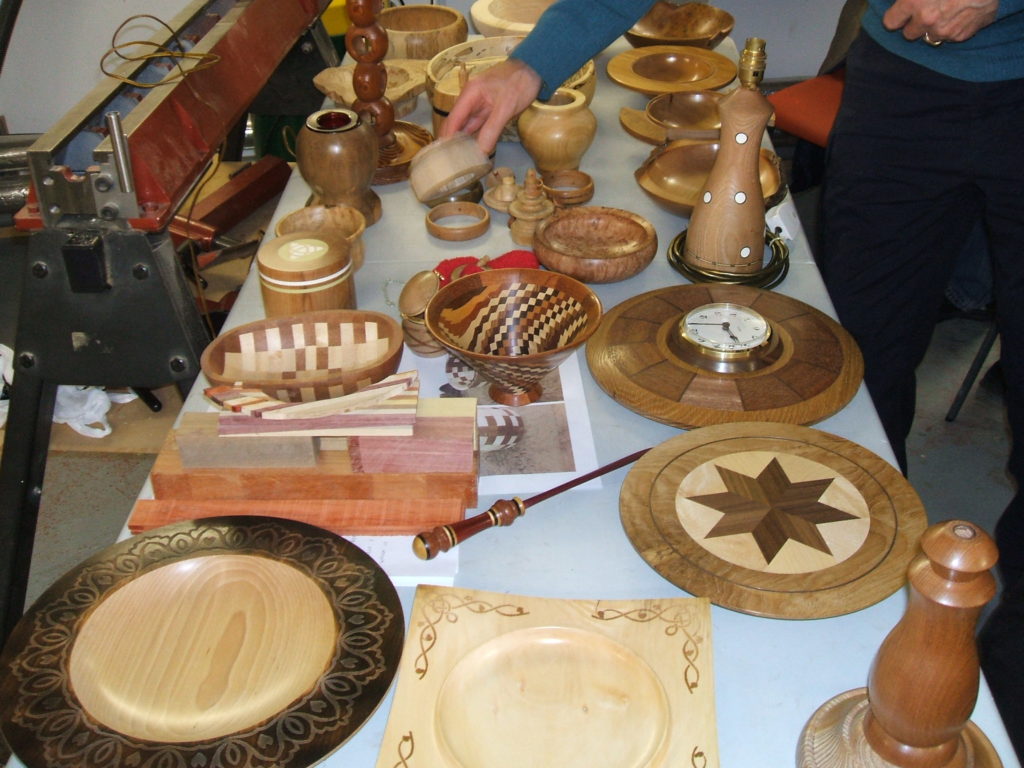
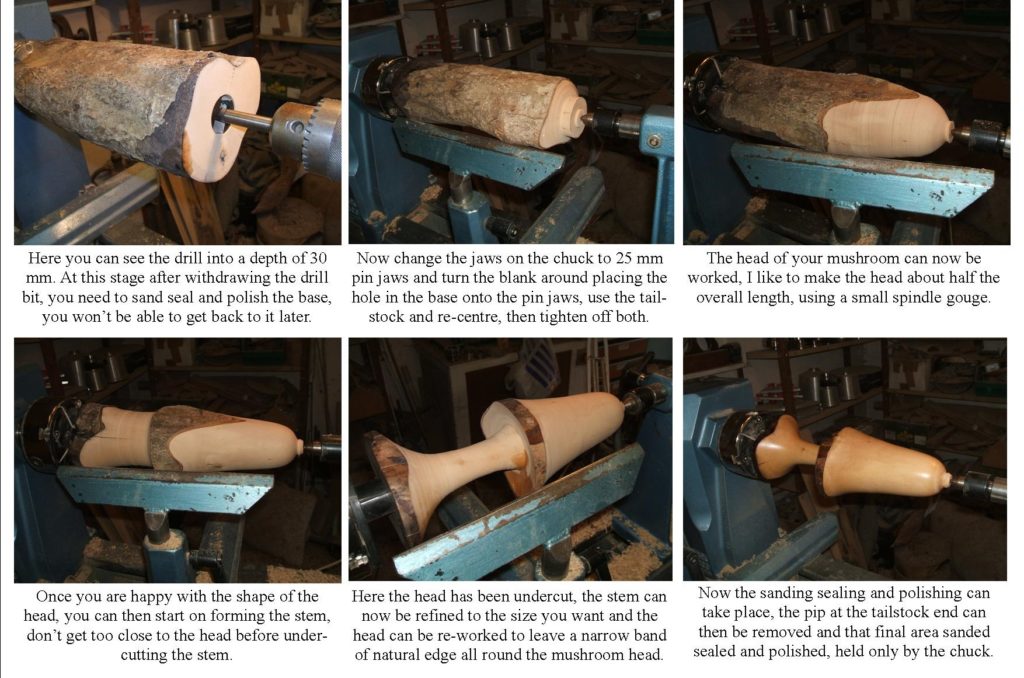
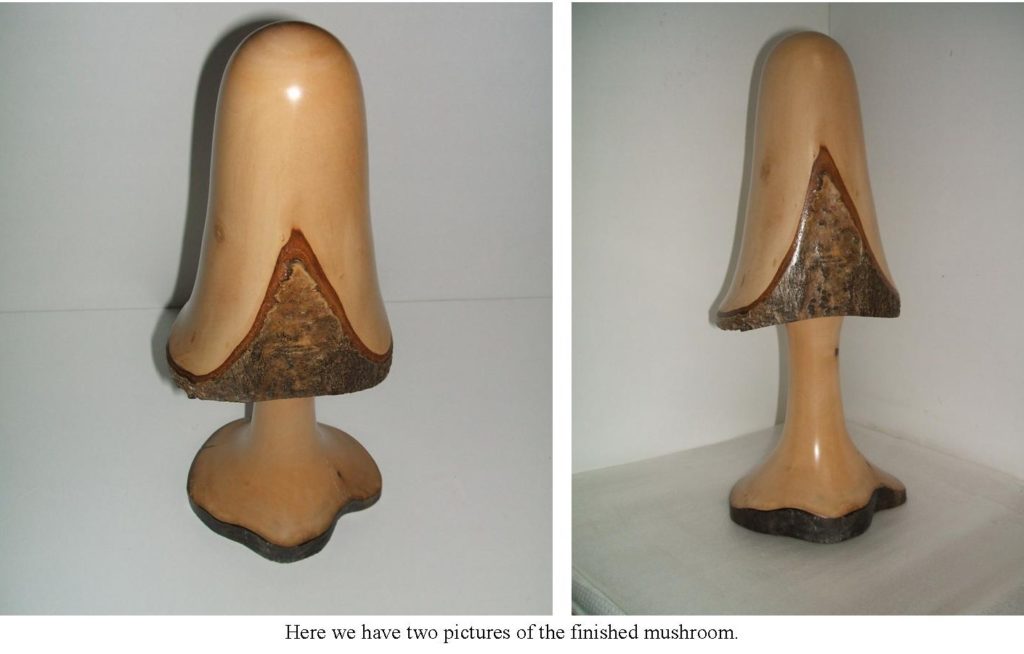
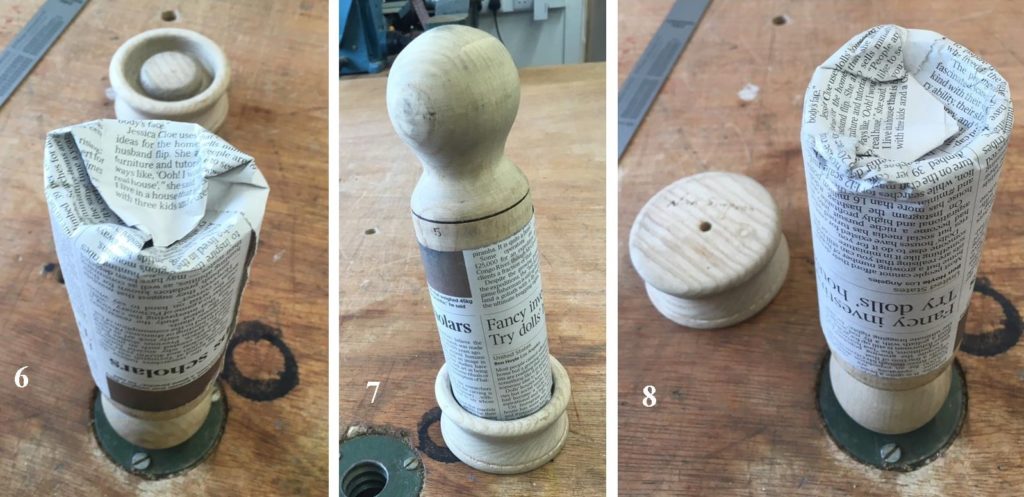
As you are all aware our normal meeting would have been tonight 16th April 2020, as this did not happen we asked you to make this a virtual meeting, treating the meeting as if it had happened. The subject of the meeting was working with natural edges or inclusions and we asked you to make something along those lines and have it finished for the 16th April, we then asked you to send some pictures of what you had made for inclusion on our web site. I am very pleased to report that 10 members have done exactly what we wanted you to do and sent a total of 44 pictures along with some text, the best way to show all these is with a picture gallery, the text I will deal with separately, I will give the name of the member followed by a number system to identify whose pictures belong to whom, these will all be listed here and the pictures will follow.

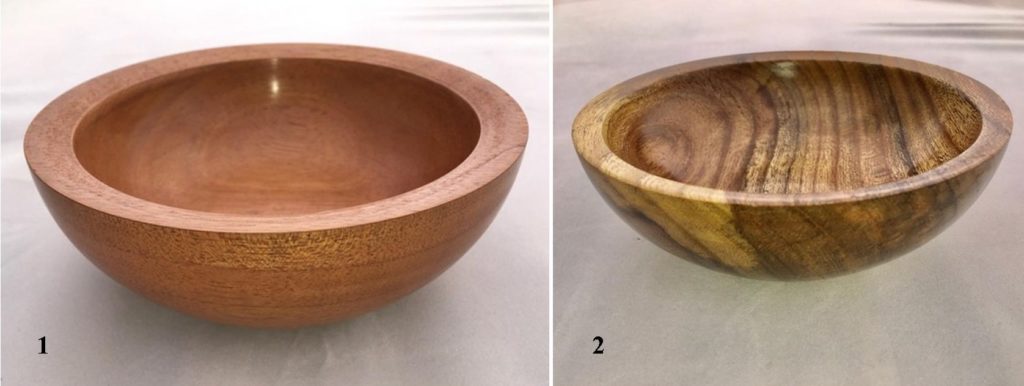
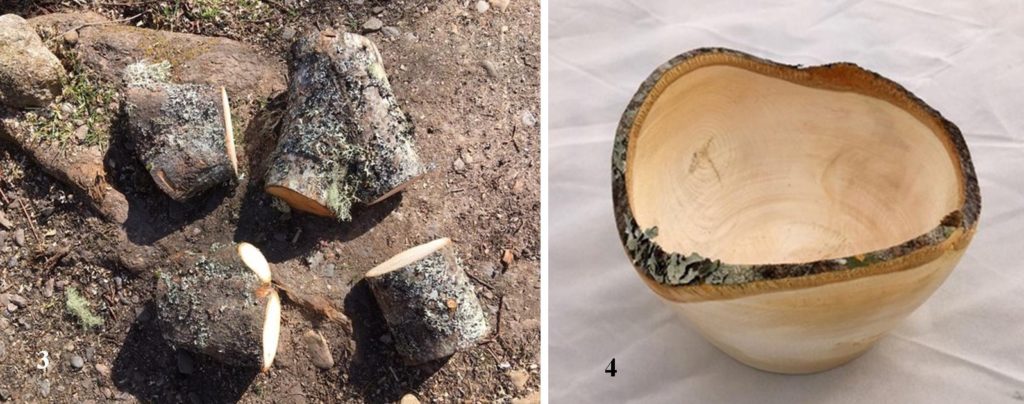
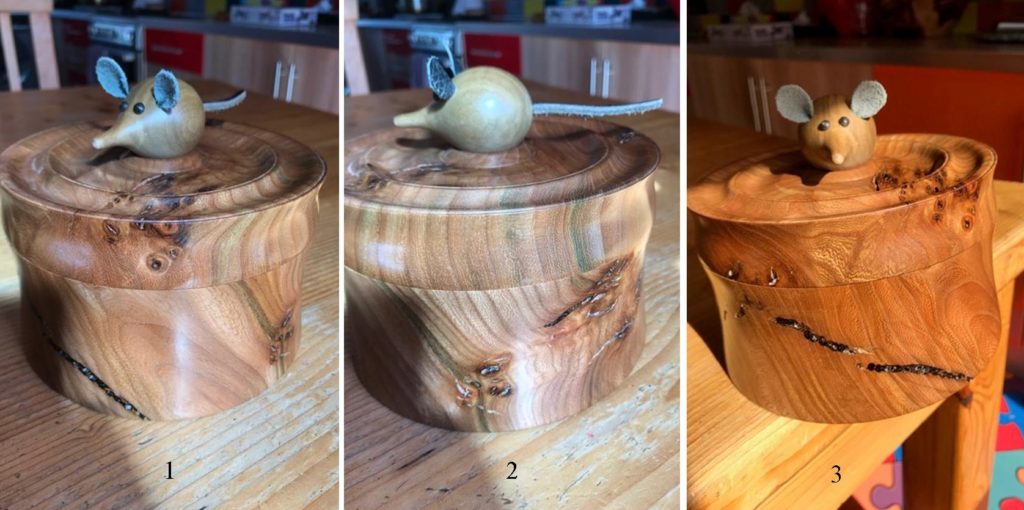
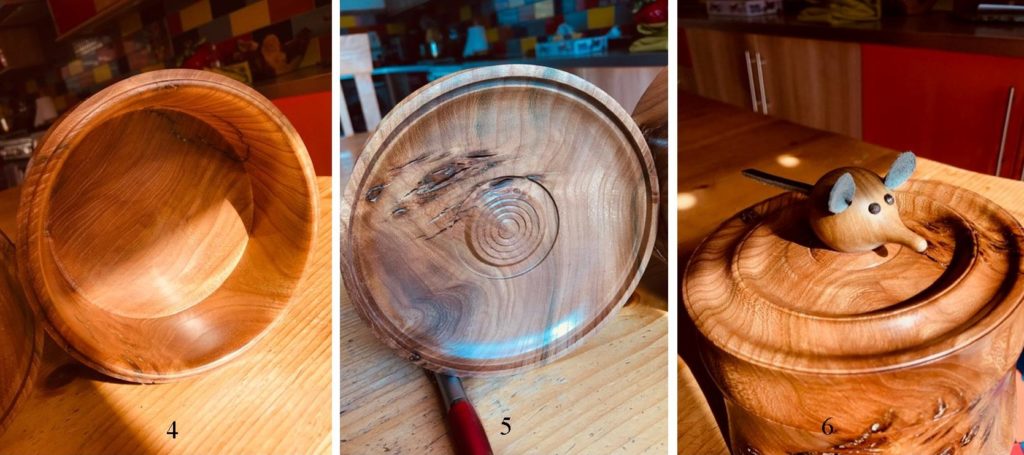
Pictures 1 to 6 are from Alan Ross. Thanks for giving us something to target our efforts on.
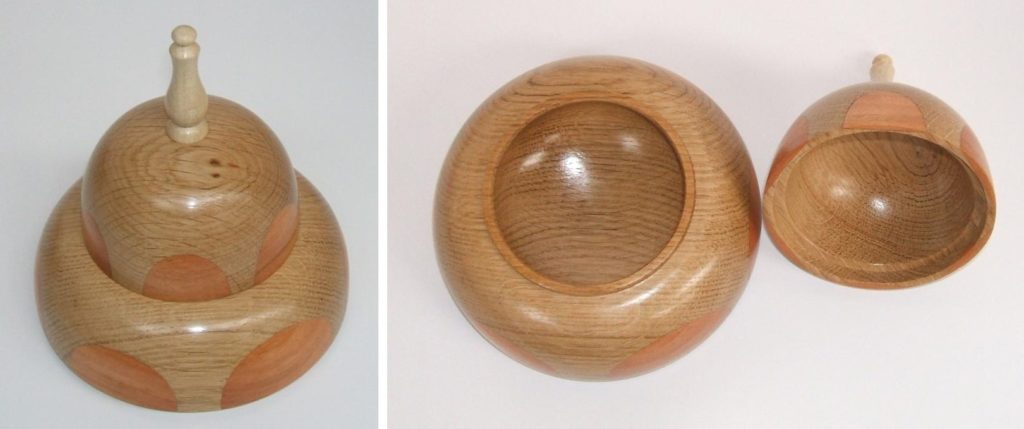
Find attached photos of live edge bowl I have had a go at making.
dia- 150mm x 80mm high.
Made from a birch log with three branches on it.
Finished with sanding sealer and sanded to 400 grit. Three coats of melamine lacquer,   buffed with ‘cut and paste’ then polished with Wood wax 22
Alan Ross (Nairn) .

Pictures 7 to 11 are from Dave Hutcheson.

Hope you are all well and staying safe. Here’s a hollow form I made today.This unusual blank came straight out of the firewood pile so required a wee bit of thinking as how to approach it. It’s a natural edged hollow form in burr elm and it’s finished with Liberon finishing oil. It measures 130mm wide by 95mm high. The branch inclusion only became apparent once turning was underway but I think it adds to the overall effect. 

Cheers Dave Hutcheson 

Pictures 12 to 14 are from Dave Line.

Please find attached Pictures of a couple of natural edge bowls as requested by Geoff.The 1st I made today is cross grain, it’s 150mm Dia by 90mm high. I don’t know what kind of wood it is. I picked it up a couple of years ago when I came across someone chopping a tree down in his garden.The second 2 are pictures of end grain turning I made a while back, again I don’t know what wood it is, I got it from you about a year ago. It is about 200mm high by about 140mm Dia.

Regards Dave Line.

Pictures 15 to 19 are from David Hobson.

The Bowl is made from Cherry

Finished with sanding sealer ,Yorkshire Grit and Liberon liquid wax

Size  230. X200 x 80.

David Hobson

Pictures 20 to 24 are from Errol Levings.

Hope the attached will be of interest.
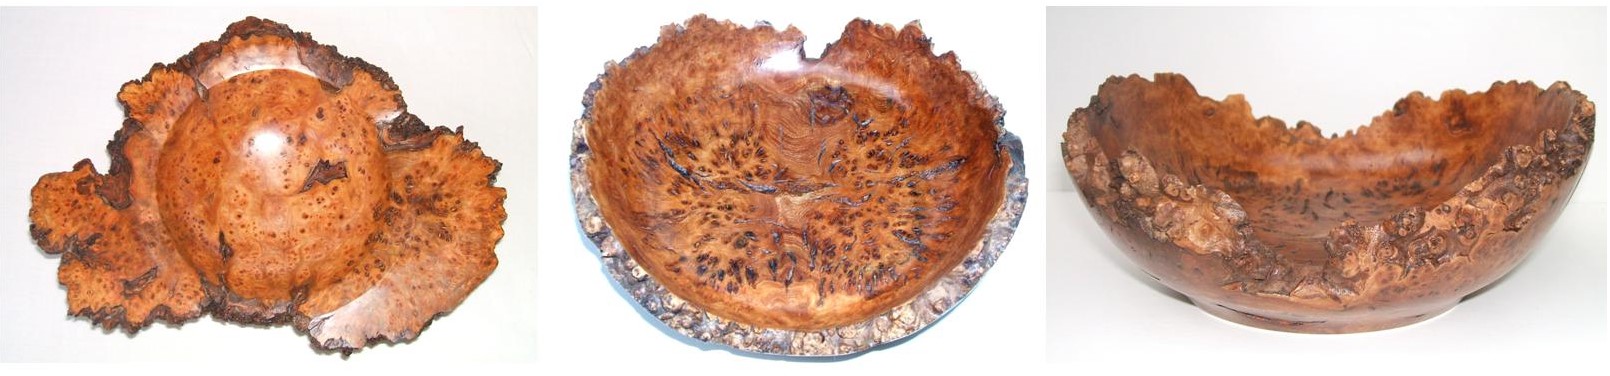
As you can see, a very spalted piece of silver birch crotch of too small an angle between branches, so bark is included very deeply into the vase.  Quite punky and difficult to avoid the soft bits breaking out – lots of sanding sealer and CA glue to harden them. Did not dare to  make either a spigot or tenon, so sized bottom to fit direct into 965 mm chuck.  Angle of bottom could have been slightly better to avoid marking by the chuck, despite several layers of masking tape to cushion the re-chuck.  Also there had been some movement of the wood so no longer fully concentric.

Thank goodness we all live in our wide open environment and have our workshops as part of our “home.”
Kind regards
Errol Levings.

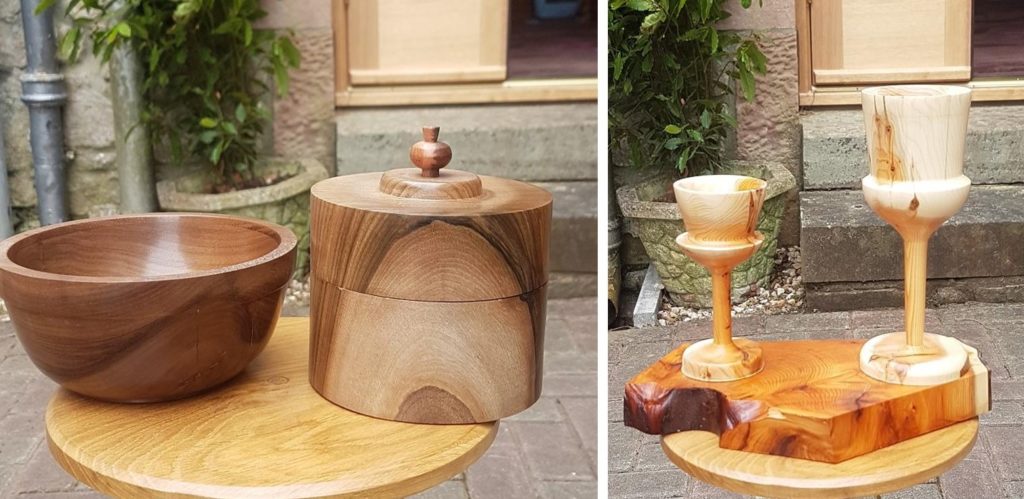
Pictures 25 & 26 are from Geoff Potter.

Here’s my submission of a natural edge bowl.
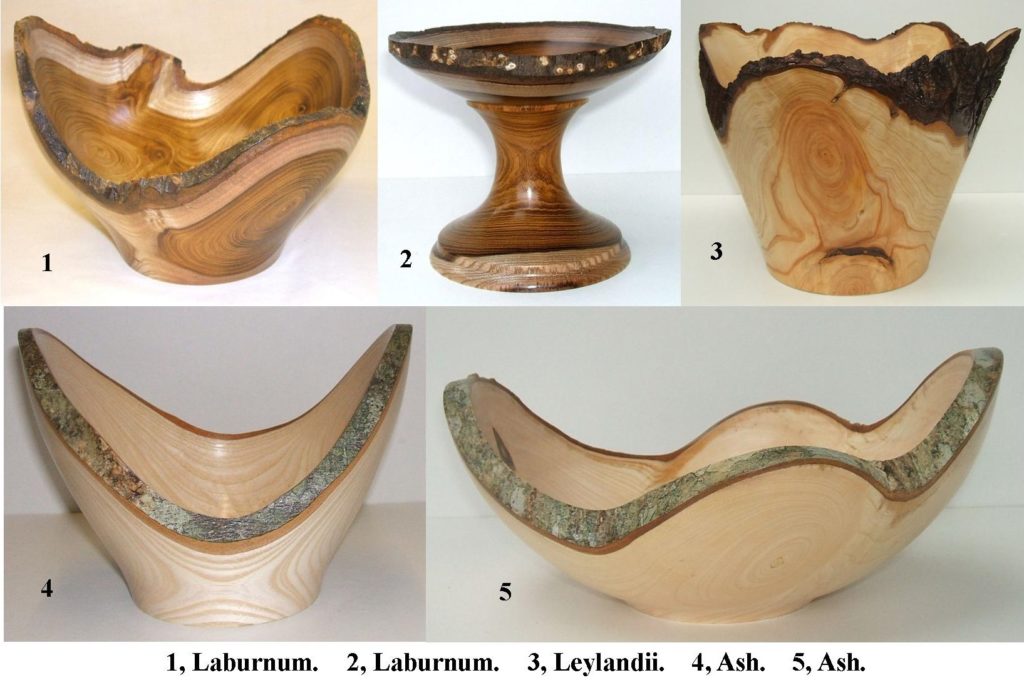
The small bowl is made from wood which I won in the Club’s fortnightly raffle and it is Laburnum I believe. The bowl was finished with a 400 grit abrasive, sanding seal and a melomine finish – inside and out. The bowl measures 15 by 7 cm.
Laburnum wood is highly coloured, retains its bark well and seems to produce a very glossy smooth finish.

Geoff Potter

Pictures 27 to 30 are from Hamish Stuart.

Hope you are all well and staying safe. Had a wee play this afternoon don’t know if it’s any good to you but thought I would send it anyway. Finished with melamine 

Hamish Stuart.

Pictures 31 to 34 are from John Ruickbie.

I decided  to make a natural edge clock for this occasion and wanted to change from the usual form. I used the first slice from a log the outer one with the bark on it. The circumference is important if it is too  small the clock face resess will be too deep as in the first one I tried which  was made of elm. The second attempt was made with sycamore and has a much shallower face. I also used a lighter base which improved the overall effect. I have included both pictures.

John Ruickbie.

Pictures 35 & 36 are from Nick Simpson.

Here are 2 natural edge pieces now that my workshop is up and running.The first is one of my own sycamore trees from Northumberland. It is a section of sound wood from a rotted-back section of branch at the trunk. It measures 8” by 4”. The damaged edges have been textured by burr and then scorched and wire-brushed. Finish was by sanding sealer (after scorching!) and Renaissance wax.

The vase is from a Yew branch in which the natural edge section was simply the irregularity characteristic of yew but the bark couldn’t be retained.. It is hollowed to 8mm but heavier at the base and stands 6” tall. Finished with 10-400 mirca, sanding sealer and Renaissance wax, which I like because it resists fingermarks.

Best wishes

Nick Simpson.

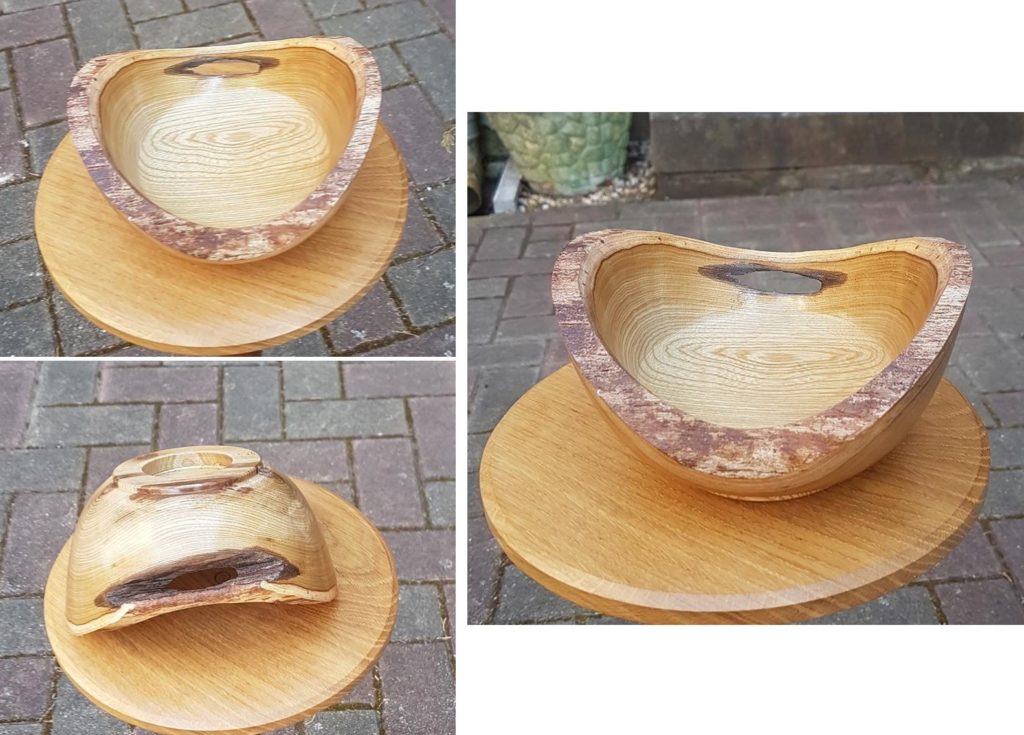
Pictures 37 to 44 are from me, Alec Mutch.

They show a natural edged bowl I made some time ago from a piece of Laburnum, it measured about 200 mm in length and just over 100 mm in height. The finish was my normal finish of Sanding sealer followed by a coat of Melamine and then buffed to a soft sheen. I like to use some weird shapes of blanks, as you will see it was made from a branch intersection.

Alec Mutch.

I would like to take this opportunity to thank all of you who took the time to make your items and more so to then send them to me for this post, we will be repeating this process for every meeting we have to miss due to this Virus, the next meeting would be on the 30th April 2020 and that will also be a Virtual meeting, the programme for that meeting is a Showtime meeting, it would normally be handled by myself. You can start to think of what you might make for this meeting, just imagine you will be there and send me the pictures of what you would have taken along for the members to see, remember there is no actual criteria for this meeting, just make whatever you like and send me the pictures and the text of course, pictures for this to be in by the 29th April. This should not stop you sending me any other pictures to upload between now and then, so keep sending me your pictures.

Remember the club house is still closed, you will be notified when we will re-start our meetings again, but in the meantime I hope you all stay safe from this deadly virus.

HWC members pictures 12-04-2020

Happy Easter everyone, I hope you are all staying well. I have received a few more pictures from our members that I will share with you now. The pictures are from David Hay, Martyn Torode and just in this morning from Nick Simpson.

These 6 pictures are from David Hay, a Wych Elm box with a rather curious finial.
Picture 4, the inside of the box. Picture 5, the underside of the lid. Picture 6, the top of the box. The following was what David had to say about his box.
  I have sent pictures of my mouse box, that I had originally made for competition,
Size width 155 mm
     Hight 95 mm
 
Wood, wych elm burr, finished with sanding sealer, then waxed & polished with mops,
Mouse is cherry with ebony eyes leather ears & tail ,
 
Regards David
This box was made by Martyn Torode, a new member to our club, Martyn thought the wood might be Oak, but it’s more likely to be Iroko and for a first attempt at a box he has done very well.
This is what Martyn had to say about his box.
Here’s my first attempt as a beginner at turning a box. It’s 3 1/2” dia x 4” tall and I think made from a piece of oak and finished with friction polish.
I had a bit of trouble with dig ins on the internal bit but managed a reasonable job in the end but I’m going to need advice with that. Maybe oak wasn’t the best wood to start with.
Hope you’re keeping well
Martyn
Just in this morning, these 2 pictures from Nick Simpson, I have to say they certainly made me smile when I saw them.
Here is what Nick had to say about his pictures.
Not Easter eggs but their precursors
I was saving these for Showtime but they might brighten up someone’s day
Both are 12” tall made of sycamore the cockerel is finished in Jo Sonja iridescent paints
Happy Easter Nick

We hope you can all have as good an Easter as possible under these lock down conditions, you may not be able to get away anywhere but your workshop is not out of bounds, keep the pictures coming and remember I’m looking for your pictures from the Natural Edged Turning virtual meeting, pictures to me by the end of 15th April please. I have 3 entries so far, hoping for some more by Wednesday.

Do remember the clubhouse remains closed, you will be informed when we will be opening again.

Virtual Woodturning Meeting.

All HWC members should have received an email from Geoff informing you how a virtual meeting would work. We were due to have a meeting on the 16th April 2020, (this will not be happening) instead we would like you all to use our programme for that date to make something in accordance with that programme, the subject matter for the programme was Natural Edged Turnings, it was being organized by Geoff Potter and he did have 5 turners arranged to man all the lathes. However we would like you all to make something with Natural edges in line with the programme, I have included a few pictures of the type of thing you might consider making, once you have made your item take a picture of it (can be more than one picture) and send it or them to me, include some text giving me the size, the species of wood or woods and any other interesting information you think relevant. I will then do a post on all the pictures sent to me, as the meeting was due to be held on the 16th April, I would like to have all your pictures and text sent to me by the 15th April and I will upload them on the 16th April just as if we were at a meeting.

We intend to use the club programme in this way until we get back to having our normal meetings, if you want to see the full programme for 2020, click on “meetings” on our web site.

Here are some examples of the type of thing you might consider making.

These are all turnings I have done in the past. 2 were done in end grain, 2 made from full logs, and one made from a half log.
Natural edged turnings can also be made on items between centres, here are 3 examples.
A selection of small bowls made with natural edges intact.

I hope some of these pictures will give you ideas of what can be done using Natural Edges. We are not limiting the entries to just our members, we would like to see any entries from turners outwith our club and those who follow our web site and facebook page.

If you need any information on how to make a natural edged bowl click on this link.

We are looking for lots of entries. In the mean time you need to keep sending me your pictures of anything you have been making, don’t just wait for the Virtual meeting keep sending your pictures now.

Send your pictures and text to me at,

a.j.mutch4321@btinternet.com

HWC members pictures 06-04-2020

Here are the latest pictures I have received from 2 of our members, the first lot are from Nick Simpson and the second lot are from David Ross.

These pictures are from Nick Simpson of an African Blackwood box he made at a meeting held on the 23rd January 2020, it wasn’t quite finished at the meeting so Nick finished it at home before sending me the pictures. Here is what Nick had to say about his box.
Dimensions are:
Shaker outside 40mm inside 30mm diameters
Height of shaker 60mm internal depth 50mm
The lid is a spinning top and is threaded by hand chasing 18tpi
Height of lid 50mm
Diameter of lid where it meets shaker 44 mm so it just overlaps
Wood = African Blackwood. There were some of the characteristic voids which can be seen (as features)
Finished by sanding from180 to 400 grit and then 2 coats of Renaissance wax.
The whole was in regular use by our grandsons until lockdown
Best wishes Nick.
This Yew box was made by David Ross, pictures arrived today.
This picture was also sent from David Ross, David mentions he was not sure of what type of wood they were, I can tell you that they are all made from Spalted Beech. Here is what David had to say about his work.

I have attached a couple of things I have turned over last month or so, the small box is made of yew 30 mm H and has a 50 mm diameter
The wood for the three bud vases came from a wood pile my son had so not sure what kind of wood they are all the items are finished in sanding sealer and a couple of coats of melamine and a coat of polish both vases at front are 90 mm H with 60 mm diameter vase at rear is 90 mm H with a 45 mm diameter
Hope all the members are keeping safe 
 
David Ross

Thank you Nick and David for taking the time to send your pictures, we hope to see many more pictures from any of our members, please keep them coming.

Do remember the clubhouse is temporarily closed, you will be advised when we will be re-opening.

HWC members pictures 03-04-2020

Hi everyone, picture just in from Tony Wilson, although not wholly woodturning this is still very acceptable to be shown as part of Tony’s work. As this was the only picture received in the last few days I have included a small box I made over the last few days.

Tony’s sit on toy made for his grand children, he made 3 of them, and well done too ! This is what Tony had to say about his picture, and I see he needed a little help with the computer part of this submission, this goes to show even if you are not quite computer literate you can still get a picture to me using someone else’s knowledge.

I hope you are in good health.
Following the request for club members to submit an example of their work please find attached a message from my daughter with a picture of a tractor with turned wheels etc.
I made three for my grandchildren.
It reflects the basic level of my skills but I thought it would be nice to try to support you and the committee in your efforts on behalf of the club and members.
I will not be offended if it isn’t suitable for your display ( probably quite relieved)
Thank you again for all the work, energy and imagination you all give for the club.
Keep well.
Tony Wilson

Below is a box I made recently, I’m calling it my Bell Box.

This is a small box I made over the last few days, quite a bit of gluing required so it takes a while before you get to the interesting part, the turning. The woods used were Oak for the main part of the body and lid, the half moon shapes were Goncalo Alves and the finial was made from Holly.
Another 2 views of the same box, this time the insides can be seen, you will observe I had hollowed out the lid as well, the overall sizes are, height 150 mm, width 150 mm and with a slightly elevated base to give you the bell shape appearance.

I do have one more set of pictures to post, but I’m waiting on some text information before I can upload them. In the meantime please keep the pictures coming, we are getting a good response from those viewing.

Do remember the clubhouse is closed temporarily, you will be informed when the first meeting will be after the crisis is over.