Report on our virtual meeting 28-05-2021 Inside-out-turning.
Our meeting on the 28th May 2021 was to be organised by myself, I chose to demonstrate the making of an Inside-out-turning, as this could not be done in our premises due to the ongoing Covid-19 restrictions I decided to do a time line on the making of an Inside-out-turning. I did ask for you all to contribute something to this meeting but only one lot of pictures have been received, they are on the subject of Inside-out-turning and they came from Dave Line, thank you Dave for taking the time to include your work.
I will put Dave’s entry in first, and this is what Dave had to say about his entry,
Hi Alec,
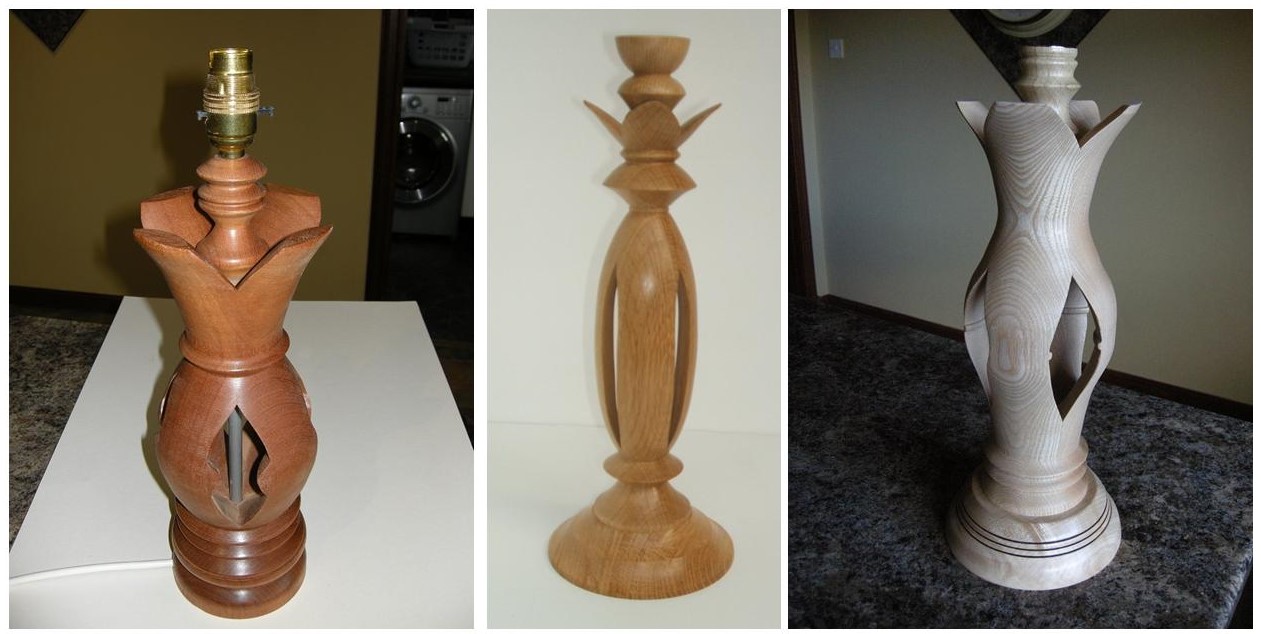
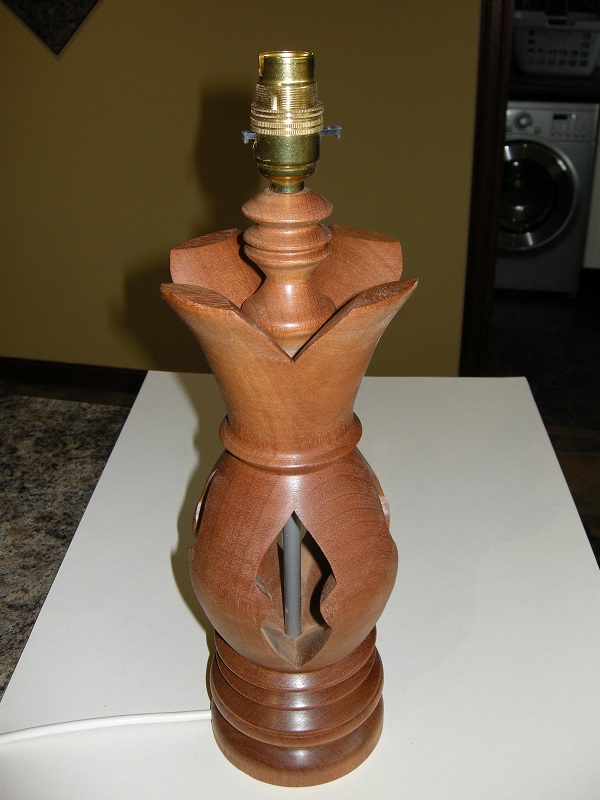
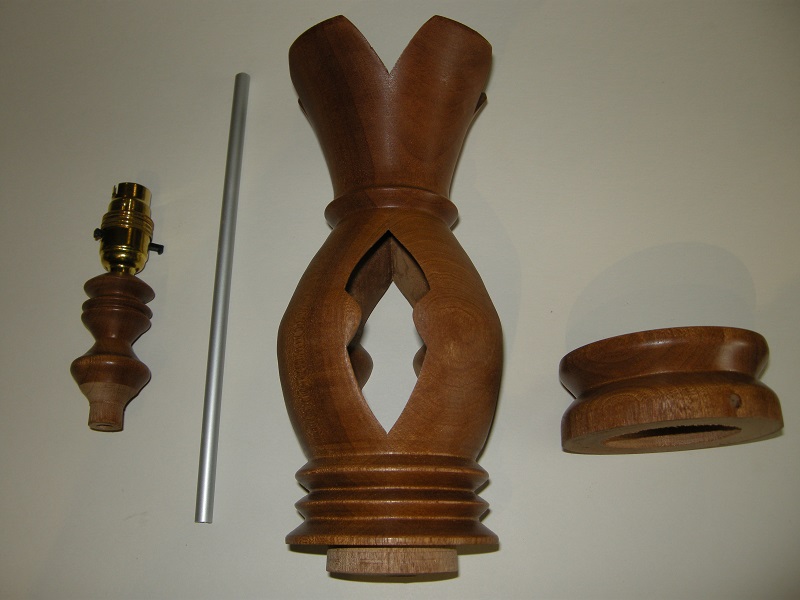
I am sending you pictures of a couple of items I made some time ago. The first is a table lamp made from Sapelle. It stands 360mm high and 120mm dia. The second picture of this lamp shows the separate components.
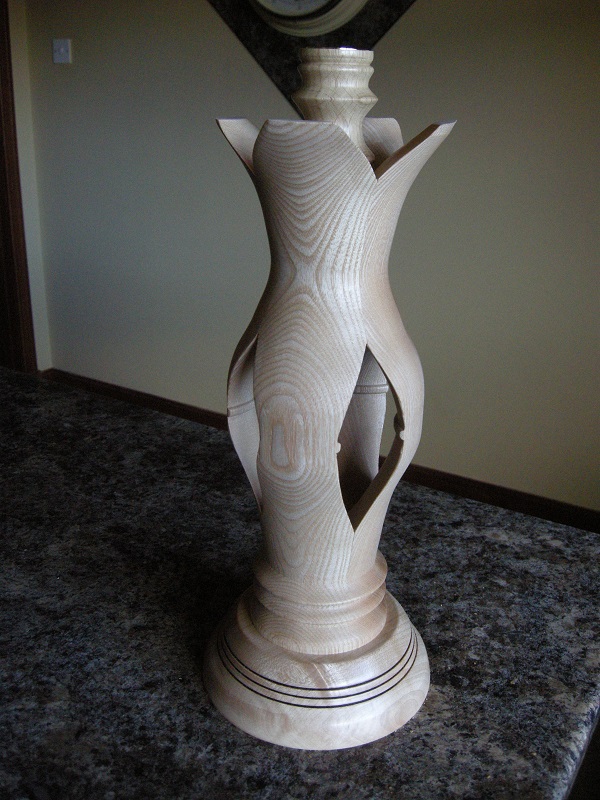
The third picture is a candle stick made from ash (I think). It stands 360mm high and is 110mm dia.
When making these I have great difficulty getting the 4 blanks perfectly square and flat as I don’t have a planer./thicknesser. If anyone has any tips I would be grateful.
Stay safe,
Dave Line.
This is Dave’s table lamp made from Mahogany.The component pieces of Dave’s lamp.Dave’s Candlestick, and yes Dave the wood is Ash.
Now for my own entry, a timeline on the making of an Inside-out-turning.
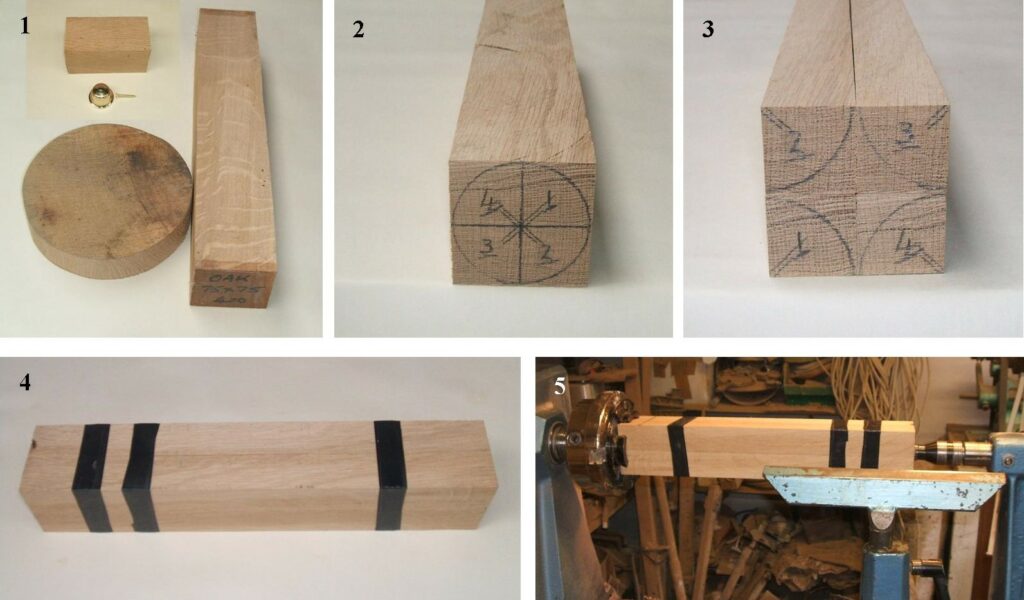
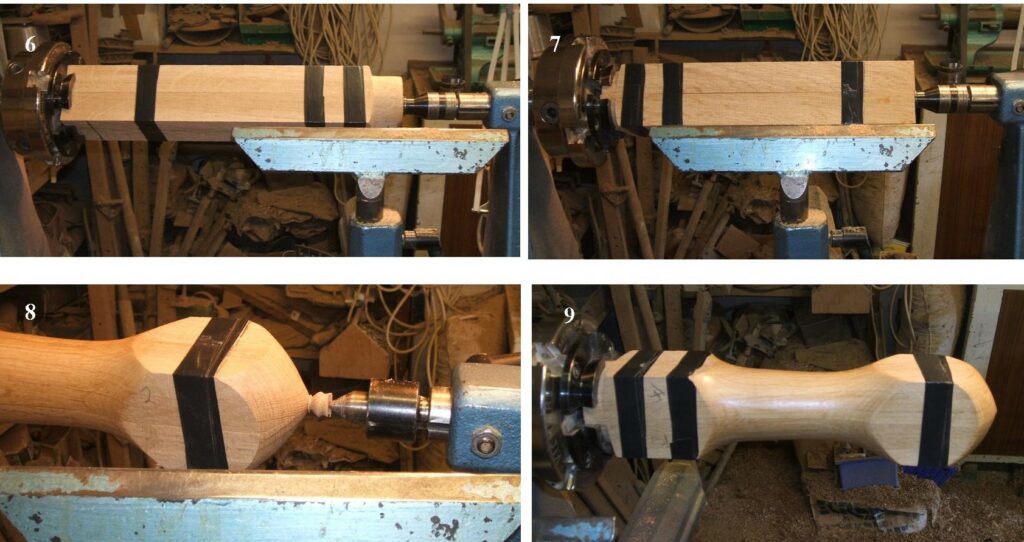
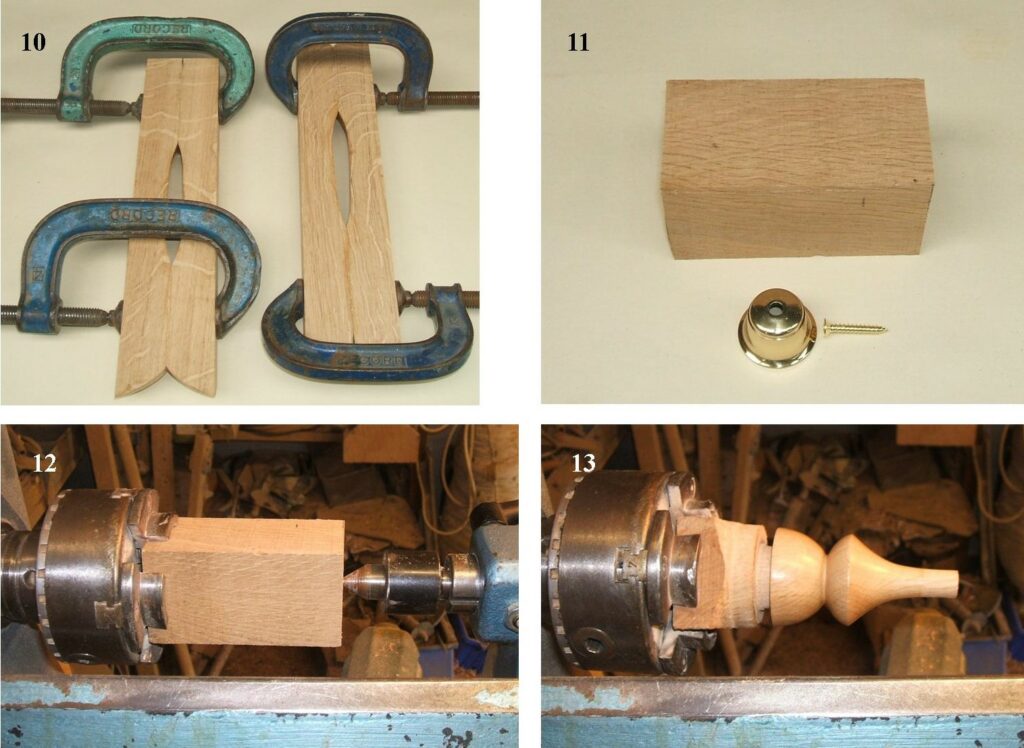
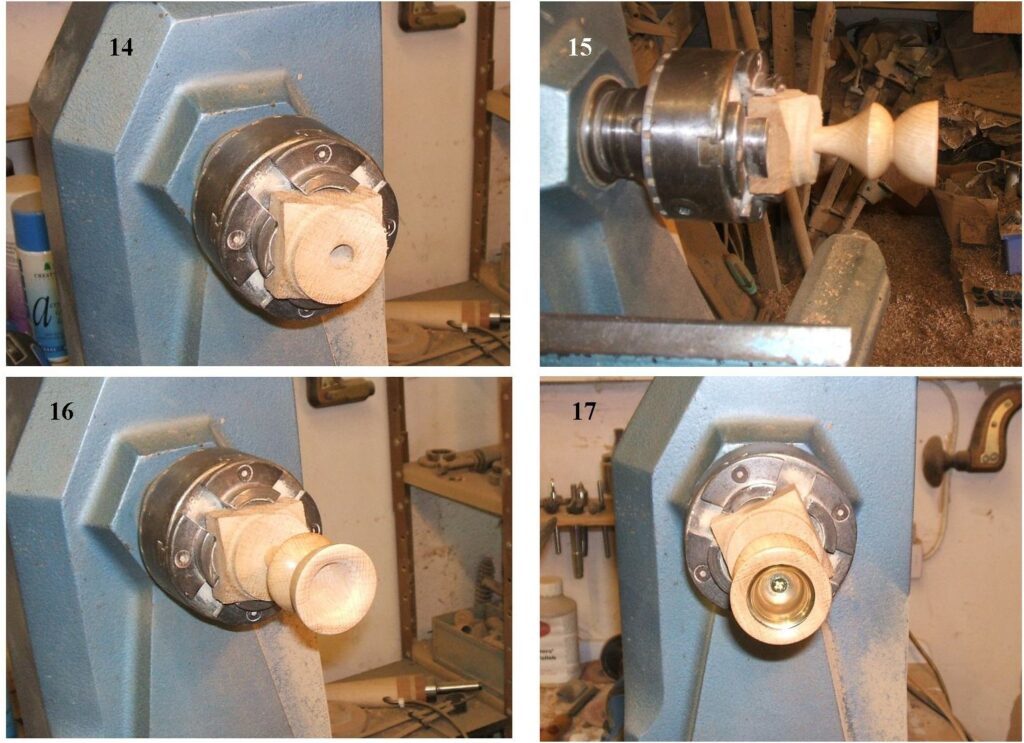
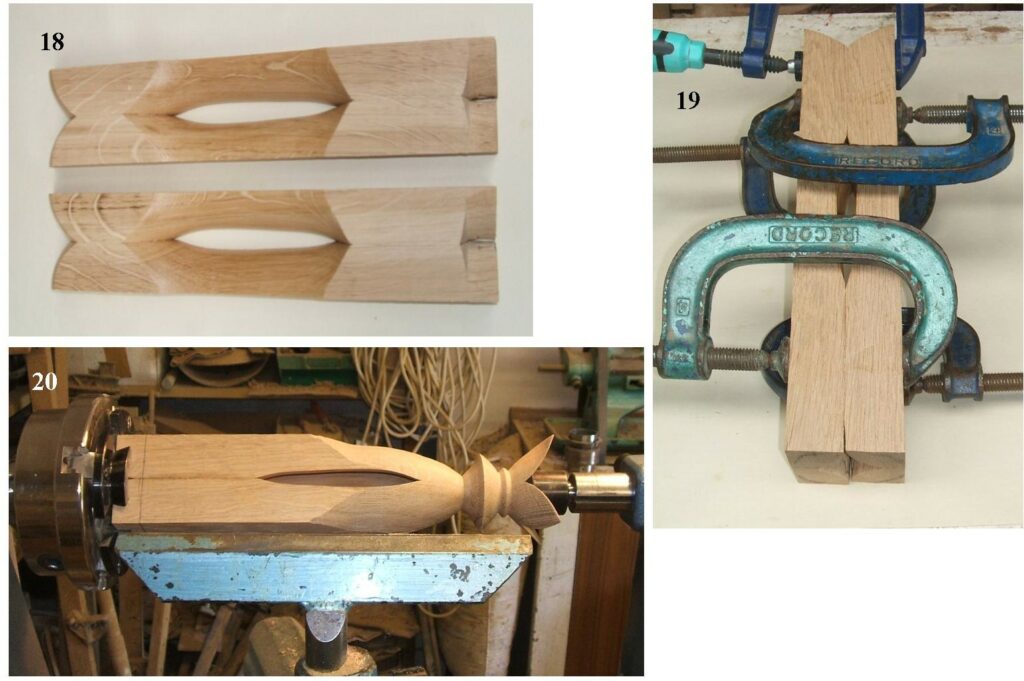
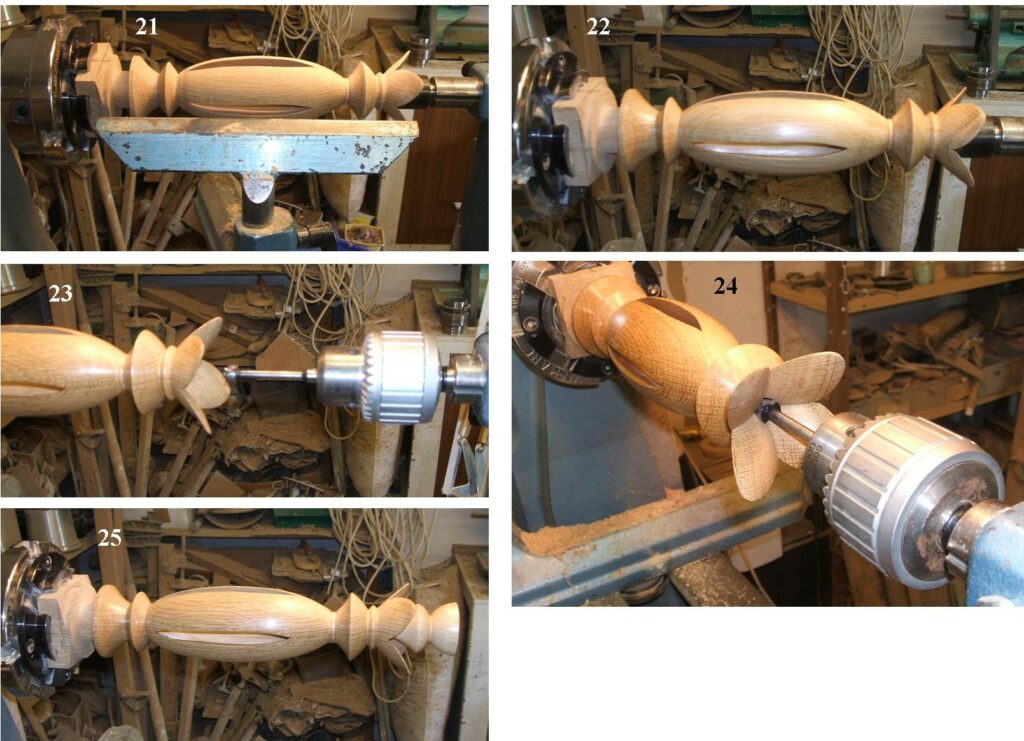
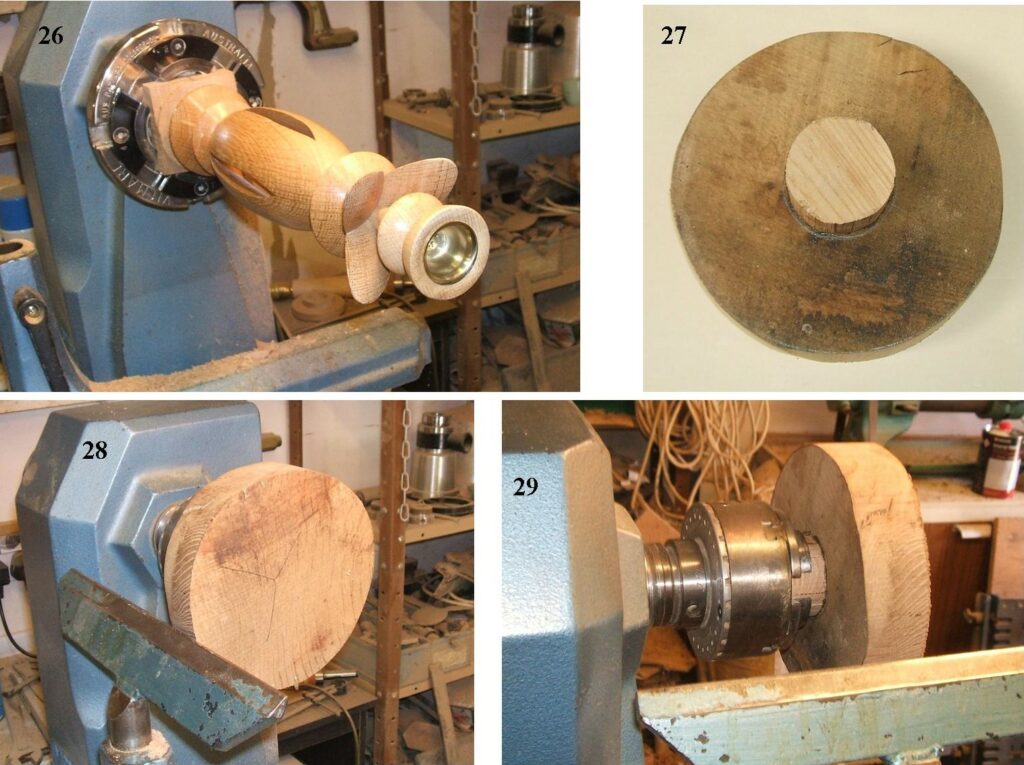
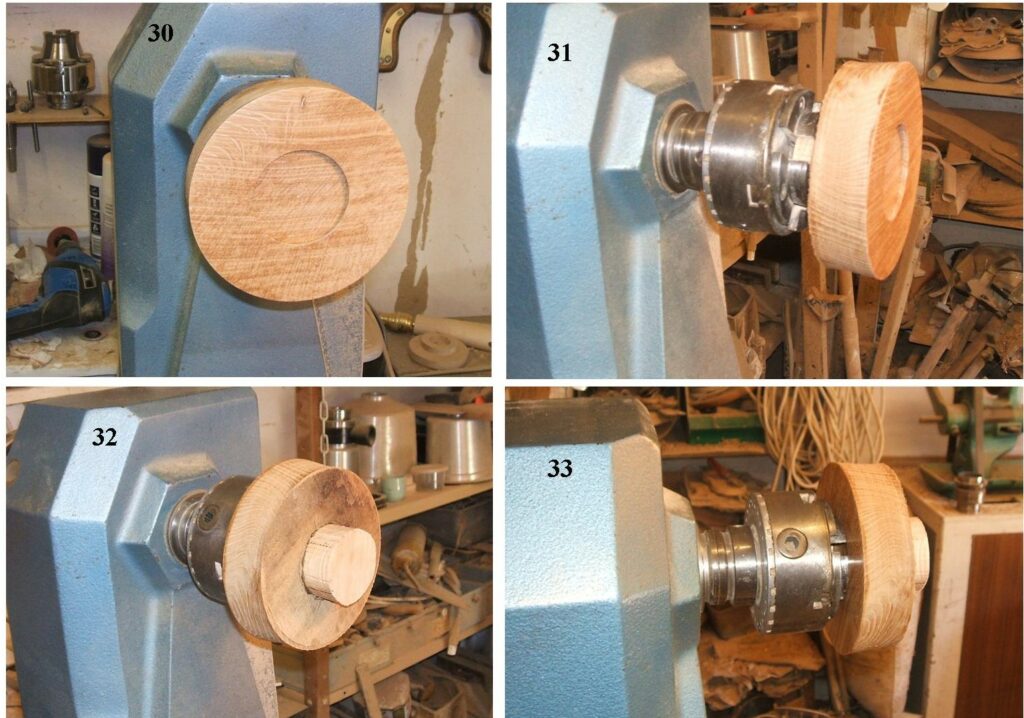
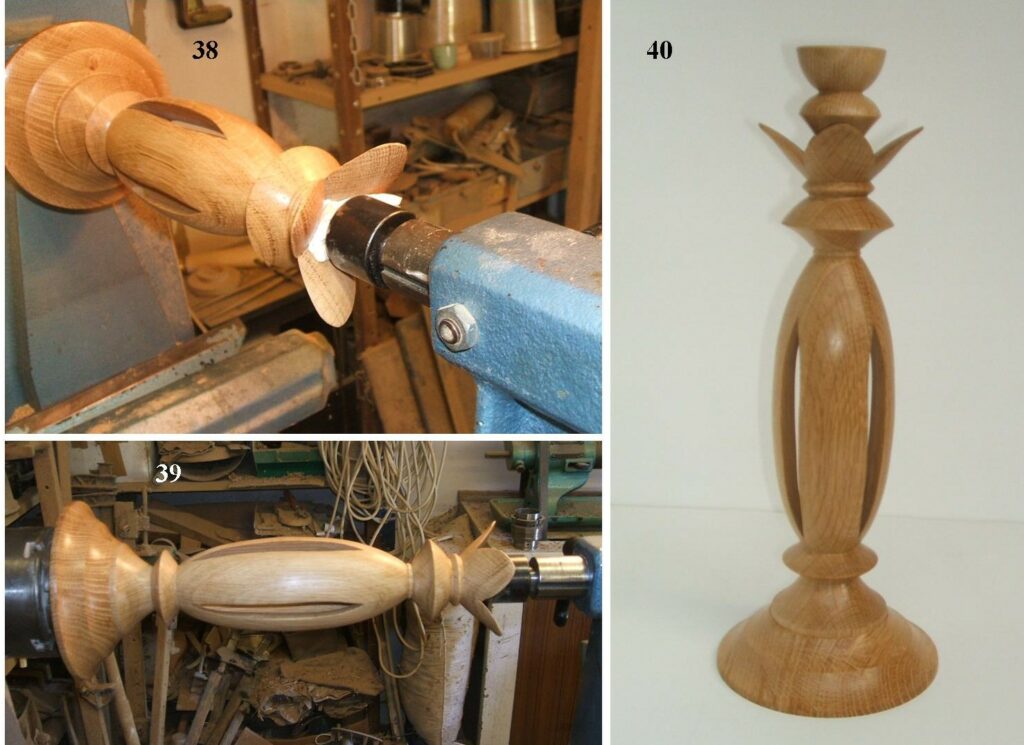
1, Shows all the components required, they are all Oak, the main stem came from a piece 75x75x400mm, the base came from 150x40mm disc, the candle cup holder was from 50x50x100mm and a 22mm brass candle cup and screw. 2 ,Mark out the diameter and the centre also the lines where the cuts will be then number each of the quadrants, it will be re-assembled using this sequence. 3, Cut the wood lengthwise to produce 4 squares, now assemble them to this pattern. 4, Tape the 4 sections together, one band at the top end and 2 bands at the bottom end, the bottom end will require a spigot. 5, Mount the blank in the lathe with the end that requires the spigot at the tailstock end.6, Turn the spigot about 20mm long by about 40mm in diameter, or to fit your chuck, 7, Turn the work piece around and hold the spigot in your chuck, I wanted a very secure hold at this stage as you will see in picture 9, the work piece is turned by holding it only at one end. 8, I formed the main body and polished that part, I then turned the top part at the tailstock end leaving a small pip to be removed, 9, Take the tailstock away and finish the cut at the top end, sand seal and polish.10, Take them off the lathe and separate, glue up 2 at a time using the numbers from picture 2, make sure you hold them flat whilst gluing, there will be a time break here to allow the glue to set so go and make the candle cup holder.11, The piece required along with the brass candle cup and screw. 12, Mounted the block in your chuck, 13, Turn the block to the shape required, the tailstock end should have a very slight taper, sand seal and polish this piece up to the parting tool cut.14, I cut off the candle cup holder, don’t discard the bit still in the lathe, drill a hole to match that of the cup holder and use it to turn the inside of the cup holder, I used a 12mm drill to match the stem. 15, The candle cup holder mounted in the hole just drilled, as it is tapered it tightens up enough to turn the seat for the brass cup. 16, The seat for the brass cup cut and sanded, 17, The brass cup fitted and screwed in place,18, With the glue set, I lightly sanded the 2 faces to be glued . 19, The 2nd gluing takes place, again a hold up point waiting for the glue to set. 20, The glue now set, time to turn the whole stem, I started at the tailstock end, be aware of the winged parts here they can easily cause you some harm if you come in contact with them with anything other than the tool, here you can see I have done almost half of the length working back towards the chuck end. 21, The stem now turned and sanded, and a spigot formed at the chuck end I made it 35mm in diameter.22, Sealed and Polished. 23, Now to drill the hole for the candle cup holder. 24, Use the drill in the tailstock, start slow and drill slightly deeper than required to allow for the very slight taper on the candle cup holder. 25, I trial fitted the candle cup holder.26, the candle cup holder fitted and as seen from the front. Remove from the lathe and cut off the surplus at the spigot end, I used the bandsaw for this but a hand saw will do just as good a job. 27, Now to make the base, I used a piece of Oak about 130mm in diameter by 40mm thick and I glued on a piece of waste to hold it in the chuck. 28, The blank mounted in the chuck. 29, As seen from the chuck side.30, I flattened the face of the bottom and created a chuck recess, also rounded off the edge. 31, The base sanded, sealed and polished including the chuck recess. 32, The piece turned around and mounted on the chuck using the chuck recess. 33, As seen from the chuck side.34, I removed the waste piece and drill a hole to match that of the stem spigot, I also marked out the extent of the stem bottom on the base. 35, The shaping of the base profile complete. 36, The base profile sanded, sealed and polished. 37, the component pieces all ready to be assembled.38, Use the lathe to glue the final assembly, you will see I put a wad of paper towel at the tailstock end to avoid any marking once the pressure was applied. 39, This assembly was left in the chuck under pressure overnight. 40, The completed candle stick, I did not glue in the candle cup holder to make cleaning a little easier if used, the taper tightened it sufficiently that no glue was required. Made by Alec Mutch.
I hope you found this timeline interesting and easy to follow, do have a go at making one it’s well worth the effort.
Our next meeting is on the 10th of June, it’s to be organised by Peter Lawrence and the subject will be making wooden weed pots. This will have be a virtual meeting again.
This website uses cookies to improve your experience. We'll assume you're ok with this, but you can opt-out if you wish.AcceptRead More
Privacy & Cookies Policy
Privacy Overview
This website uses cookies to improve your experience while you navigate through the website. Out of these, the cookies that are categorized as necessary are stored on your browser as they are essential for the working of basic functionalities of the website. We also use third-party cookies that help us analyze and understand how you use this website. These cookies will be stored in your browser only with your consent. You also have the option to opt-out of these cookies. But opting out of some of these cookies may affect your browsing experience.
Necessary cookies are absolutely essential for the website to function properly. This category only includes cookies that ensures basic functionalities and security features of the website. These cookies do not store any personal information.
Any cookies that may not be particularly necessary for the website to function and is used specifically to collect user personal data via analytics, ads, other embedded contents are termed as non-necessary cookies. It is mandatory to procure user consent prior to running these cookies on your website.