Our next meeting 02-09-2021 Demonstration by Alec Mutch.
Our meeting on Thursday 2nd September 2021 will be in Munlochy, start time of 6.45pm.
Yes this is our first actual meeting where turning will be demonstrated after a very long shut down. I will be doing the demonstration, I’m going to make a thin walled end grain goblet made from a branch of fairly wet wood and leaving the top as natural edged as possible. To do this you will need to make up some sort of light assistance as you will see, and the procedure for turning this type of goblet is not what you might expect, all will be revealed on the night.
I have demonstrated this before at our club but it was a long time ago and we do have some new members who may not have seen this type of turning being done.
Here are a few pictures of the procedure along with a short bit of text for each picture.
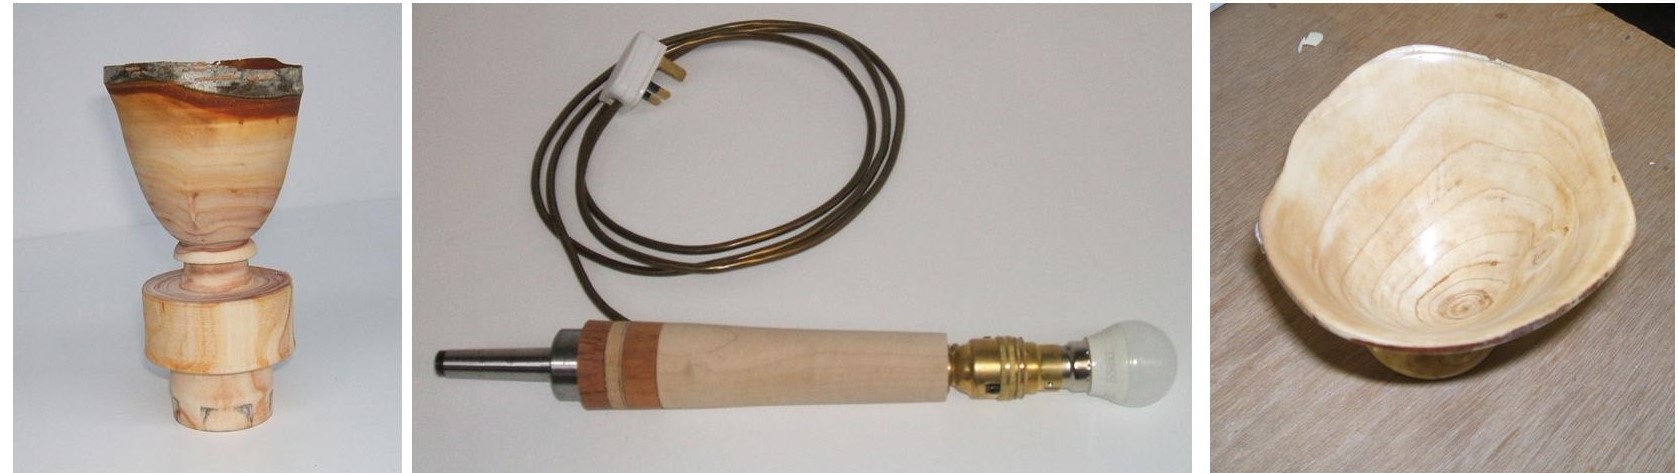
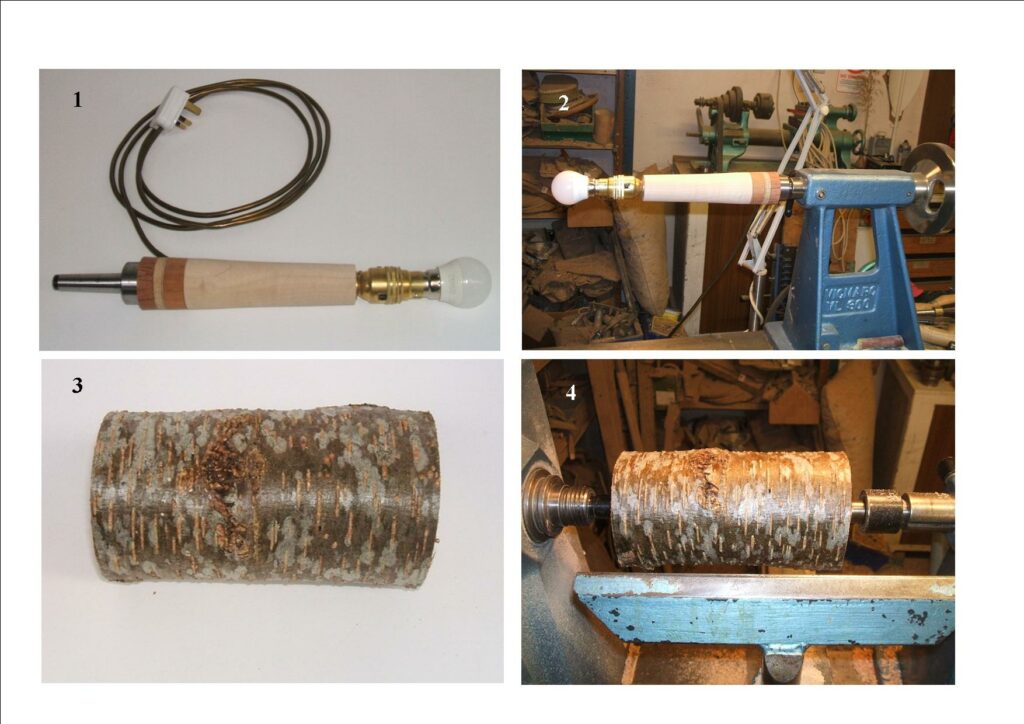
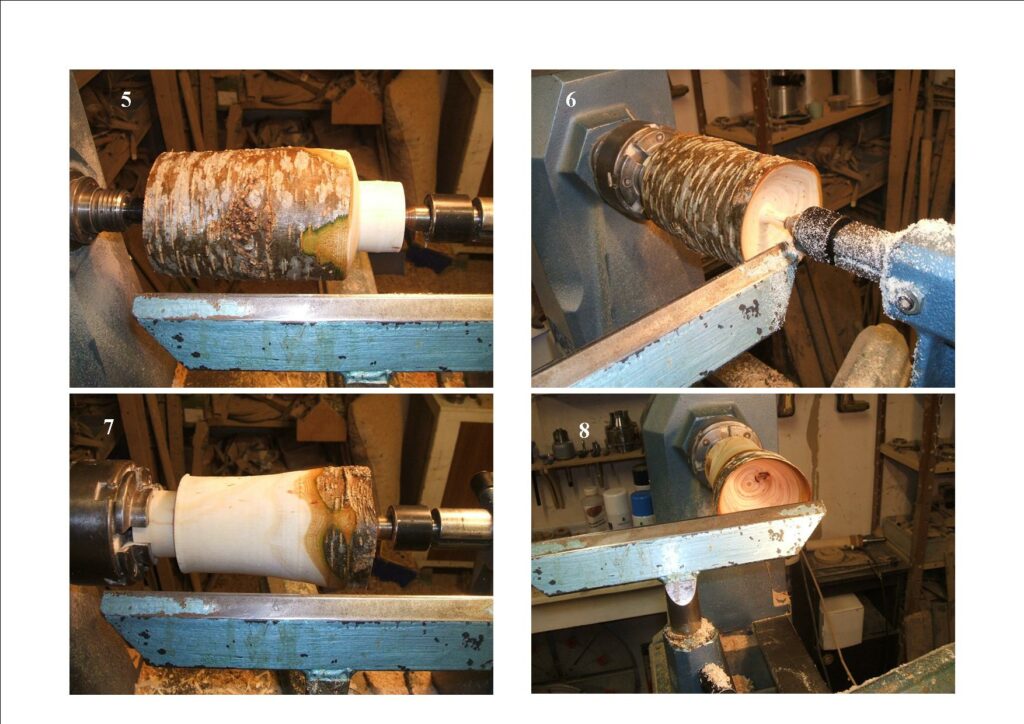
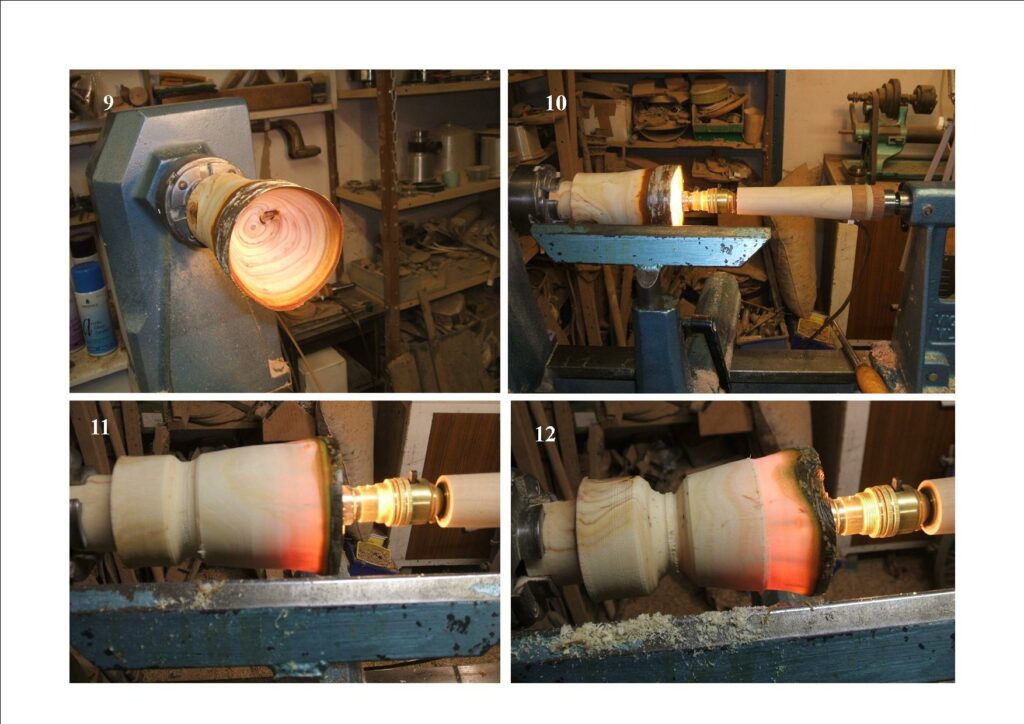
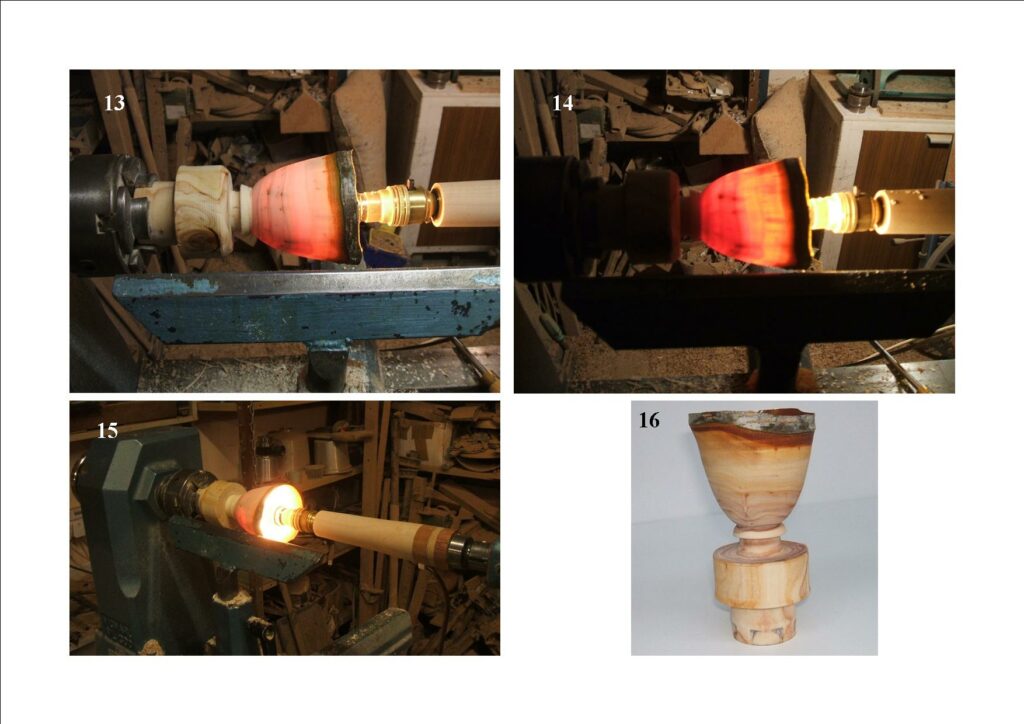
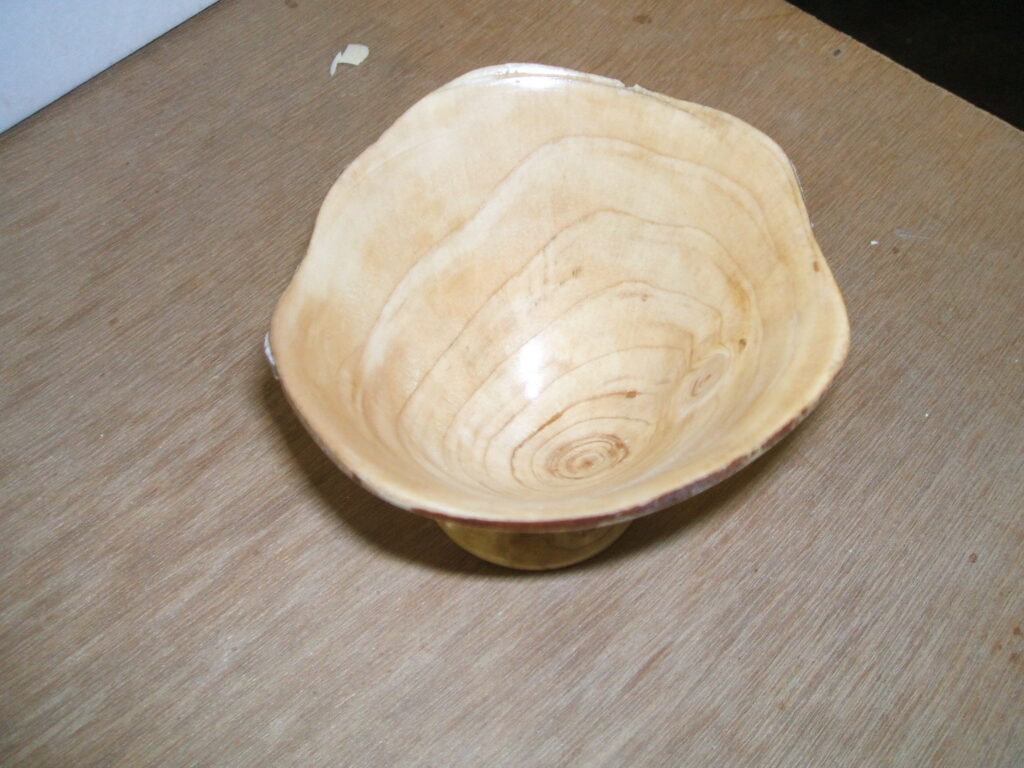
1, this is the piece of equipment I referred to earlier, you will need to make up something similar if you want to do this. 2, The light stick now mounted in the tailstock, (won’t be needed just yet). 3, The branch of Cherry I’m going to use. 4, the branch mounted in the lathe, held between centres.5, create a spigot at one end, this will need to fit your chuck. 6, Held by the spigot, now start to remove as much wood as you can at the tailstock end and internally leaving a small pip being held in the tailstock. 7, You can remove some of the outside, leaving the natural edge at the tailstock end, don’t over do this at this stage. 8, hollow out the inside to your preferred shape and depth.9, using a wet and dry sanding medium, sand the inside. 10, Mount the light stick in the tailstock and put the light inside the cup, use an LED bulb as it gives off a lot less heat. 11, Start to shape the outside from the tailstock end back towards the chuck end, as you get thinner you will see the colour change from the light inside, it will start to turn red, the thinner you get the darker the red will be. 12, continue to follow the cuts towards the chuck end, as you do so more and more of the red will show through, all you need to do is follow the red.13, the cup now fully formed and a small foot created, the colour looks even throughout and that tells me that I have a constant thickness all the way to the base. 14, An even better picture of the effect the light has on the wood , this was when I switched off the area lights. 15, the light shown inside the cup. 16, the goblet off the lathe, ready for the microwave, when using the microwave, varying degrees of success are to be expected. I did this one from a branch of almost dry Leylandii, the light did work on this one although not to the same extent as there was no moisture to carry the light through the wood, the advantage was that I could sand seal and polish this one on the lathe.
We hope to have a good turn out respecting the fact that some of you may still be sheltering, we are making every effort to make our premises as safe as possible, and some of that work is still ongoing hence the changes in the programming.
The changes in the clubhouse require funding, and we have an appeal for donations ongoing, I understand that is going very well and we thank all of you who have contributed, continue to buy the raffles for both the weekly draws and the big Christmas draw.
This website uses cookies to improve your experience. We'll assume you're ok with this, but you can opt-out if you wish.AcceptRead More
Privacy & Cookies Policy
Privacy Overview
This website uses cookies to improve your experience while you navigate through the website. Out of these, the cookies that are categorized as necessary are stored on your browser as they are essential for the working of basic functionalities of the website. We also use third-party cookies that help us analyze and understand how you use this website. These cookies will be stored in your browser only with your consent. You also have the option to opt-out of these cookies. But opting out of some of these cookies may affect your browsing experience.
Necessary cookies are absolutely essential for the website to function properly. This category only includes cookies that ensures basic functionalities and security features of the website. These cookies do not store any personal information.
Any cookies that may not be particularly necessary for the website to function and is used specifically to collect user personal data via analytics, ads, other embedded contents are termed as non-necessary cookies. It is mandatory to procure user consent prior to running these cookies on your website.