

Start time 6.45pm.
My (Alec Mutch’s) theme for this meeting is to demonstrate the use of pieces of equipment that are needed to deal with long hole boring and also to create threading using a thread box and tap in our woodturning.
I will show you all the equipment required for both of these subjects and some examples of threading that can assist in various applications, including making up some small jigs to help your work when threading.
Items that require long hole boring are things like Standard Lamps or even table lamps if the stem of the table lamp is quite long, a thread box and tap can also be used on table lamps to secure the stem to the base. Another very good use for the thread box is to make a tapestry or cross stitch frame for holding the material tight when being worked.
Here are a few pictures of the equipment required and some practical uses they have been put to.
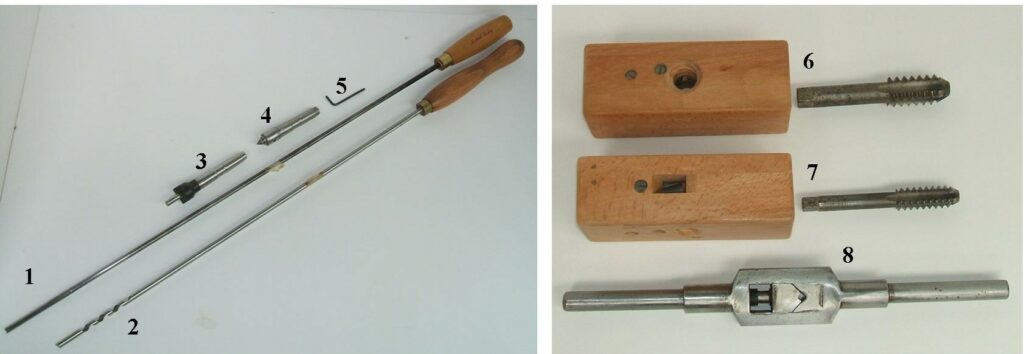
Item 1, is a long hole boring auger, this what they call a Shell Auger it has a very small cutting point at it’s tip which requires to be kept sharp, but don’t over sharpen as the material soon disappears rendering the tool useless. Item 2, is another type of long hole boring Auger, this one can be sharpened a little oftener as it’s constructed in a different way, it also has a short twist section at the tip to assist with the swarf, I’m not sure the twist section is of great benefit it can present problems if you try to drill further than the twist section will allow, and that’s sometimes difficult to judge. In practice I prefer the Shell Auger. Item 3, a counter bore, this tool is required if the hole needs to be drilled from both ends as is the case with most standard lamps. Item 4, is the tool that allows the drill to be passed in through the tailstock, it’s on a Morse taper, has a removeable pin. Item 5, the Allen Key required to release the pin in item 4.
Now for the Threading equipment, Item 6, is a 1inch Thread Box and Tap set. Item 7, is a 3/4inch Thread Box and Tap set. Item 8, is a Tap Wrench required to hold the Tap when in use. A word of warning, there are various Tap Wrenches on the market, do not be tempted to get a small Tap Wrench as the forces required to create the threads is quiet substantial.
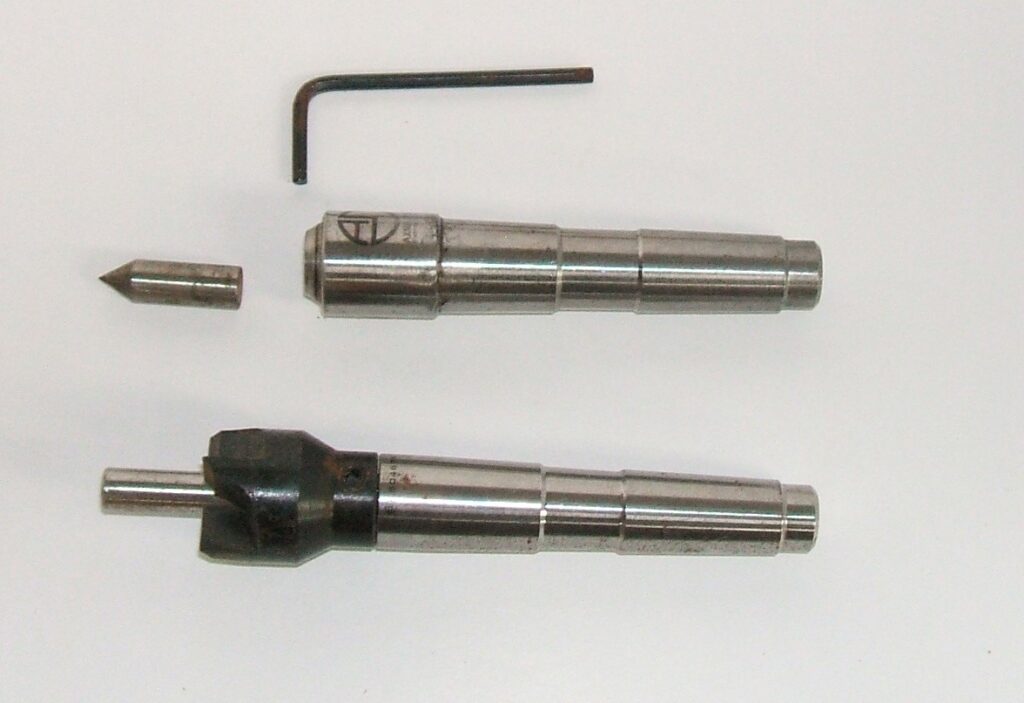
A close up of 2 of the tools required to do long hole boring.
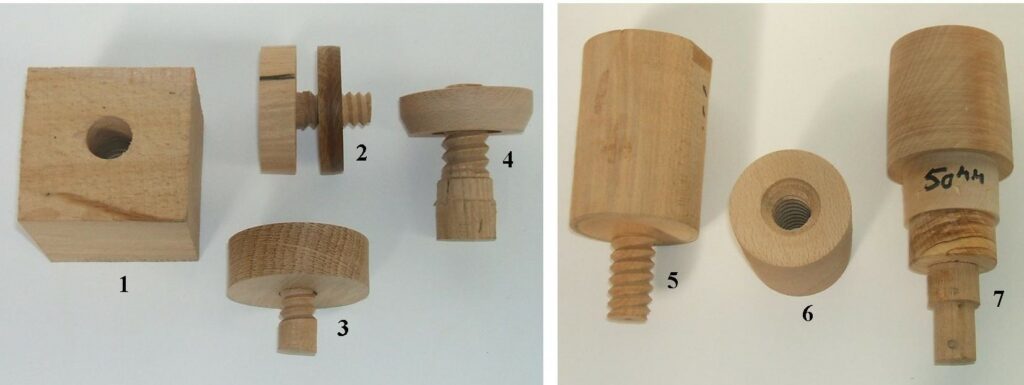
Some examples of threading. Item 1, a square of Beech drilled ready to make the threads. Item 2, a Beech Thread and Nut. Item 4, a Thread and Nut made in Oak. Item 5, an example of the thread being extended by hand right up to the shoulder, the Thread box does not go all the way as shown, it needs to be completed by hand. Item 6, a threaded collar, this example shows the collar has been opened up sufficiently to not have to complete the thread by hand, the best choice. Item 7. a Simple jig made to go in the chuck and tailstock, it can be mounted with various sizes of threaded collars especially useful when making Standard Lamp collars.
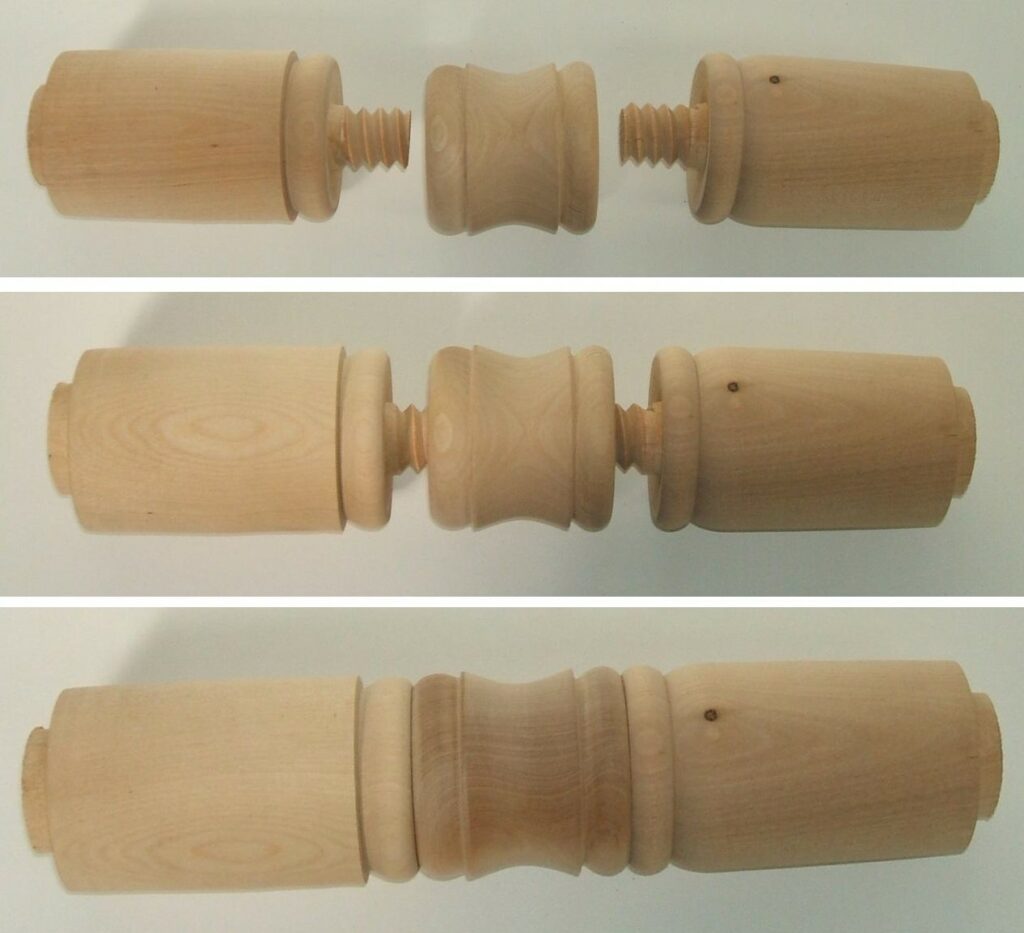
In this picture I have made up a mock up of the junction piece for a Standard lamp, on some Standard Lamps there may be more than one junction piece. Top picture, the lower and upper sections with the junction collar in the middle. You may have noted that the lower and upper sections have the grain running in line with the construction, the junction collar has the wood grain running across the threads, it’s not possible to thread using these Taps in line with the grain. Middle picture , the threads now being put to use. Bottom picture, the 3 sections threaded together and completely in line with each other.
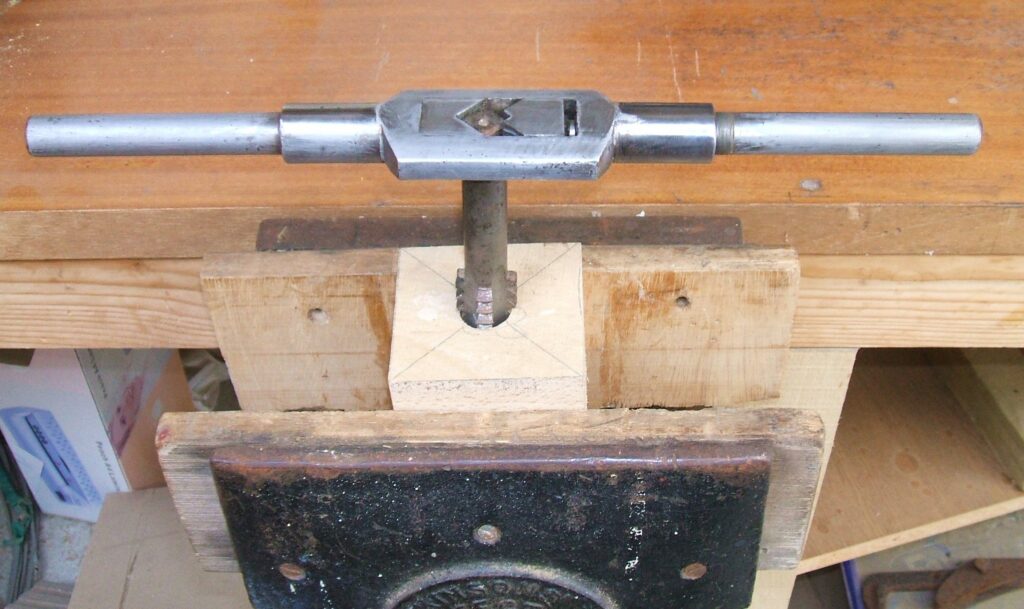
I mentioned earlier that there needed to be some considerable forces applied to create the thread, for this I make the junction pieces out of a square of wood with the grain running across the threads and held in the vice, you may find gluing on a start piece of scrap wood before drilling can benefit the start of the thread, taper it slightly and start the thread on the lathe, if you cannot lock the headstock when doing this a vice will be required, all will be revealed.
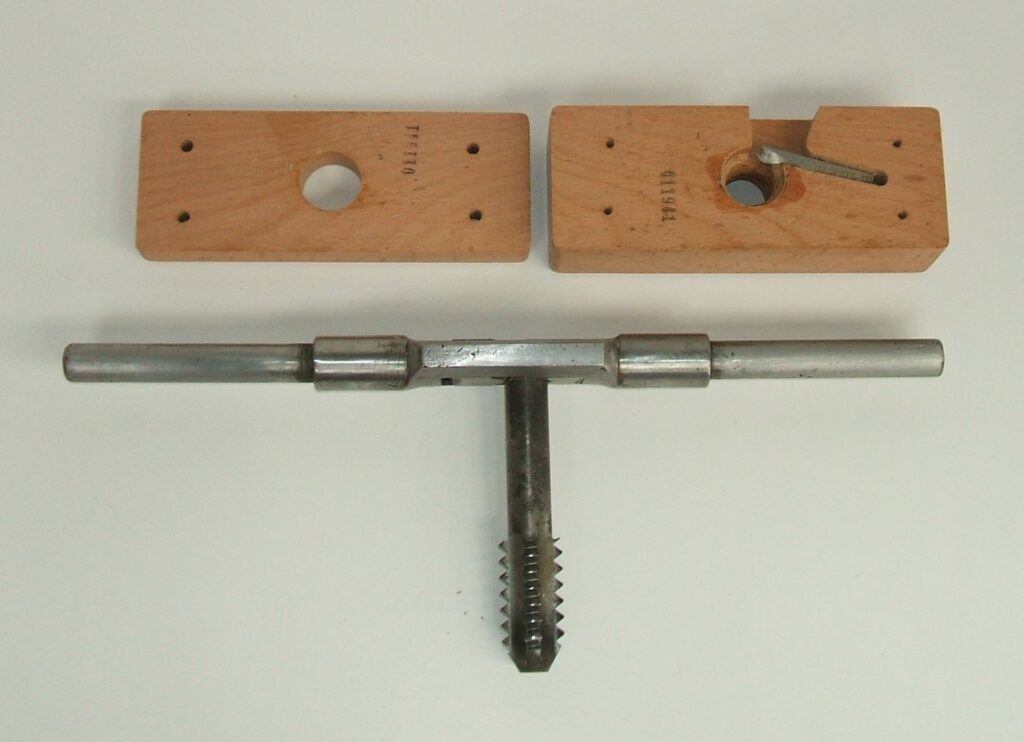
In this picture you will see that I have taken apart a section of the Thread Box, this allows the thread to be extended to it’s maximum cutting area before you need to complete the thread by hand.
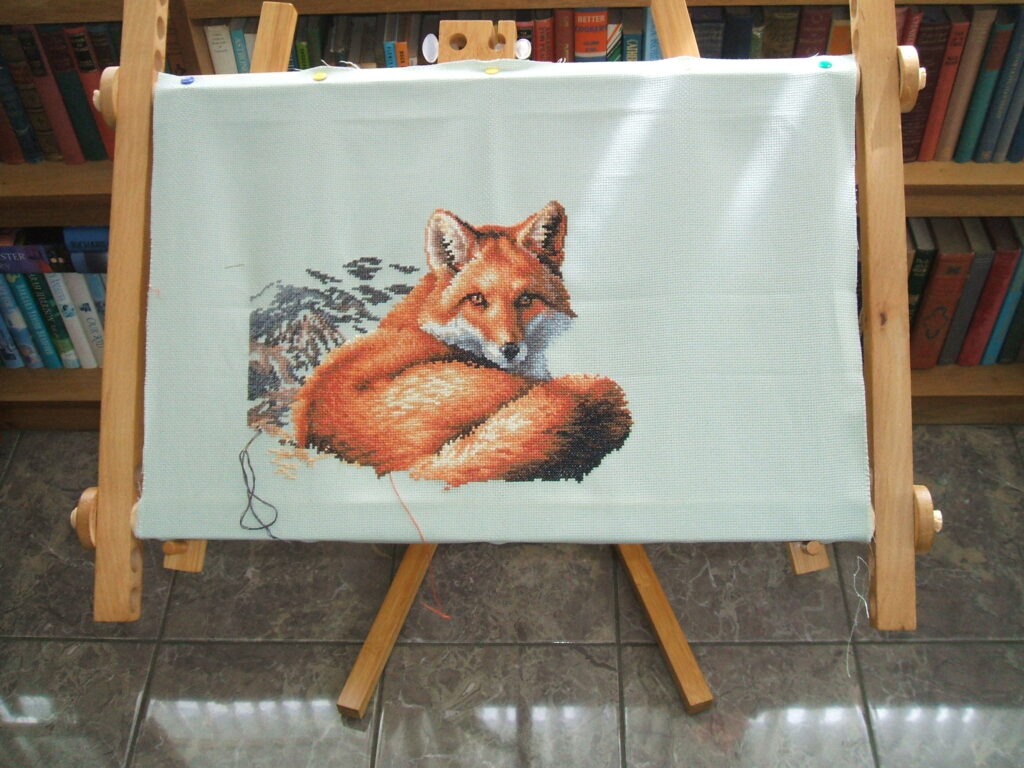
The main frame holding the tapestry is made from 4 pieces of wood, drilled and threaded with locking nuts also made from wood.
I will try to show you all some of the uses these pieces of equipment are capable of doing, and why you should consider buying and using them. We are looking for a good attendance and you will all get a seat, the camera and screens will be in use. Tea and Coffee will be available for the usual 50p donation, the raffles will also be on sale, hope to see you all there.