
Our meeting this week on Thursday 17th August was a solo presentation by Alec Mutch, The subject matter was in 2 parts, the first being Long Hole Boring and the second was Threading in Wood. He explained that there would be no actual end product made at this presentation, the purpose was to show what was required and how to use the tools.
Alec dealt with the Long Hole Boring 1st by showing the members the tools and equipment required to do Long Hole Boring, that was followed by a practical demonstration on how to use the Long Hole Boring tool. He explained that it was very important to not push the drill in too far in any single cut, the flute on the drill was quite short and soon filled up with the swarf, this meant the drill should only be progressed in short burst of about 25mm at a time, it was equally important to keep the flute facing upward to catch the swarf as failure to do so could result in the drill being difficult to withdraw.
Thread cutting was next on Alec’s agenda, again he went through the tools required to do Thread cutting, this was achieved by using a Threading box and Tap, he brought 2 examples of these tools a 1″ set and a 3/4″ set. This was then followed by a practical demonstration on the use of both the Threading box and the Threading Tap. The Tap was used first to create the female thread on a piece of Lime wood, the Male thread was created after bringing a piece of Lime wood down to the recommended diameter with a gouge and the Thread box used by hand.
The following pictures were supplied by Fiona Campbell supplemented by a couple from me, and I thank Fiona for her involvement in agreeing to take some pictures, here are those pictures along with a little text, I hope you were all able to follow what I was doing and what the pictures relate too.
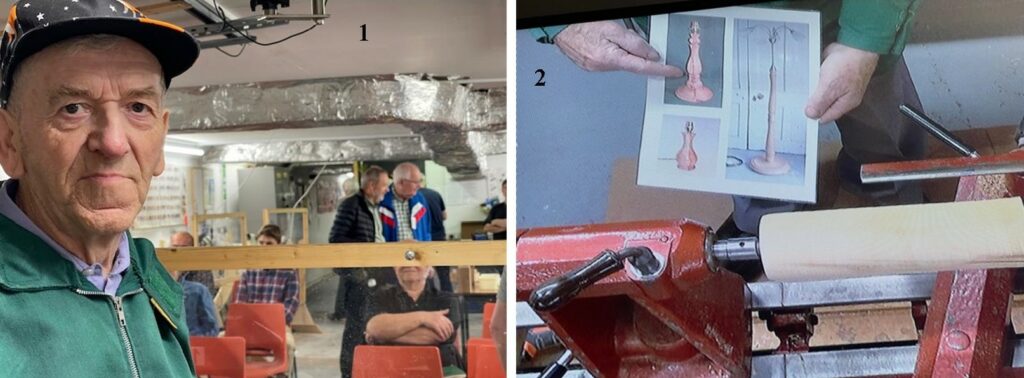
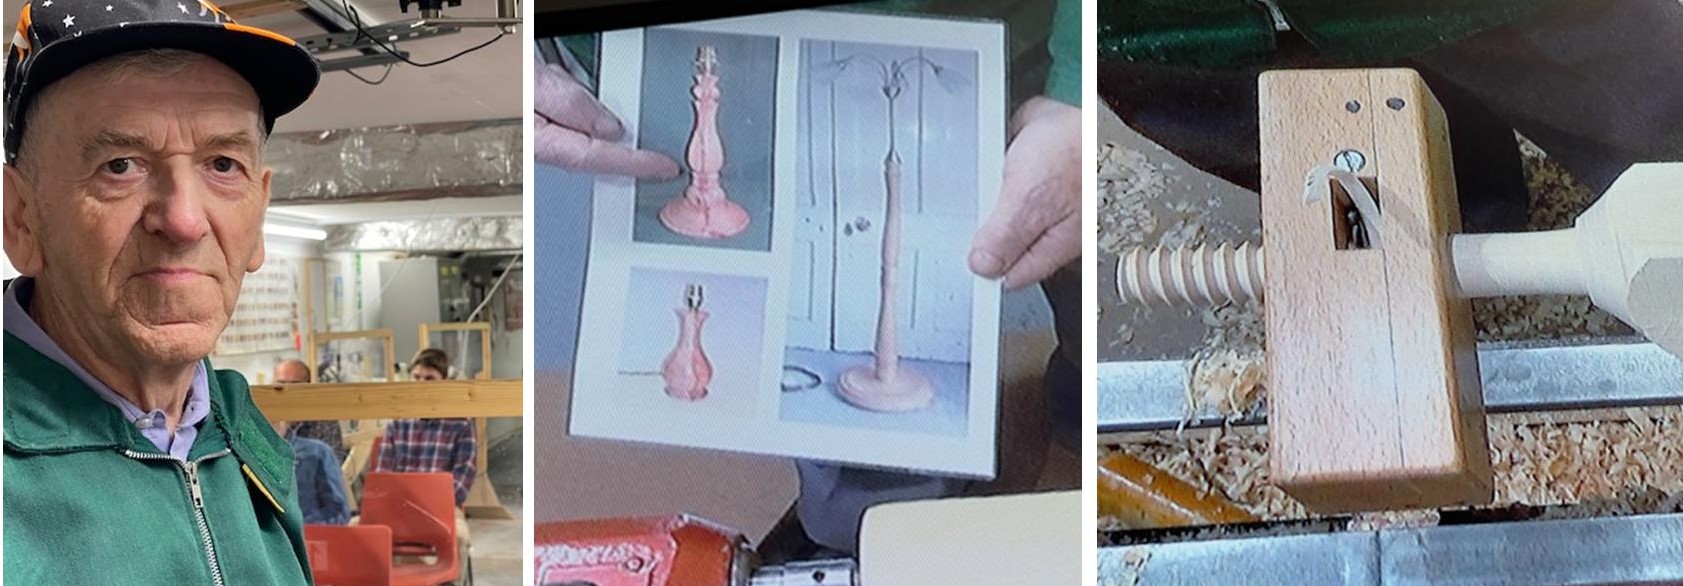
Picture 1, is myself setting up to get started, in the background some of the members taking their seats as they arrived. Picture 2, I started with the Long Hole Boring first, a piece of wood is mounted ready to be drilled, but first I showed the members some examples of items that required Long Hole Boring, a couple of table lamps and a standard lamp. The Standard Lamp and one of the Table Lamps also required the use of the Threading equipment.
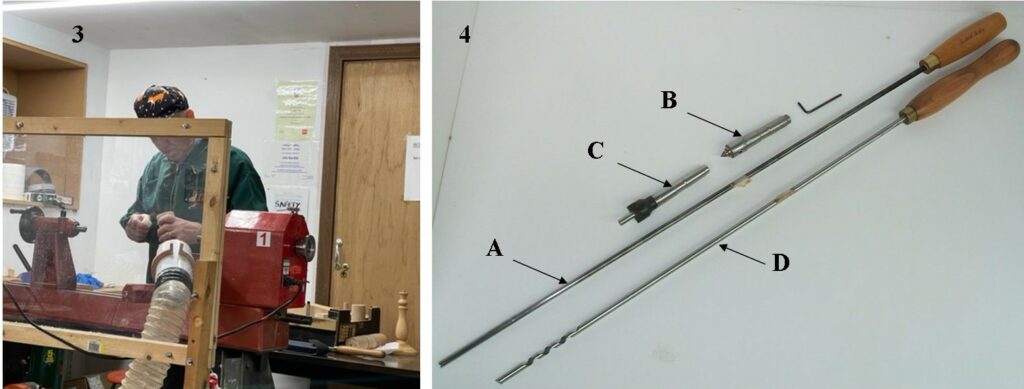
Picture 3, I’m placing some wax on the end of the piece to be drilled, this will assist in the wood not overheating during the drilling process. Picture 4, a reminder of the tools required. (A) the Shell Auger I used, (B) the piece that went in the Tailstock with detachable point, (C) the counter bore tool, to be used in the headstock after turning the work piece around. (D) another type of auger (not used), shown as an alternative.
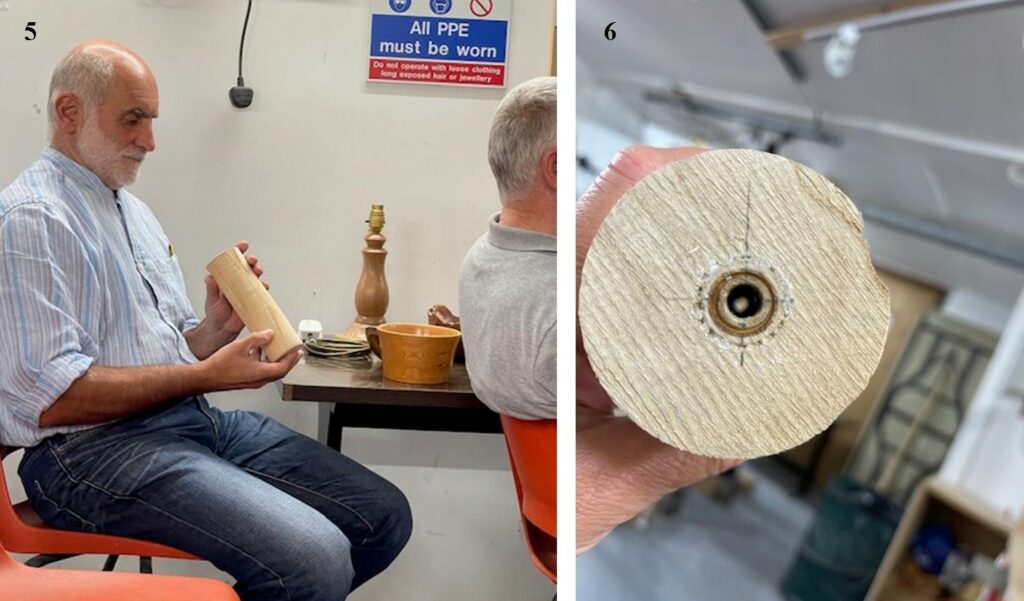
Picture 5, one of our members taking a look at the newly drilled piece of wood. Picture 6, a close up of the newly drilled hole, note the groove next to the hole where the wax was applied, it served it’s purpose of not over heating the end.
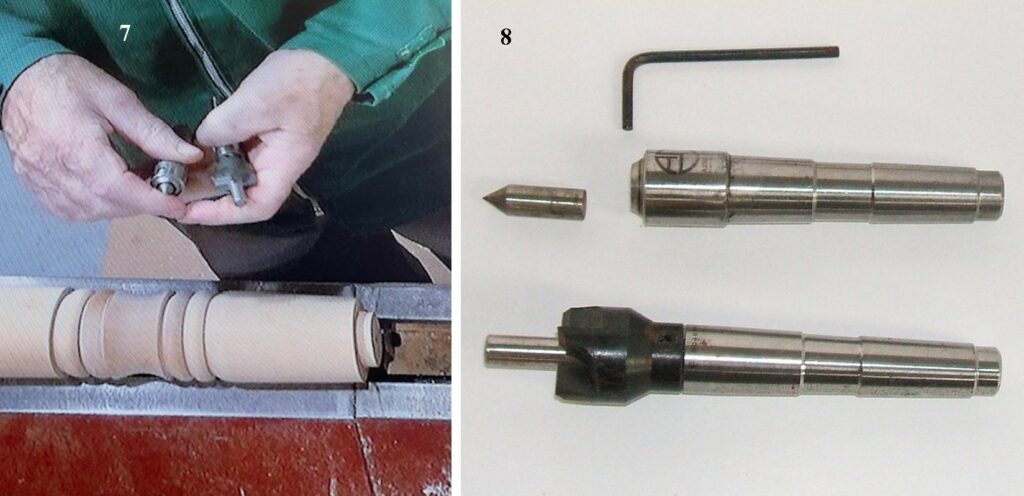
Picture 7, here I am showing and explaining what tools are required and how they are used for Long Hole Boring. Picture 8, a reminder of the tools required, top, the part that goes in the tailstock with detachable pin, bottom, the counter bore tool used in the headstock after turning the workpiece around.
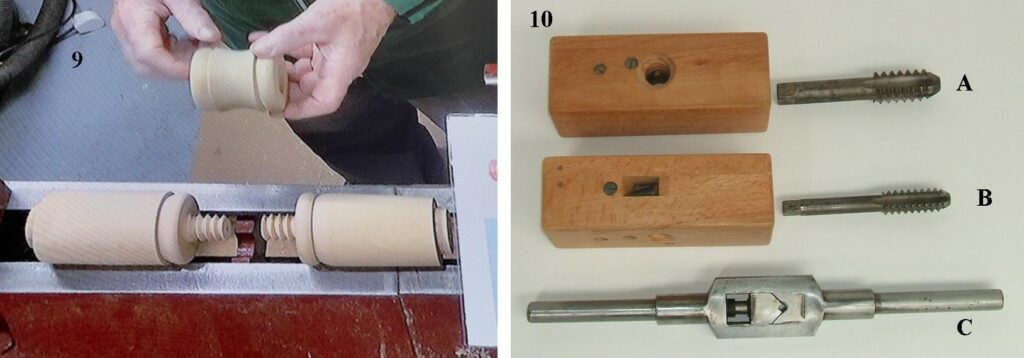
Picture 9, onto the Threading, here I’m explaining where the use of the Threading equipment is used. Picture 10, a reminder of the Threading tools, (A) a 1″ Thread box and Tap set, (B) a 3/4 ” Threadbox and Tap set, (C) a Tap wrench used with either Tap.
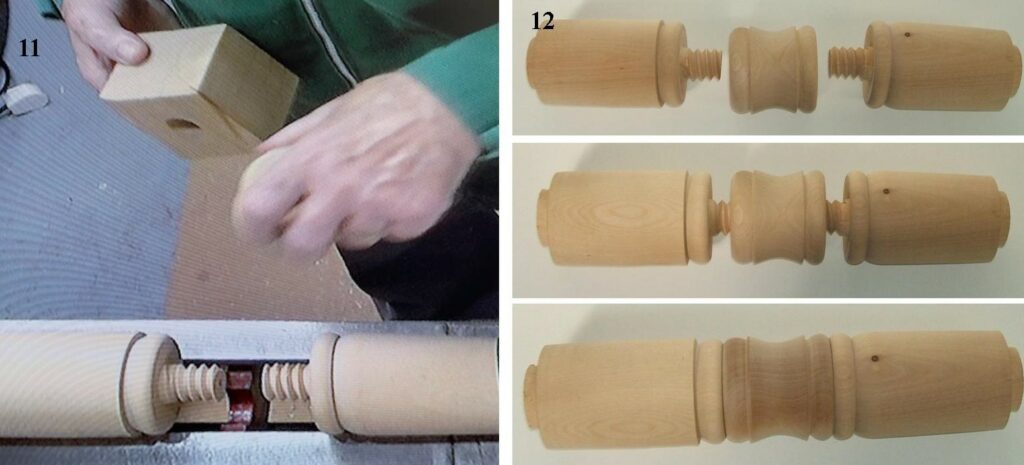
Picture 11, in my hand is the piece that would make up one of the junction pieces, it’s been drilled and now requires Threading with the use of the Tap, I explained that the grain needed to be across the threads as it was very difficult to drill and Thread on end grain. Picture 12, the junction piece made and ready to screw together, you will see that by using this method the workpiece is completely straight.
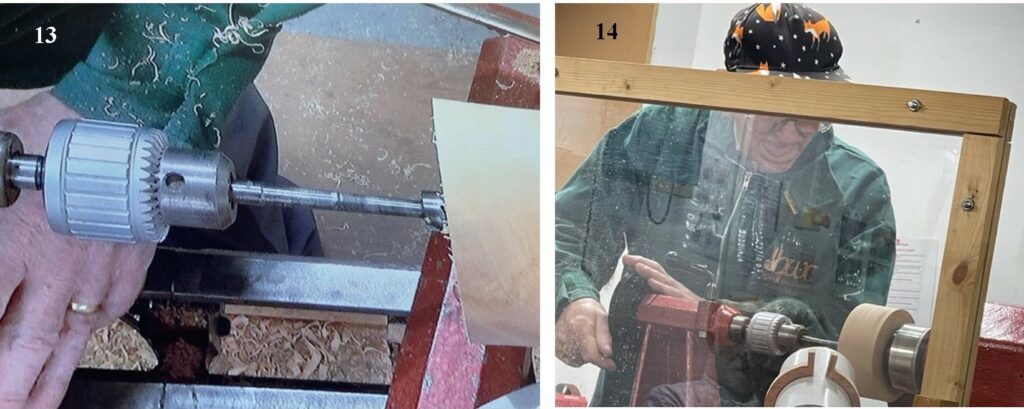
Picture 13, drilling the base of a Table Lamp for threading. Picture 14, the drilling continued, you may note that the piece of wood is considerably thicker that is required, this serves 2 purposes, the first being when it’s cut to the right thickness the screw holes are removed, the 2nd is the Tap needs a gentle slope to get it started this too gets removed when reduced to the correct thickness.
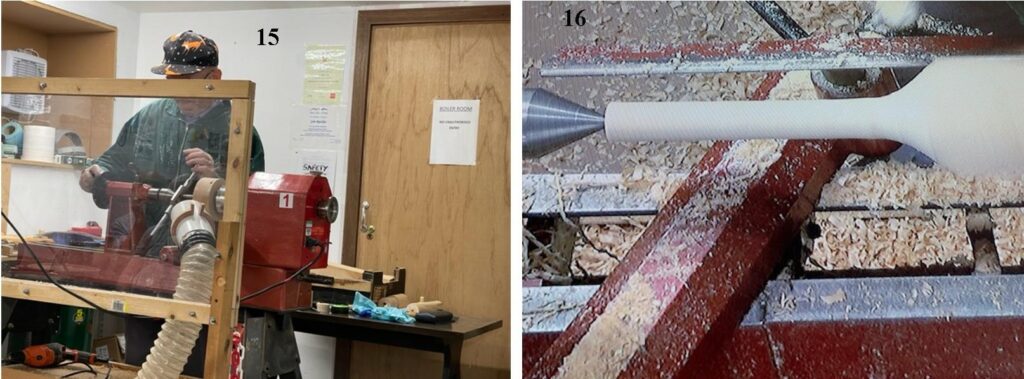
Picture 15, now using the Tap to thread the base piece, lock the headstock, set up the Tap with the wrench and the tailstock in contact with the piece to be threaded then simply turn the wrench and the tailstock wheel in harmony, this does take a little co-ordination but it will keep the threading to go straight. Picture 16, here I have cut a piece of Lime wood down to the correct diameter ready to be threaded.
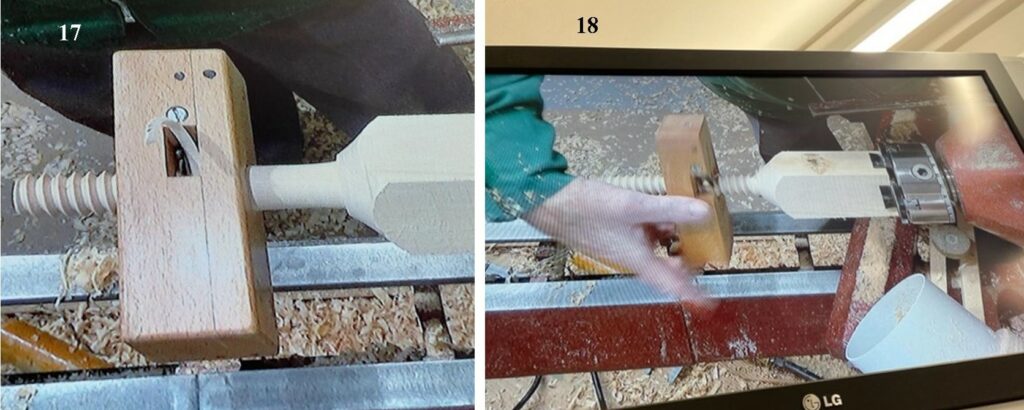
Picture 17, the Thread Box in use, offer the wood to the guide hole in the Thread Box apply a little pressure to get it started then simply turn by hand, it does not require any force once started. Picture 18, you will need to remove the top of the Thread Box to get a thread right up to any shoulder, here you will see I done just that then wound the Thread Box back along the thread carefully to complete the thread again by hand turning the Thread Box.
I showed the members a few jigs that I had made up for working with threading, several question were asked on the suppliers of these tools and the likely costs, I was able to point them in the right direction for the suppliers but not so sure of the present day costs, my Threading equipment is more than 30 years old.
The meeting was reasonably well attended for a Summer meeting, our next meeting is on the 31st August and is being handled by Peter Lawrence, Peter will have 4 lathes in use and the turners have been supplied with the wood for this meeting by the club for them to make anything they wish, a second piece of wood was also supplied for them to practice with at home.
Hope to see you all there.