Report on our meeting 27-10-2022. Managed by John Ruickbie.
Our meeting this week on Thursday 27th October was managed by John Ruickbie, John did this presentation as a solo event, his theme for the presentation was how to make Staved Construction items, in lay mans terms how to make use of Barrel making techniques in woodturning. There wouldn’t be a lot of turning in this presentation as most of what John put forward was more to do with how to construct an item for turning that used Staved Construction methods.
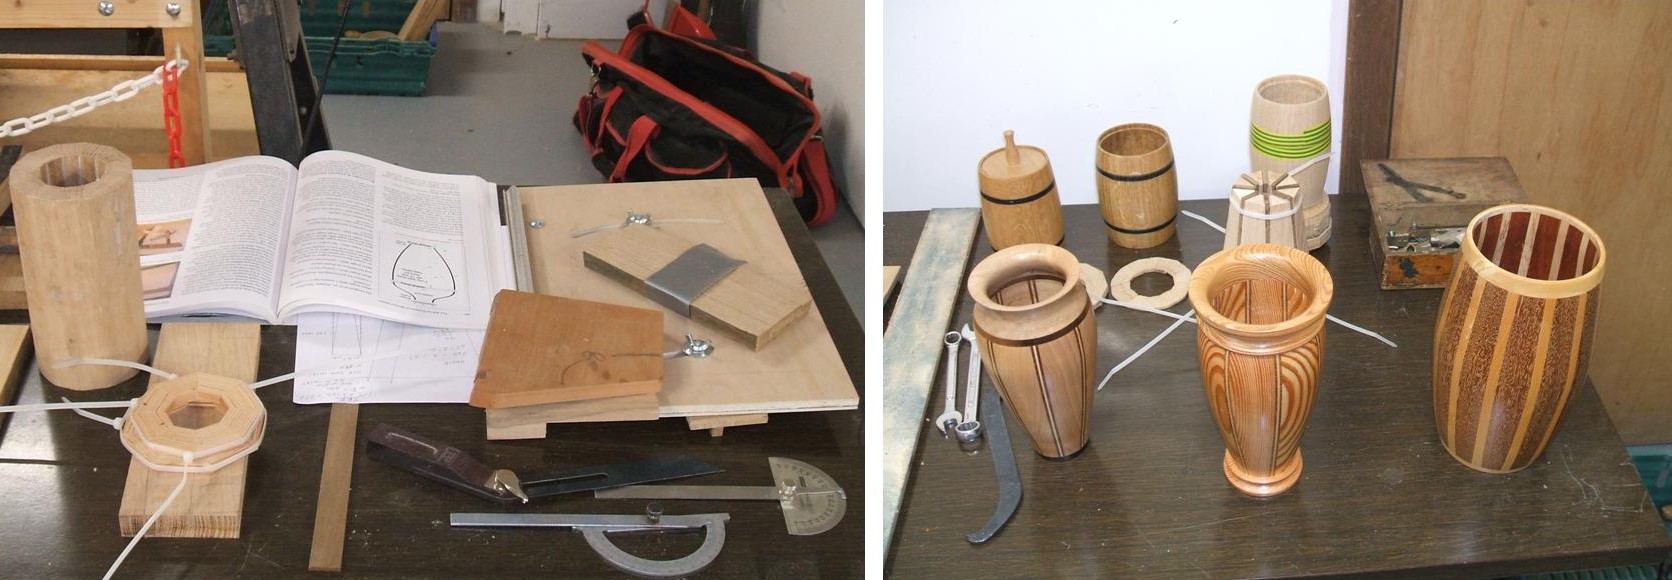
John brought along a few finished items he had made using the Staved Construction method, he also brought along a lot of bits of in progress examples showing just exactly how to make up the Staves and how to assemble them. He went into great detail on how to cut the Staves accurately and explained his method for assembly, this also included a lot of information on the correct adhesive to use and the reasons for doing so, his clamping methods were also demonstrated, these were mainly down to the use of cable ties, John explained that the glued assembly didn’t need a great deal of pressure as long as the joints were very accurate, and for this he would always do a trial piece first as a dry run just to see the joints all lined up accurately both on the outer face and the inner face.
I took a few pictures during John’s presentation, here are those pictures I hope they give you a better insight into just how Stave Construction is achieved.
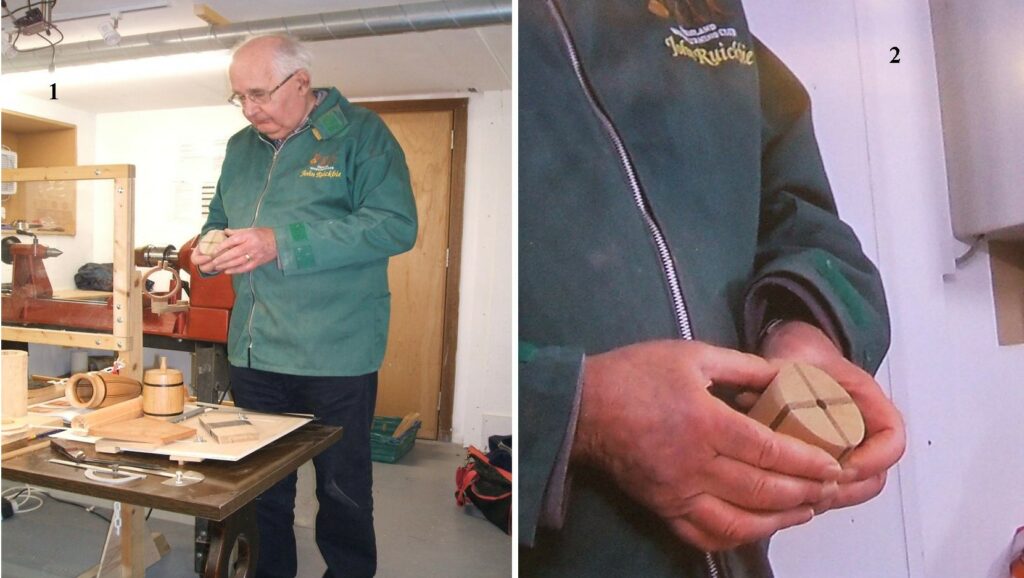
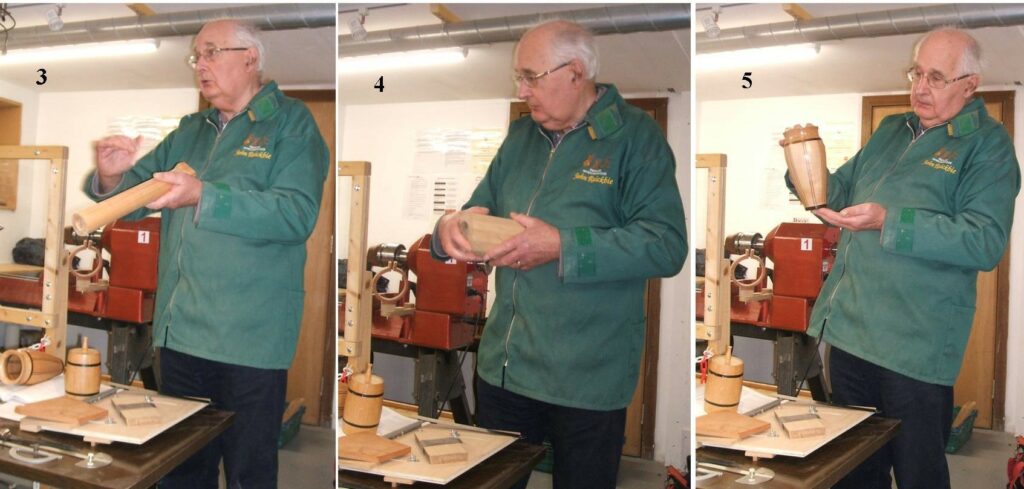
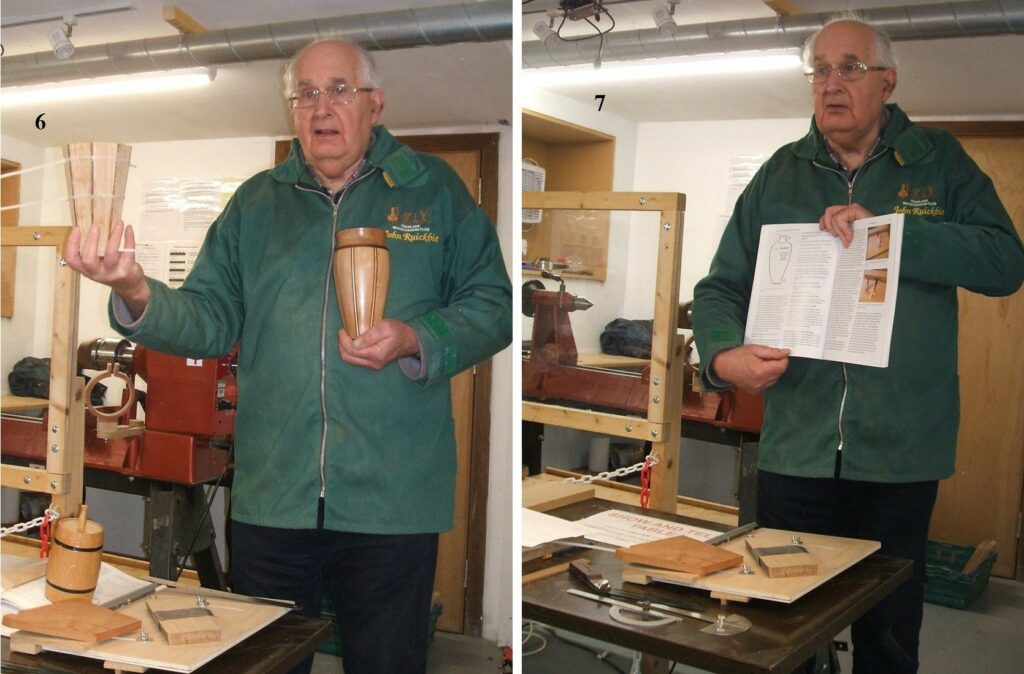
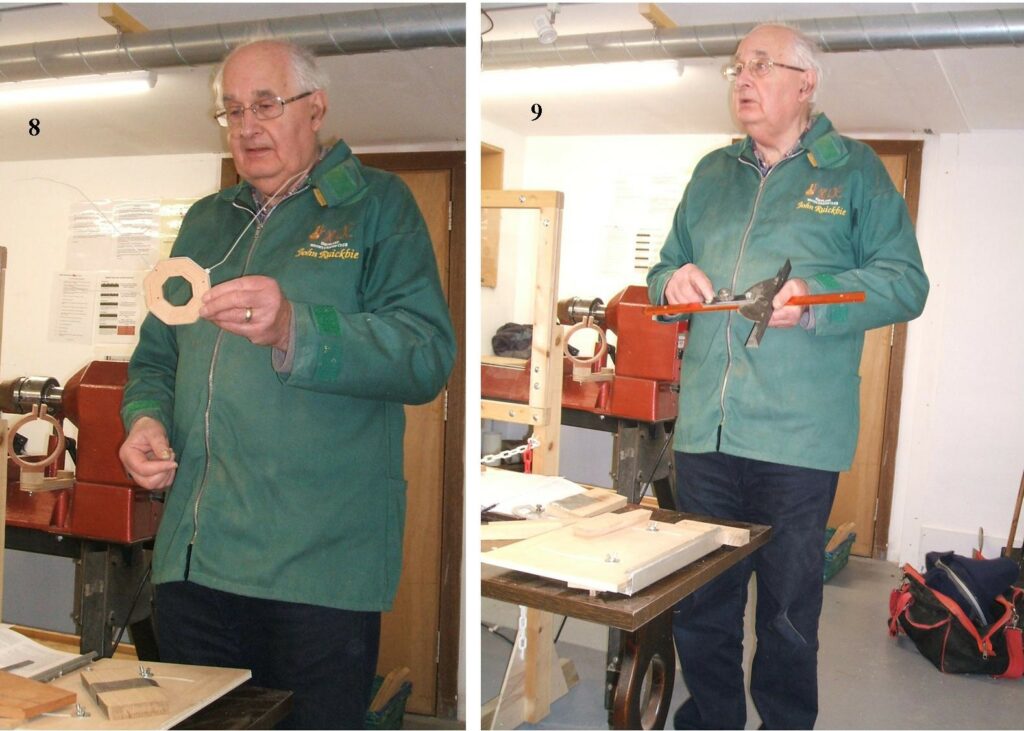
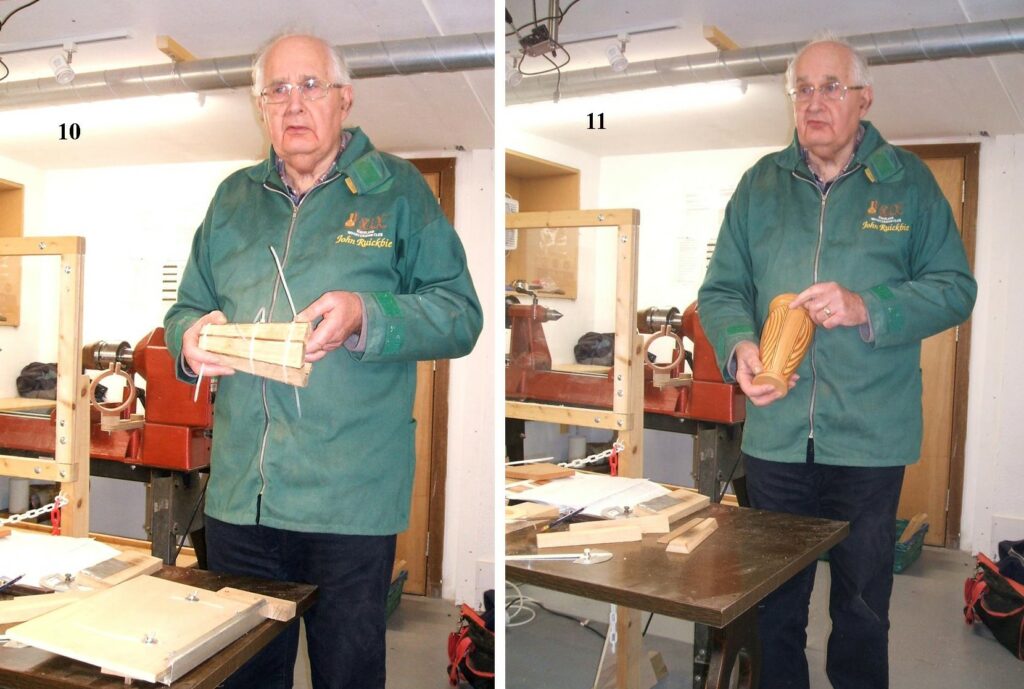
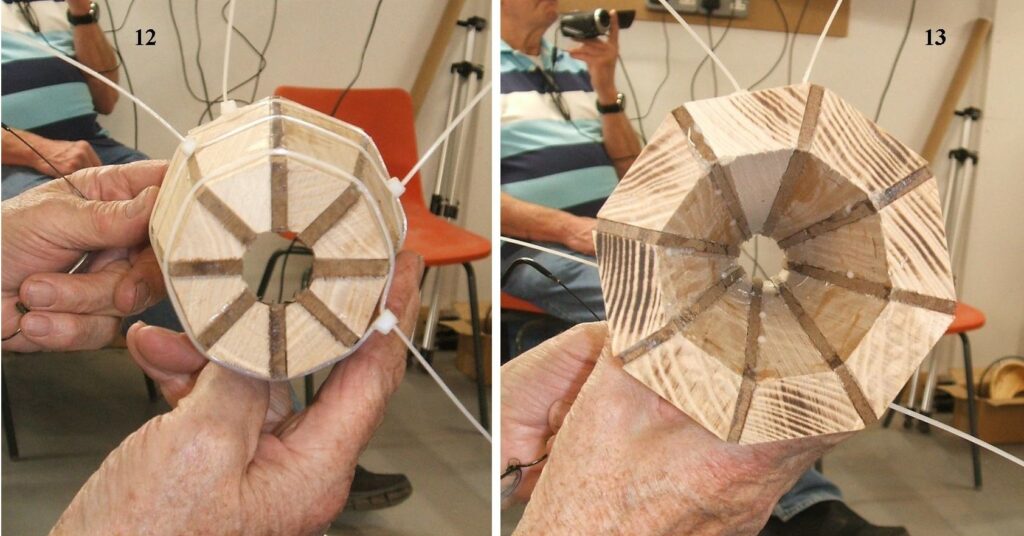
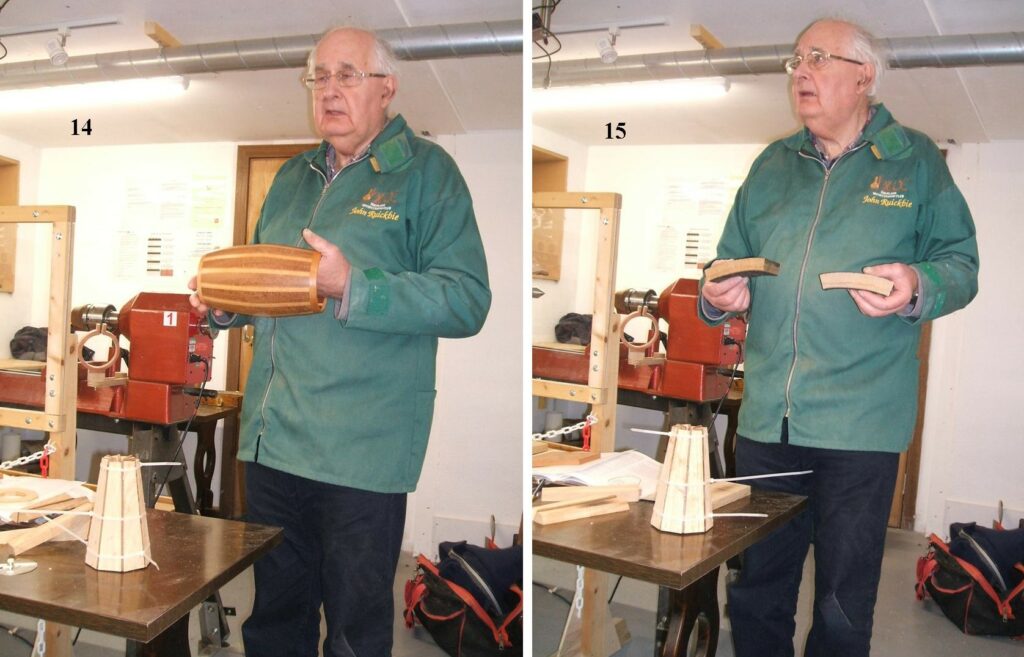
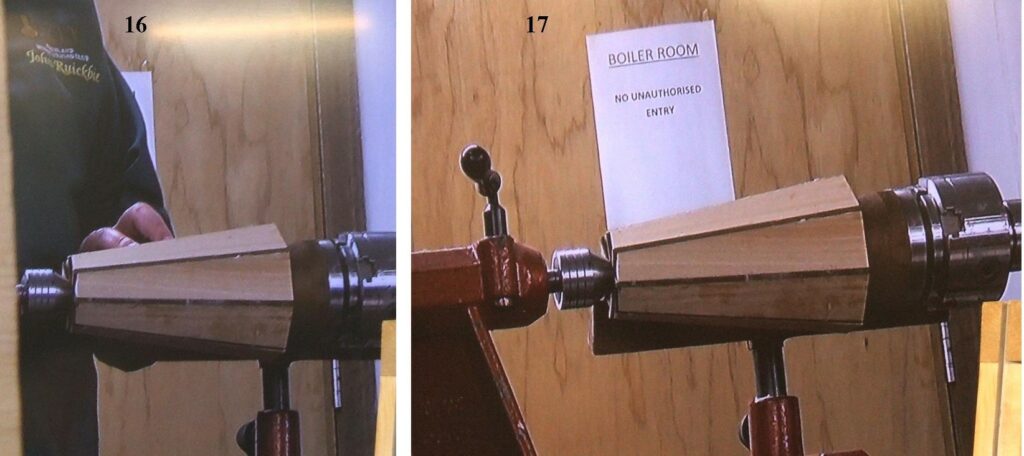
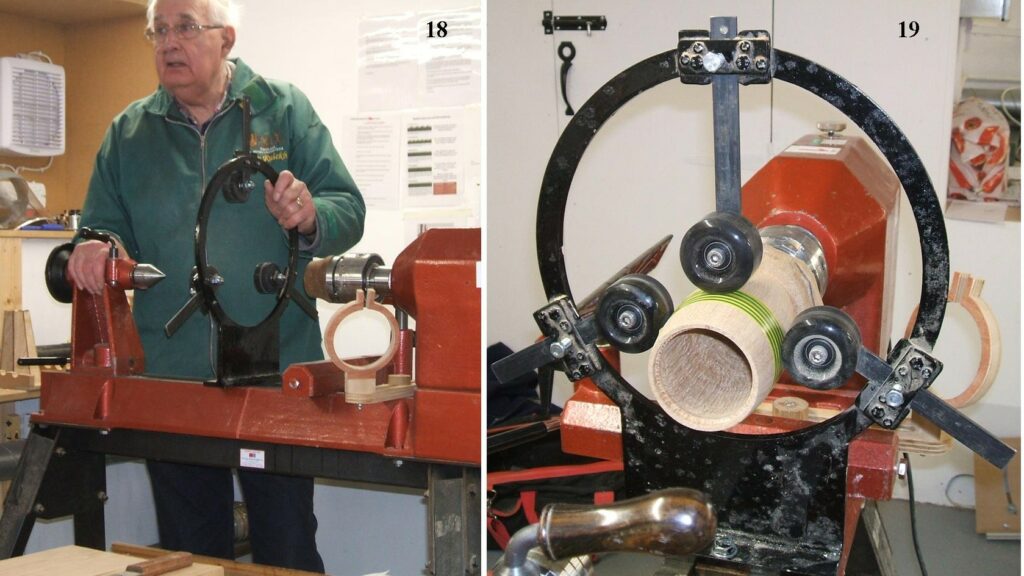
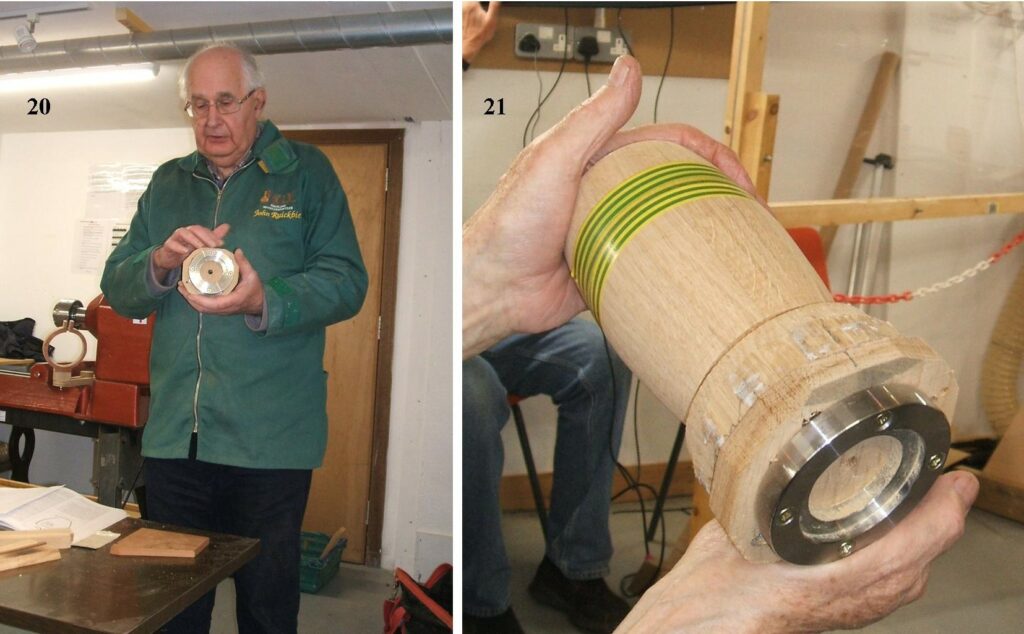
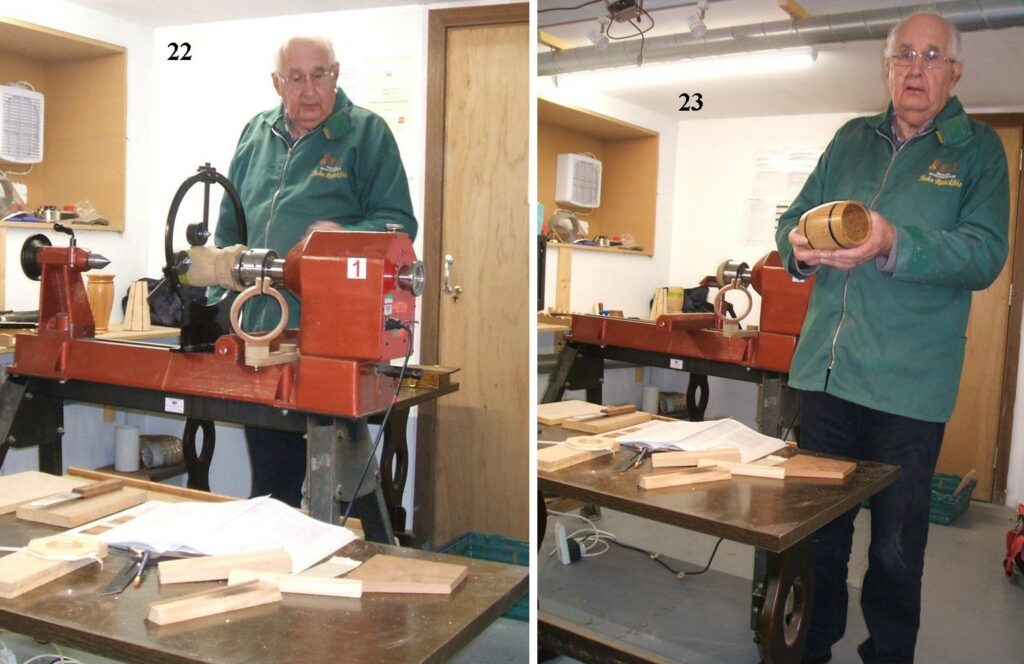
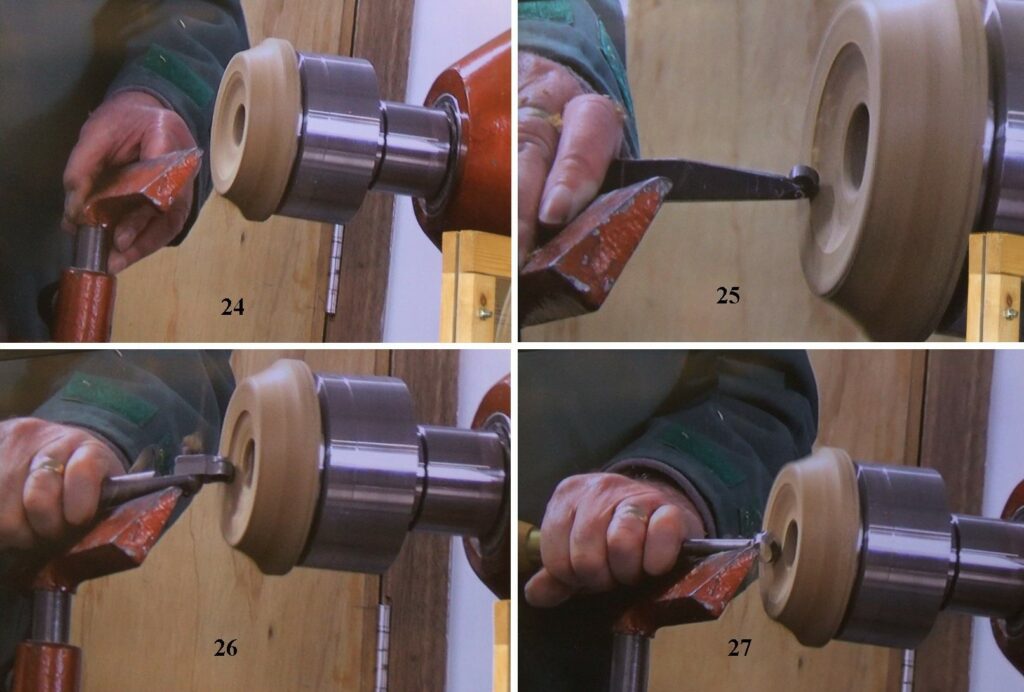
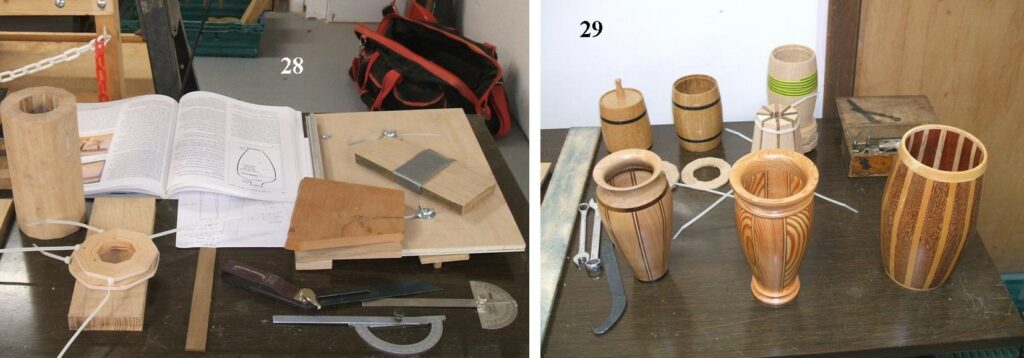
Pictures 1 and 2, this is John Ruickbie as he starts his presentation, he began with some very simple items being assembled, these he had also turned to let those present see the finished result.Here John is showing the progression in assembly from the tube style assembly shown at picture 3, to a 12 piece construction in picture 4, finishing up with a rather more elaborate construction in picture 5.Picture 6, shows John holding part of the assembly in his right hand that would ultimately go to make part of an item similar to that being held in this left hand. Picture 7, here John is showing a book with a similar type of assembly to be, there are numerous books on the subject of Stave Construction, Segmented turning and Polychromatic Assemblies, just go on line for a few examples. Pictures 8 and 9 are all to do with accuracy. In picture 8, John is holding one of his trial pieces just to check for accuracy, these are not glued but they will show up any defects in the assembly were there to be defects, in this case there were none, John now knows he can progress cutting the staves to the dimensions used in the trial piece. Picture 9, John mentioned accuracy on many occasions, to that end he had made up his own cutting guide to fit on his bandsaw complete with very fine adjustments if necessary, John said the guide that came with the bandsaw was not accurate enough to achieve the degree of accuracy required to get the best results.Pictures 10 and 11 are both to do with adding thin flat pieces to the construction between each of the staves. Picture 8 John has used a dark wood to go between each of the staves, he explained that these thin pieces needed to be cut to an even thickness and for this he used a drum sander. Picture 11, takes the inserting of thin flat pieces to a different level, her he has used 3 very thin pieces between each of the staves, these were all cut to about 3mm thick and he used 2 dark woods and 1 light wood.Pictures 12 and 13 are showing both ends of the same piece of an assembly, The 8 pieces of stave have been added to by using 8 pieces of dark wood. You can see the accuracy of the assembly in both pictures. Picture 14, this is where John explained the use and the problems with different glues, on the item he is holding he is feeling the joints on the inside, he explained that all PVA glues can move after they have been turned, some more than others and the best of the PVA glues is probably the White Gorilla Glue, but for best results the glue to use on all this type of work is Cascamite, this is a mineral glue that does not allow for any movement after turning and therefor very little in the way of movement so your joints will not be felt. Picture 15, John liked to use recycled Oak barrel staves, he went on to explain exactly how to re-cut them taking into account the limitation on how they could be used.Pictures 16 and 17, these show John setting up a tapered Stave Construction on the lathe ready to be turned. For the wide end John used a tapered piece of wood to hold the open end by friction, the tailstock is used in the other end.Pictures 18 and 19, this is John’s steady for turning the inside of his assemblies, he made this himself and got a blacksmith to cut and assemble the main stand, the rest he made himself from various pieces of scrap he had, the only other part he needed to buy was the wheels and the came from a pair of roller skates he purchased on line. Picture 19, shows just how the open end of the assembly is held and the tape gives the wood a bit of protection from the wheels.Picture 20 and 21, these show the base piece John uses on his assemblies, a faceplate ring mounted on a scrap piece of wood then glued to the piece to be turned, John liked to use a bigger piece than what was probably required.Picture 22, the steady in use, John ran the lathe just to let those watching see and hear it in operation, it was on the whole very quiet. Picture 23, here John had made a barrel, he had cut a couple of grooves on each of the areas where the rings were to be, he then coloured these to look like the rings on a whiskey barrel.Picture 24, John is demonstration the use of various tools used to cut the inside of the assemblies. Picture 25, is a tipped tool with quite a fine cut, picture 26 another tipped tool this one is rather more brutal and removes a lot of wood but requires regular clearing of the swarf, picture 27 here John is using a ring tool, probably the best for this job.Picture 28, here are just some of John’s preparation items for his presentation. picture 29, including some examples of finished work that John brought along for everyone to see.
That completes John’s presentation, we hope you found it interesting and informative, John has offered to help anyone who wishes to take up Staved Construction on a one to one basis.
The members were very happy with John’s presentation and afforded him a rousing round of applause, he was also thanked by the club for his presentation.
This website uses cookies to improve your experience. We'll assume you're ok with this, but you can opt-out if you wish.AcceptRead More
Privacy & Cookies Policy
Privacy Overview
This website uses cookies to improve your experience while you navigate through the website. Out of these, the cookies that are categorized as necessary are stored on your browser as they are essential for the working of basic functionalities of the website. We also use third-party cookies that help us analyze and understand how you use this website. These cookies will be stored in your browser only with your consent. You also have the option to opt-out of these cookies. But opting out of some of these cookies may affect your browsing experience.
Necessary cookies are absolutely essential for the website to function properly. This category only includes cookies that ensures basic functionalities and security features of the website. These cookies do not store any personal information.
Any cookies that may not be particularly necessary for the website to function and is used specifically to collect user personal data via analytics, ads, other embedded contents are termed as non-necessary cookies. It is mandatory to procure user consent prior to running these cookies on your website.