
Start time 6.45pm.
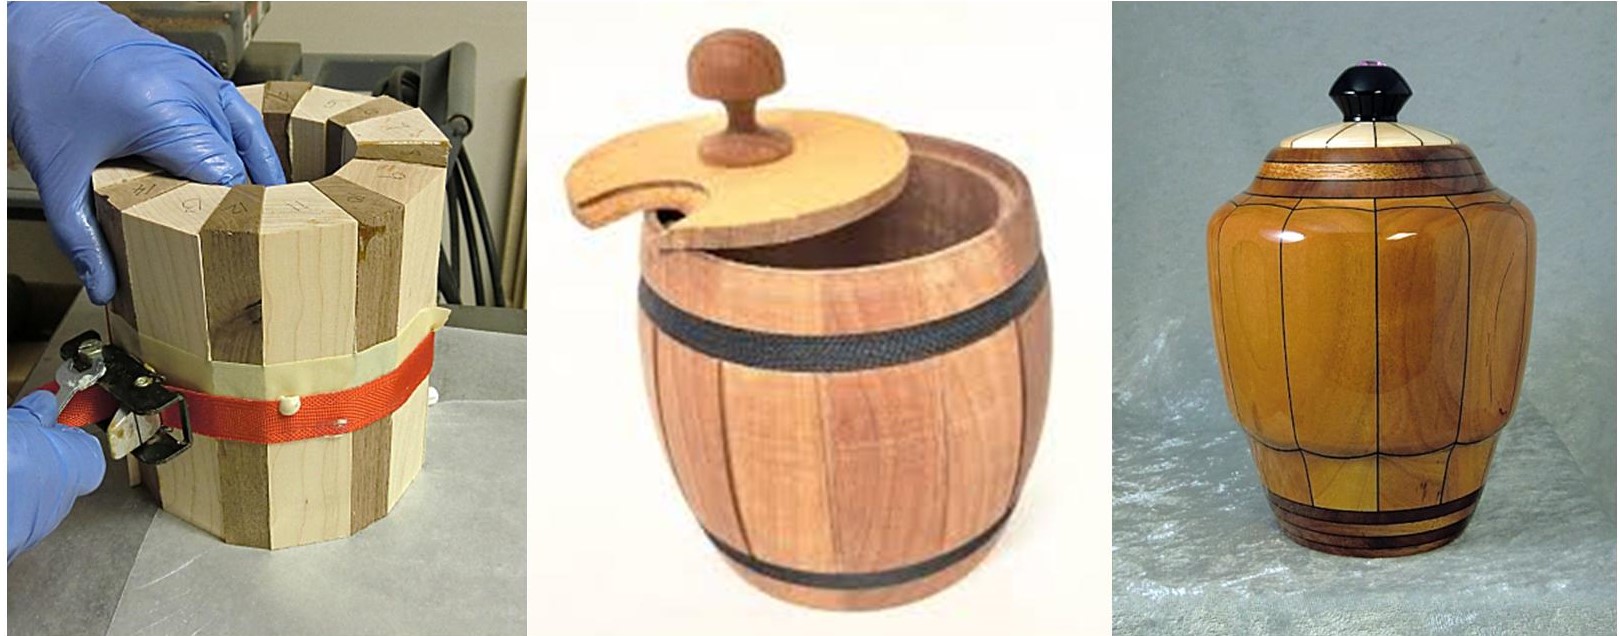
Our next meeting is being managed and presented by John Ruickbie, John is going to be working with Staved Construction, this method involves using strips of wood machined to given angles along their length in order to create a cylinder when assembled.
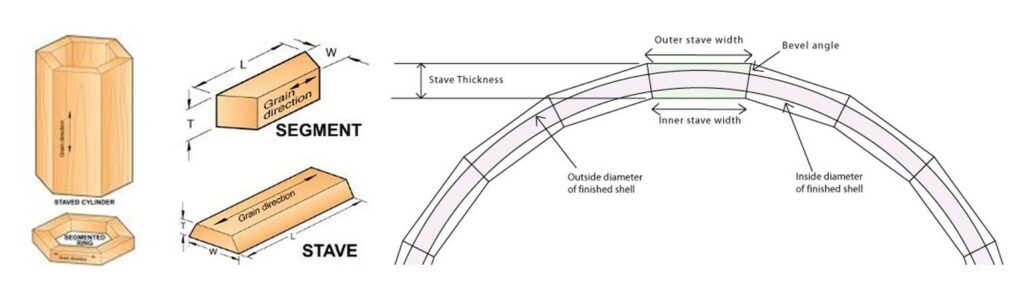
It can involve as few pieces as 6 or it can involve as many as you feel able to include once you work out the angle that each piece needs to be cut to, they are assembled vertically, glued and clamped and allowed to set and dry before re-working. Some of the items being made this way can also include a solid ring top and bottom, or that same ring can be made up of segments, the difference between a Stave and a Segment is that the Stave is set into the work piece vertically, and the Segment is set in horizontally.
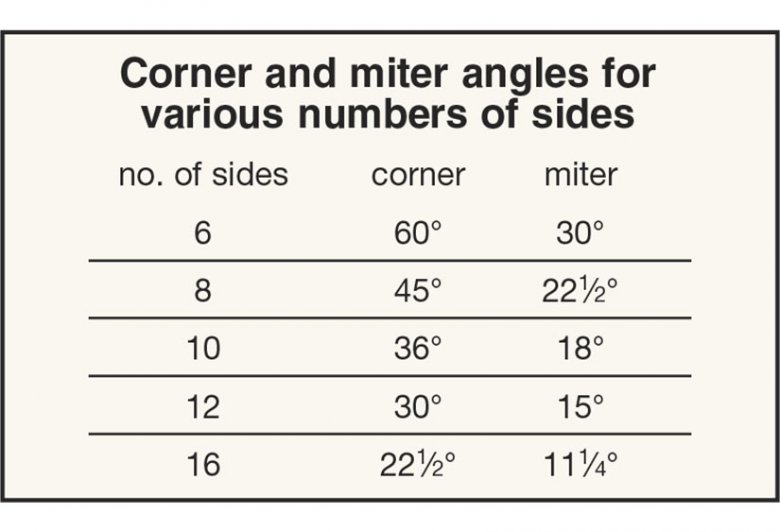
There are a few things you need to be aware of when making Staved Construction items, the angles being cut need to be absolutely accurate, you need to work out the angles depending on how many parts you are going to use, e.g. if you use only 6 pieces the corner angle is 60 degrees but the Stave needs to be cut at 30 degrees on both sides of it’s length, if you use 12 pieces of wood the corner is now 30 degrees and the Stave needs to be cut at 15 degrees.
Gluing up is important, use a glue with minimal allowance for movement, this rules out most of the PVA glues with one exception, Gorilla Glue, the best glue to use is one of the mineral glues, something like Cascamite or any of the Glues ending with “mite”, they do not allow for any movement at all, downside, needs to be mixed with water, does not keep if you mix up too much, and less time for assembly, goes off in about 20 minutes.
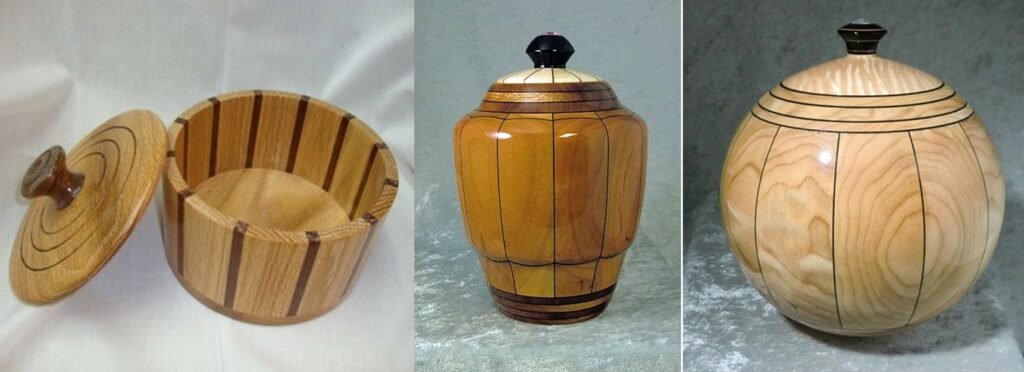
I had a look through our archives and the net and found a few pictures that will give you an idea of what John will be doing, there may not be a lot of turning in his presentation as most of Staved Construction is involved in preparing the wood.
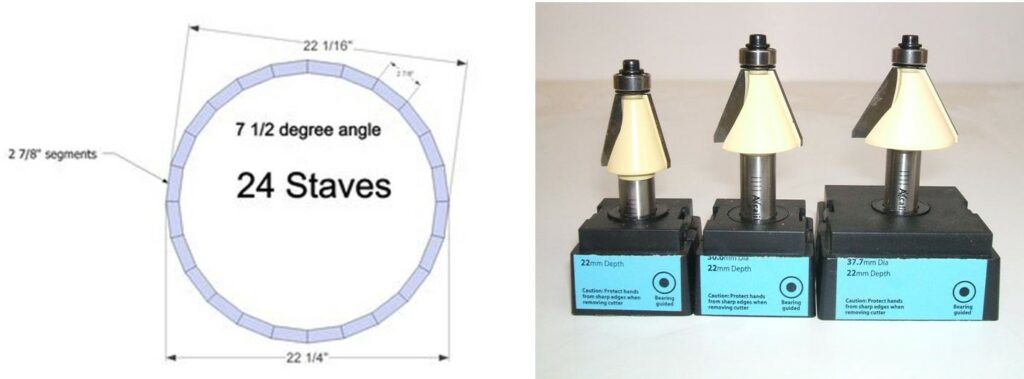
A table saw is probably the best for cutting the mitres on the Staves, but if you do not have a table saw there are Router bits that come with the correct angles to suit some of the Stave Construction methods, a Router table would be required and the use of the fence is essential, these cutter are ok up to 22mm in thickness, more than enough for any Stave Construction.
Here is a little bit of information, and some pictures on Stave Construction.

I hope this wets your appetite to come and watch John delivering his presentation on Stave Construction. This will be a solo presentation and you will all get a seat.
Do remember to buy the raffles that will be on sale both for the weekly raffle and the Christmas raffle, we are also taking in donations of items for the Christmas raffle, tools wood, bottles whatever. Coffee will also be available by donation.