Report on our meeting 29-09-2022, Finishing part 2.
Our latest meeting was on Thursday 29th September 2022, it was Finishing part 2, a follow on from a meeting we held in July with Finishing part 1. This meeting was managed by Nick Simpson where he showed and explained some of his alternative finishes, taking things away from what would be considered normal finishes.
Some of the subjects Nick covered were the use of spirit stains, antiquing some items including fuming to make them look old, he also included distressing an item again to make it look old, using the grain patterns to best advantage including scorching and sand blasting and the use of dyes on the scorched wood, he also talked about faux rust effect and how it was achieved, he showed some items that had copper wire included for embellishment and also how to make it look like copper wire was included.
I was due to have a small part of this meeting to talk and demonstrate the use of Pebeo paints on any woodturning, however Nick had more than enough content to fill the whole meeting that it was decided at the last minute that my presentation would be carried forward to a future meeting.
I was able to get a few pictures of Nick’s presentation and here are they, you will see they are somewhat different to the usual finishes we woodturners normally do, but what it also shows you that nearly anything in woodturning is possible, all you need is the idea and the innovation to make it happen. Pictures now,
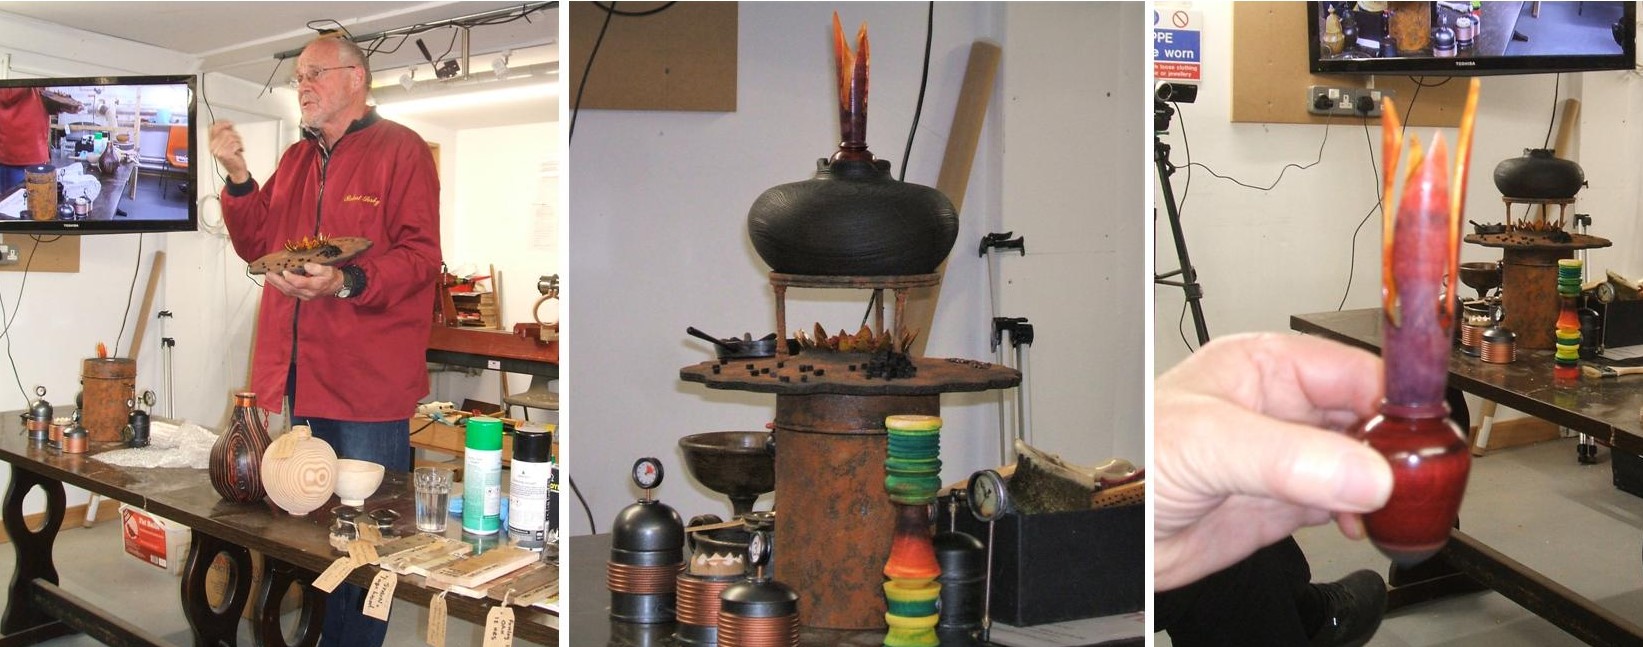
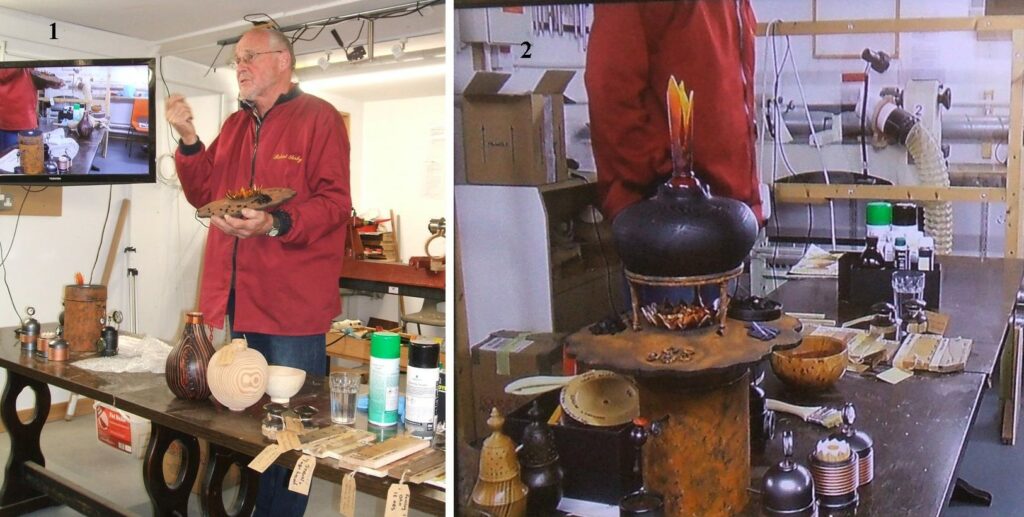
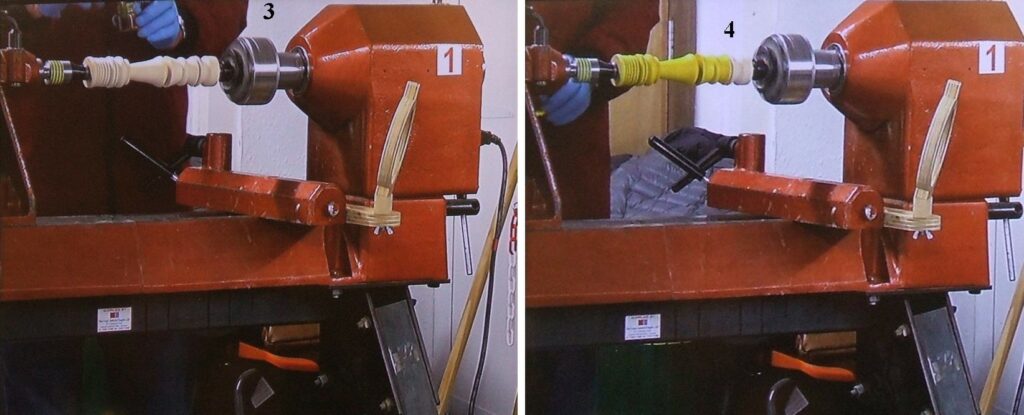
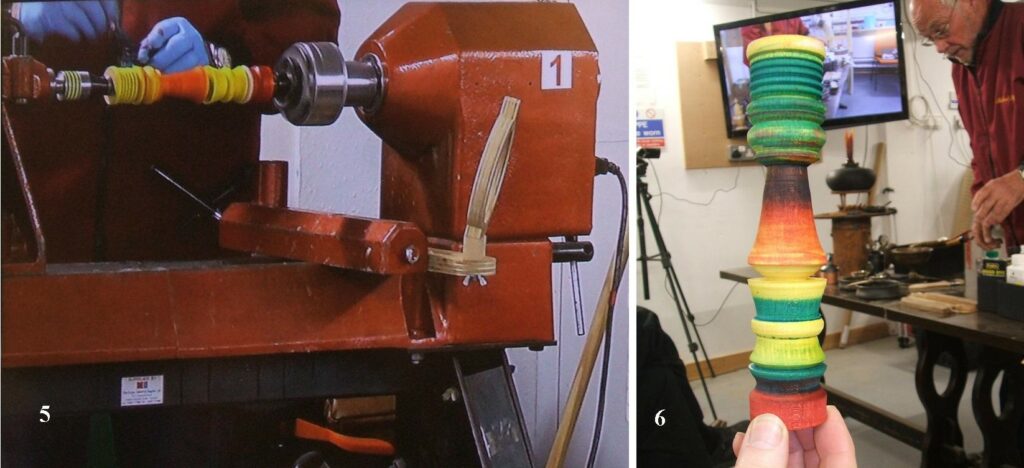
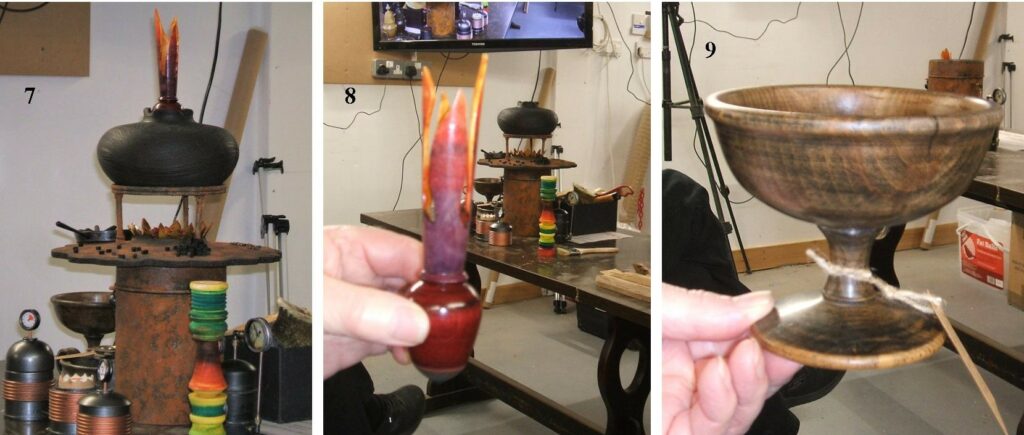
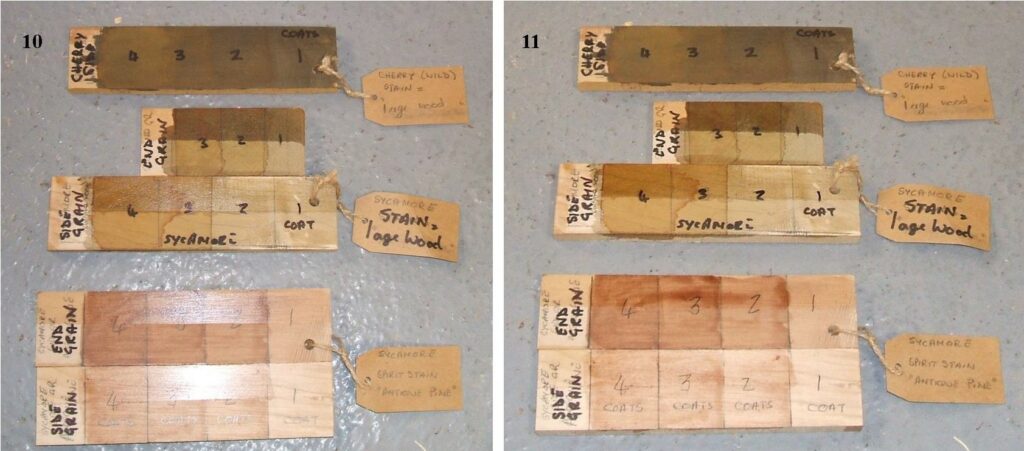
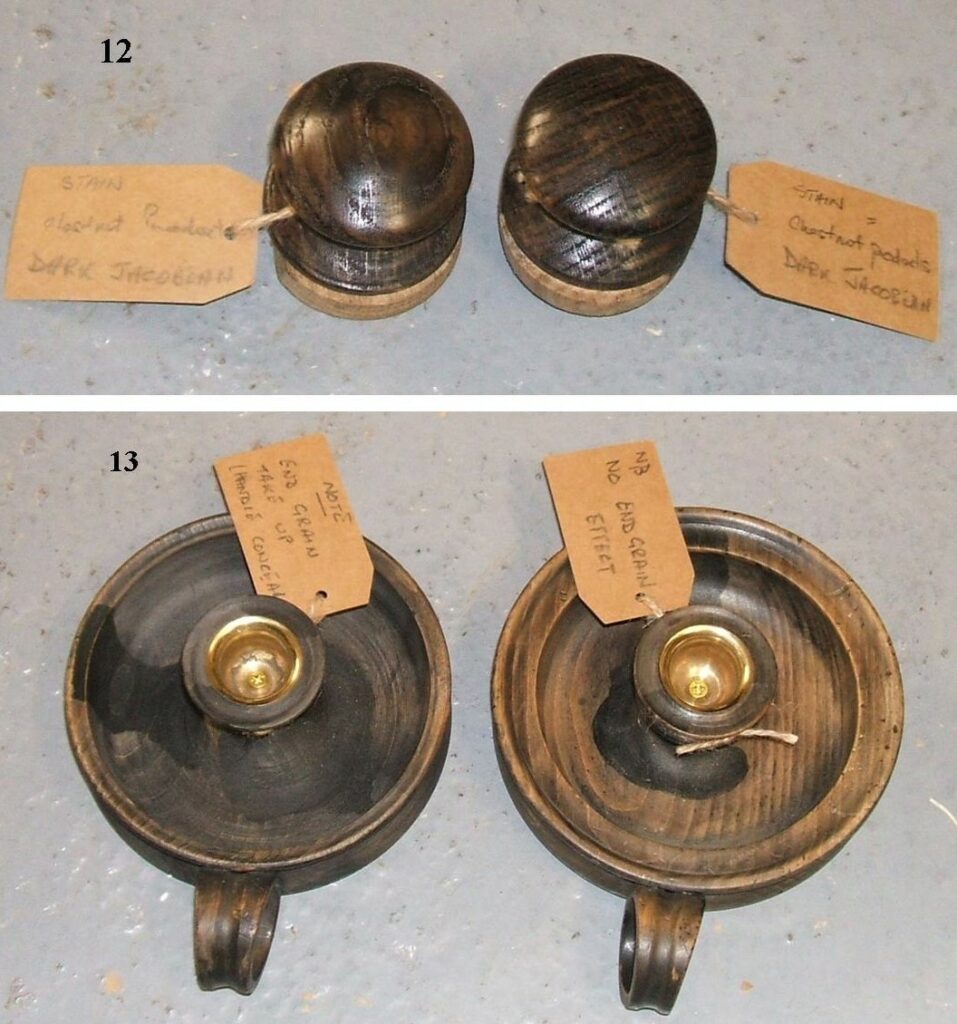
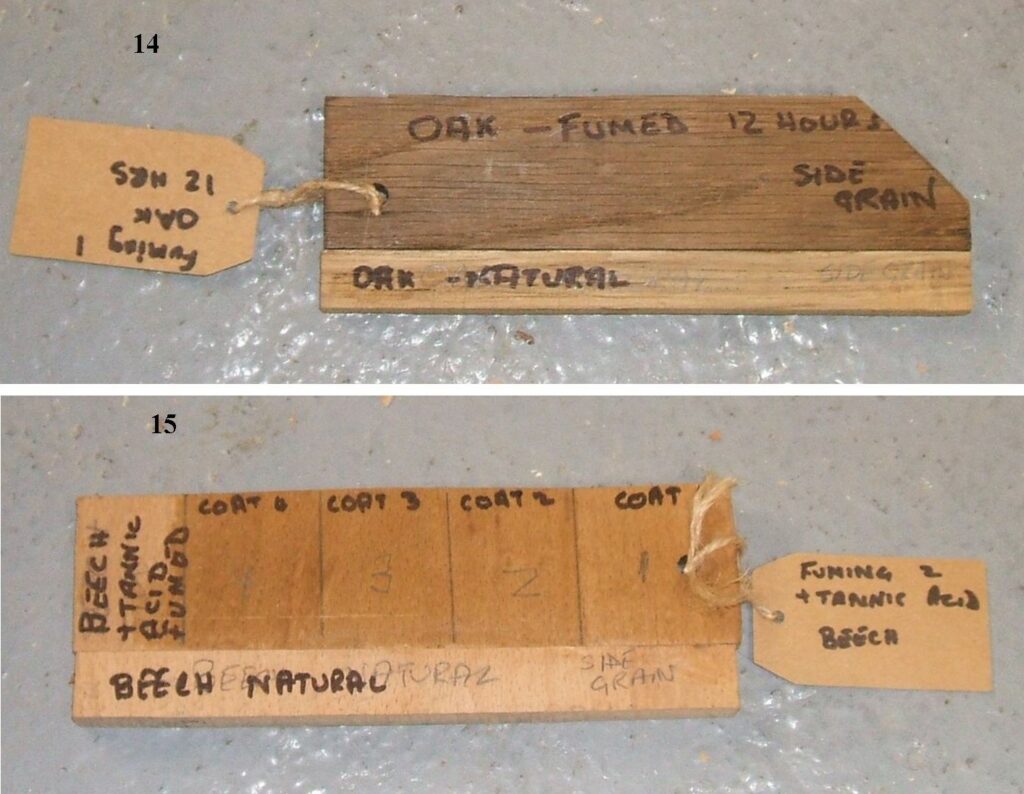
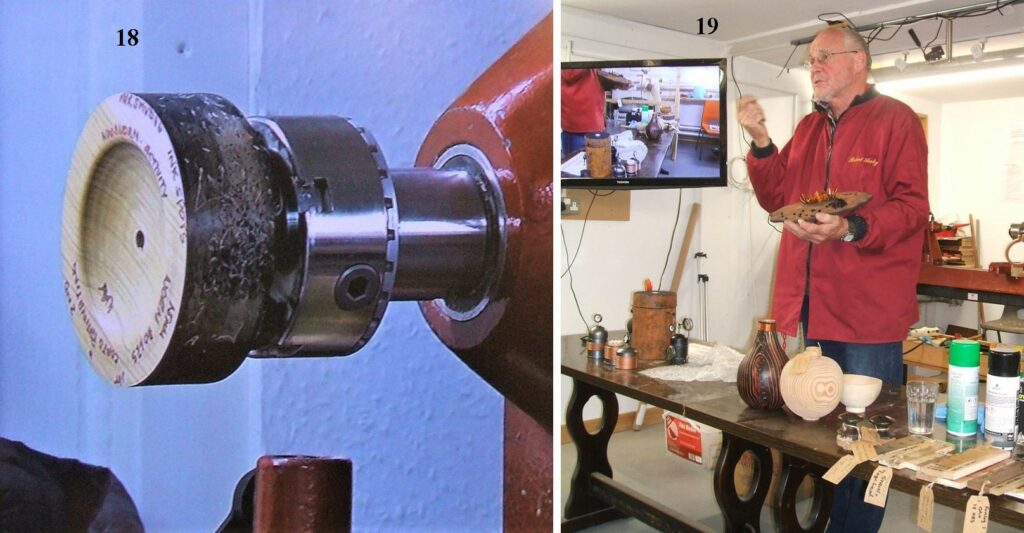
Picture 1, Nick during part of his presentation, Picture 2, some of the items he would go on to pass round and explain how it was done.Picture 3, Nick was talking about the use of spirit stains, here he has mounted a turning on the lathe ready to start the staining process, note the use of some protective gloves when applying the stains. Picture 4, the first colour being applied with the use of a soft brush.Picture 5, more than one colour can be applied at the same time, this can lead to some variations in the colours and also some drift into one another giving a very pleasing effect. Picture 6, the staining complete, allow to dry, usually a matter of minutes, can be worked on further once touch dry, some of the sealers when brushed on can react with the colouring and act as a solvent, try a sample first and if there is some brush drift, use a spray sealer first, this will eliminate most if not all of the problem.Picture 7, all the items you see are in fact made from wood, they have been worked by Nick to make them look like they were made from metal that has gone rusty. Picture 8,this item shows the variation in colours that can be achieved using the stains and allowing the drift and fading to best advantage. Picture 9, a chalice that has been stained and distressed to make it look old.Pictures 10 & 11 are both of the same samples having been stained with progressive coats to find the right shade, and to see the difference in side grain or end grain. I took picture 10, with the flash, I then took another picture 11, without the flash. Picture 12, 2 chest drawer knobs, both stained with Dark Jacobean oak stain, the one on the left was made in side grain, the one on the right was made from end grain, the one on the left is the correct way that all drawer knobs would have been made. Picture 13, 2 candle holders, the one on the left was made from end grain, the one on the right was made from side grain, both stained with the same stain.Picture 14, this shows the result of Oak after being fumed. Picture 15, shows the result on a piece of Beech after it’s been fumed and treated with Tannic acid.Picture 16, this is an Elm bowl with a few areas of burr , Nick explained how he got rid of white residue in the burr pores by simply using a heat gun on a very low heat. Picture 17, A selection of items that had all been stained or sand blasted and some that had both done , very interesting to see the results of some of these practices.Picture 18, here Nick was demonstrating how to get some distressing into a turning, here he used a 1.5mm drill bit to emulate worm holes, he also used a small hammer to create shallow dents and bruises. Picture 19, the item Nick is holding was made entirely out of wood although it appeared to be a solid piece of metal, here he is explaining how it was done.
That concluded Nick’s presentation, a short question and answer session followed with Nick answering all the members questions, he was then given a well deserved round of applause by the members.
Our next meeting is on the 13th October and it’s a showtime meeting again, I will be doing the compere and we are looking for you to bring lots of your turnings to be shown and talked about.
This website uses cookies to improve your experience. We'll assume you're ok with this, but you can opt-out if you wish.AcceptRead More
Privacy & Cookies Policy
Privacy Overview
This website uses cookies to improve your experience while you navigate through the website. Out of these, the cookies that are categorized as necessary are stored on your browser as they are essential for the working of basic functionalities of the website. We also use third-party cookies that help us analyze and understand how you use this website. These cookies will be stored in your browser only with your consent. You also have the option to opt-out of these cookies. But opting out of some of these cookies may affect your browsing experience.
Necessary cookies are absolutely essential for the website to function properly. This category only includes cookies that ensures basic functionalities and security features of the website. These cookies do not store any personal information.
Any cookies that may not be particularly necessary for the website to function and is used specifically to collect user personal data via analytics, ads, other embedded contents are termed as non-necessary cookies. It is mandatory to procure user consent prior to running these cookies on your website.