
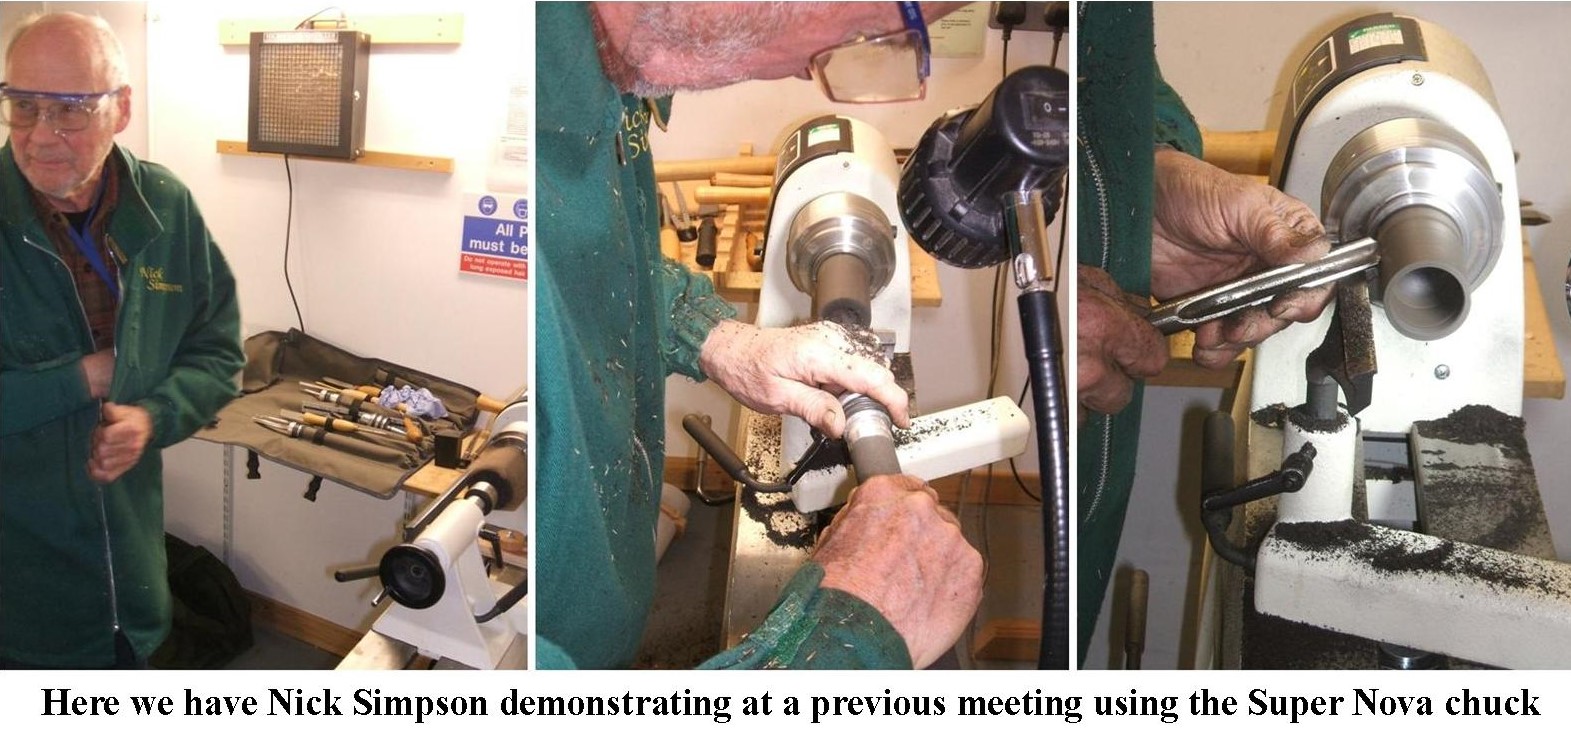
As most of you will be aware some servicing of some of the club equipment has been carried out whilst under lockdown. This is being done by Nick Simpson who brought all the bits of equipment back to his own workshop to do the servicing. Here is his report on the 2nd of the chucks he has serviced, a Super Nova 2 chuck.
Nick’s News – Week 3
Servicing HWC Chucks – #2. Supernova 2
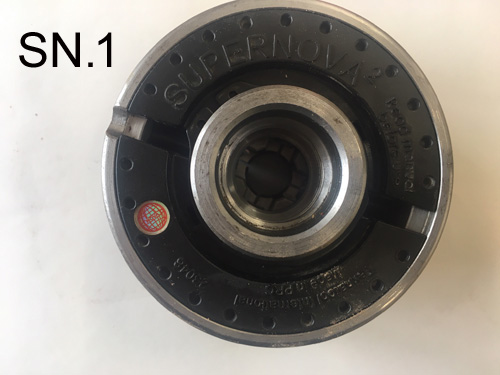
The SuperNova 2 is similar in design to the earlier Nova G2 but has a backplate which keeps the insides relatively free from dust and uses a rack and pinion drive for the scroll. It is important to clean the chuck regularly and re-lubricate. This is a simple process, which is illustrated in the accompanying photographs (SN.1-5). Details of cleaning and re-assembly are shown in the photos G2.D and F from my previous article posted by Alec on 25th April.
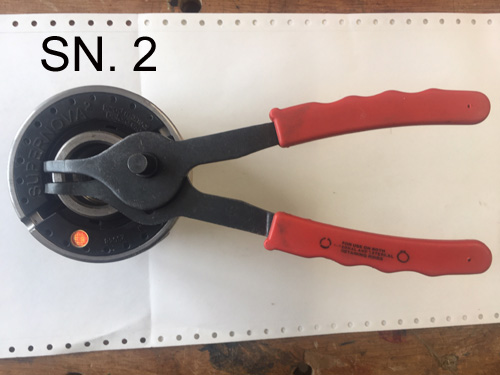
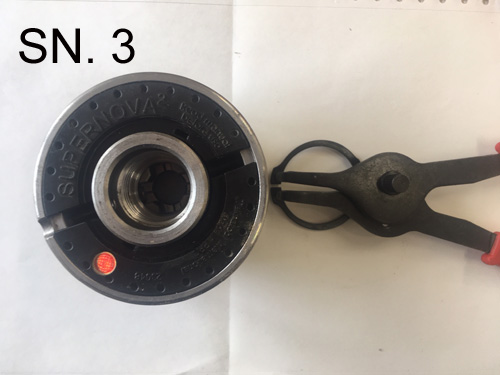
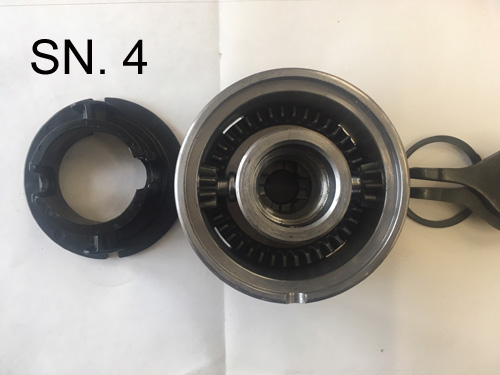
Picture SN.1 shows the rear view of the chuck when removed from the lathe. The backplate is seen in situ and is held in place by a circlip (SN. 2). The next step is to remove the circlip (SN.3). It is advisable to wear eye protection as the circlip is made of sprung steel and can ping off the pliers unpredictably. The back plate should fall out when the chuck is turned over. If it is reluctant to separate there are 2 slots which can be accessed by 2 small slotted screwdrivers and the plate can be levered off. The 2 pinions should now be exposed and withdrawn from the housing to expose the back of the scroll (SN.5). The scroll can now be removed by inverting the chuck. Having removed the scroll, the jaw the jaw carriers may be slid out of their corresponding slots in the chuck housing. Each carrier is stamped with a numbers 1-4. For the SuperNova 2 chuck there is no need to record which slot the individual carrier came from. Now, in a well-ventilated area with nitrile gloves and eye protection, brush off all surfaces with a brass wire brush and then steep the parts in a de-greasing solvent (see G2. D in my previous report). I used paraffin but any solvent will do. Dry the parts on paper towel and leave to fully dry or to speed the process blow with compressed air using the above PPE.
Reassembly is the reverse process with certain caveats. Spray each part with lubricant prior to assembly. My preferred lubricant is PTFE spray, because it is a ‘dry’ lubricant, but any fine oil will do. Do NOT use grease of any grade. With the chuck on its back insert jaw carrier labelled 1 into any slot. Now insert all the other carriers in order 2-4 into slots in a clockwise sequence. Bring the carriers together so that their inner edges form a square and turn the whole over (G2. F of previous). You can now drop the lubricated scroll onto the jaws and with a little ‘jiggling’ it will engage with the carriers. Now replace the lubricated pinions and engage them with the teeth of the rack, replace the backplate locating the recesses over the appropriate pinion and refit the circlip and the job is complete. JOB DONE.

Nick is now working on the Patriot chuck, details of which will follow shortly. In the meantime I would like to thank Nick on behalf of the club members for all his good work on the servicing.