Report on our meeting 04-08-2022 Segmented Turning by Dave Line.
Our meeting on Thursday 4th August 2022 was all about Segmented Turning, the meeting was managed by Dave Line as a solo presentation. Dave brought along a big selection of items all made using this method, he also brought along some of the equipment he needed to do Segmented Turning, most of which he made himself.
Dave started his presentation by letting everyone know he only started doing Segmented Turning after seeing John Ruickbie doing it at our club in 2018, he also asked John to give him some pointers on Segmented Turning, and they set up a few training sessions on a Saturday morning with John teaching Dave the art of Segmented Turning, and now Dave has the confidence to pass on his experience to others.
Dave would be the first to tell you everything he was doing did not always go to plan and he made a few mistakes along the way, but his ethos was to learn from his mistakes, he brought along a couple of items that had not gone to plan just as examples of what can go wrong and did go wrong, and explained what had gone wrong.
I took a few pictures of Dave’s presentation, these should give you an insight into Dave’s Segmented Turning experiences.
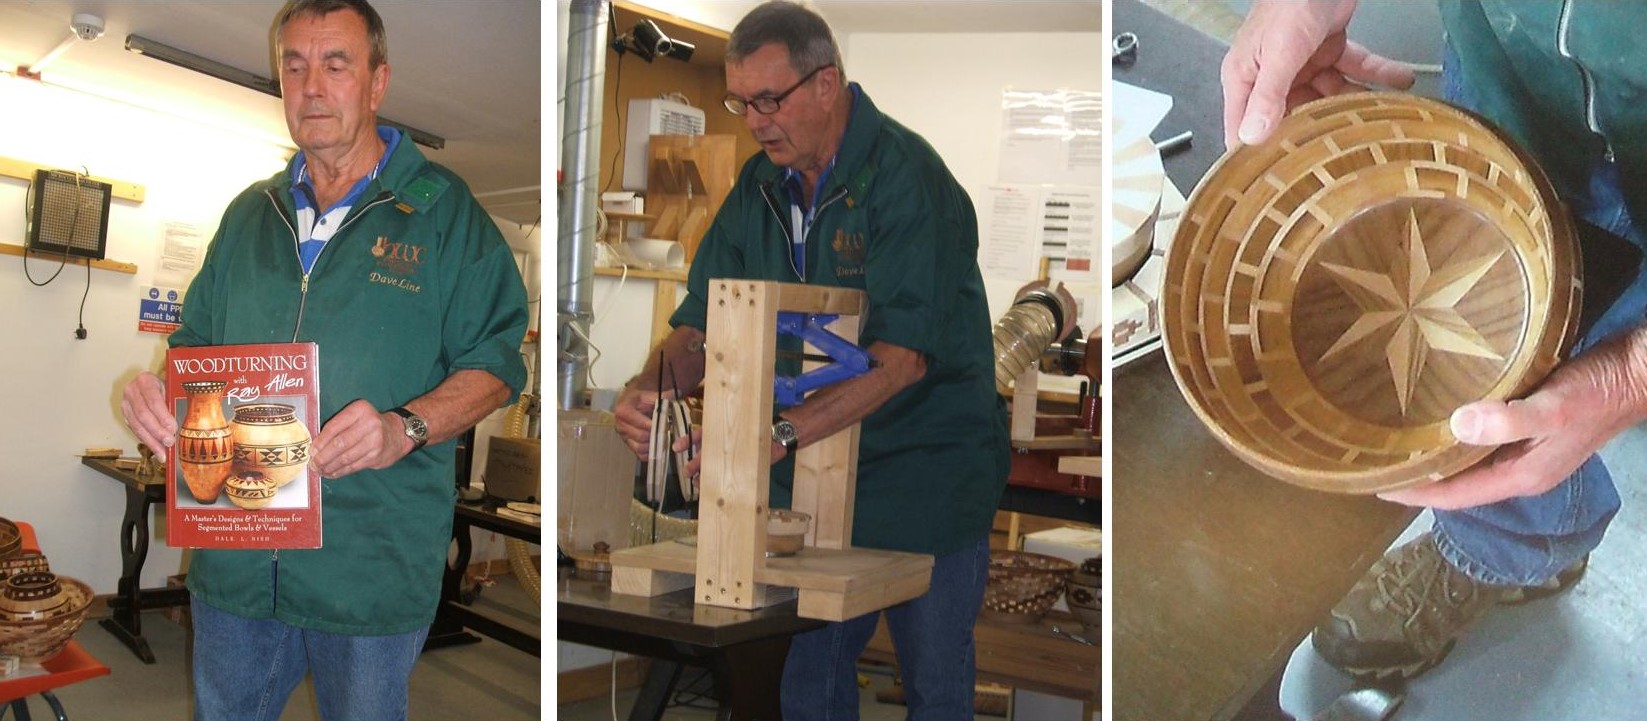
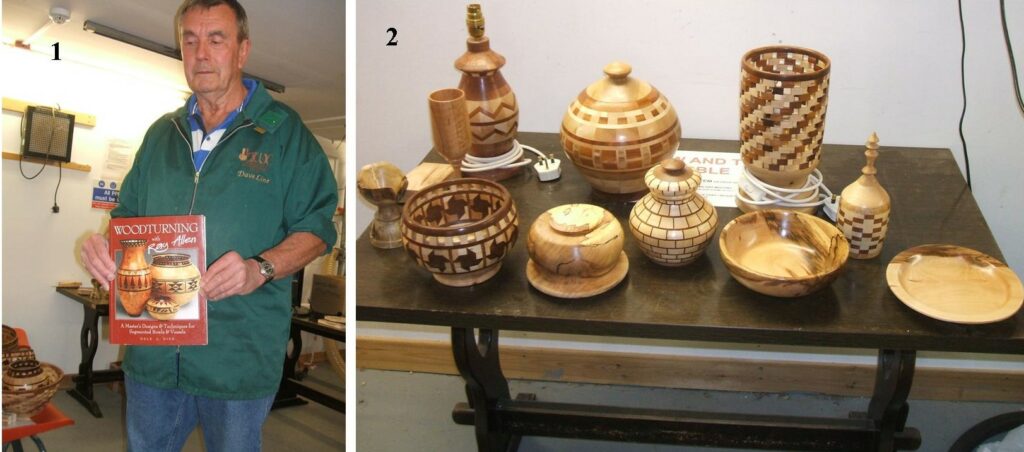
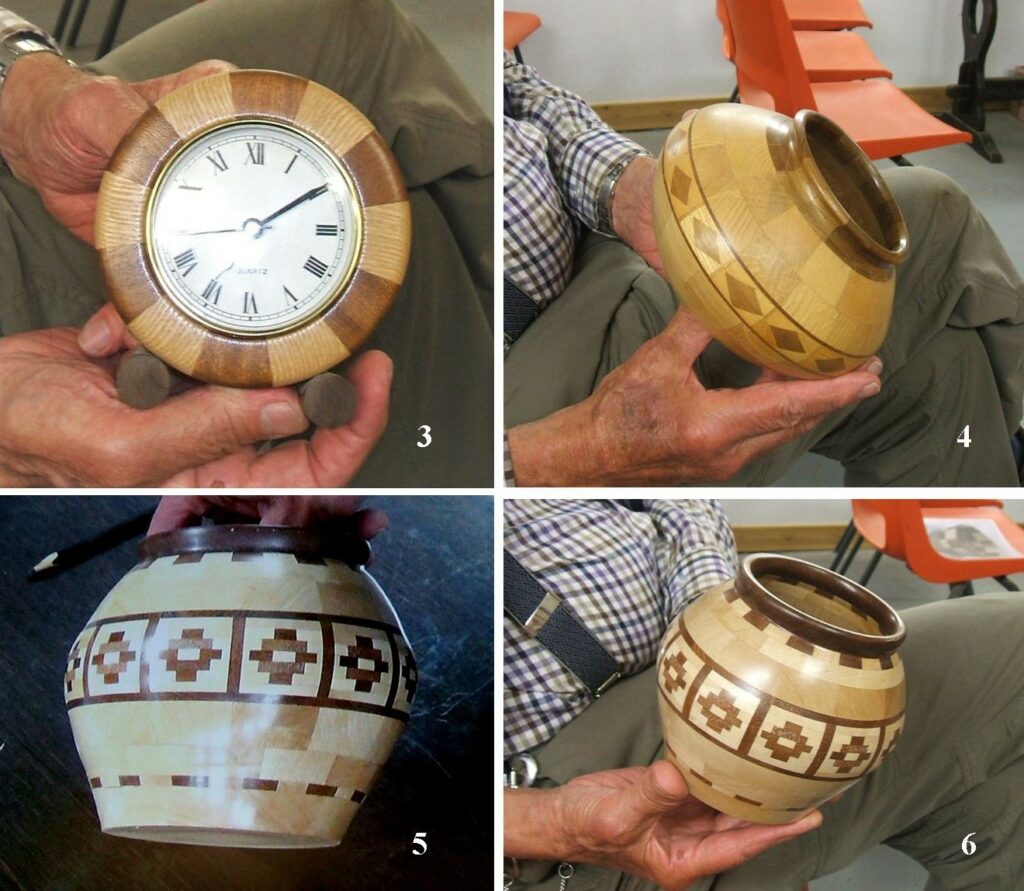
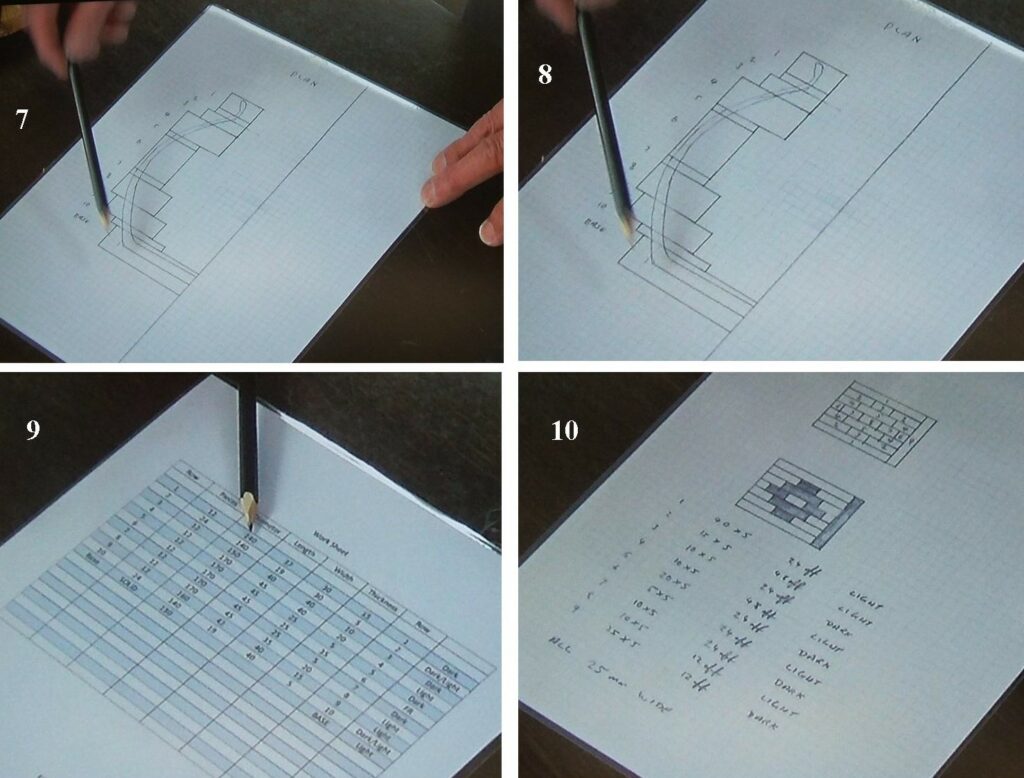
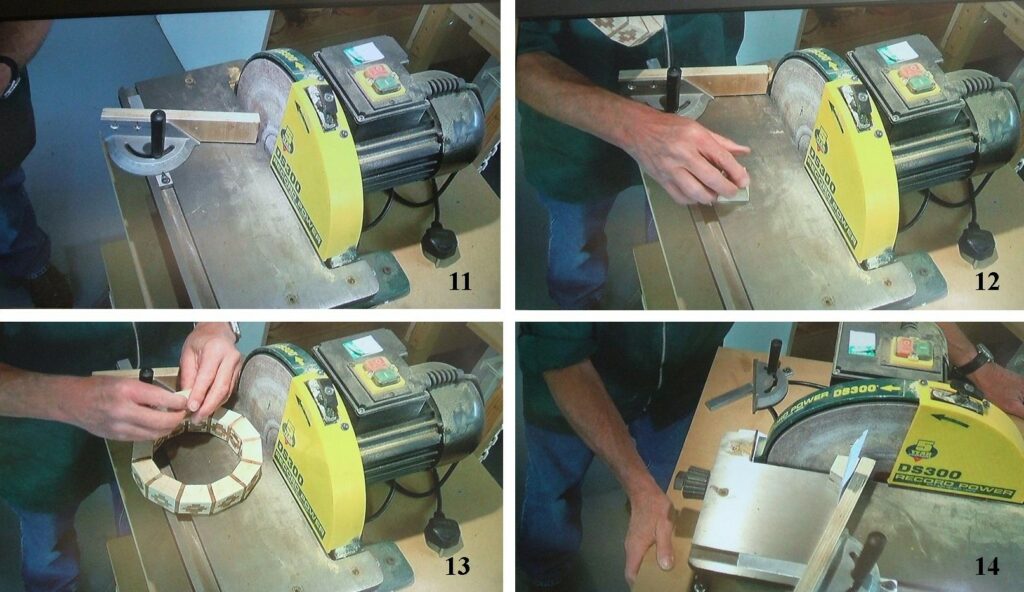
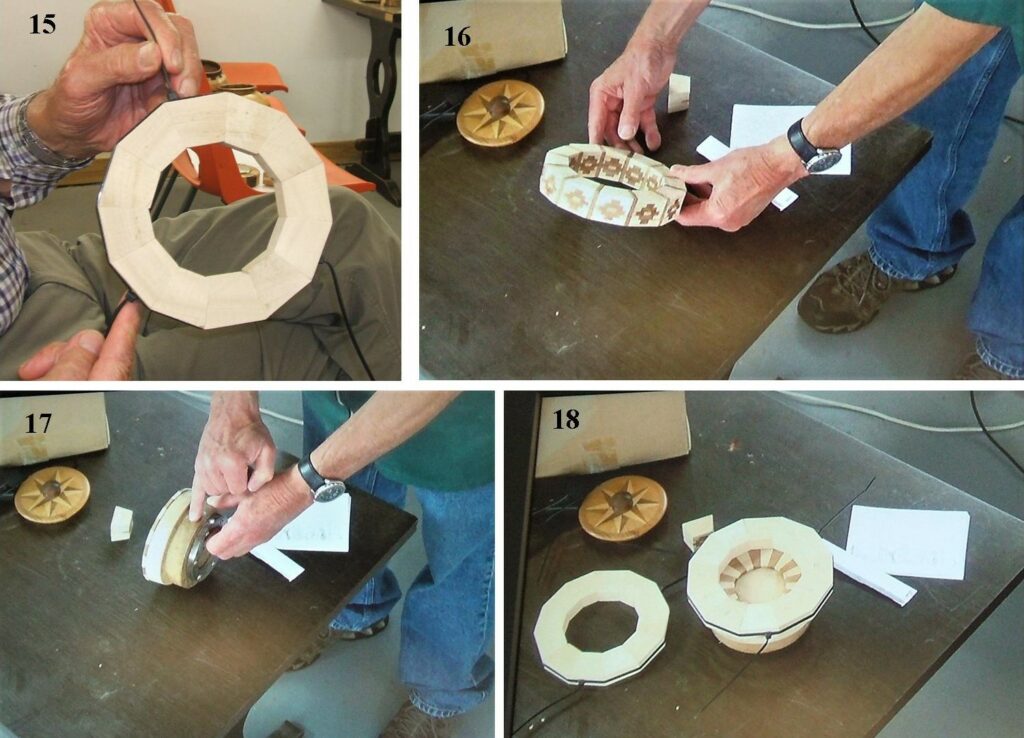
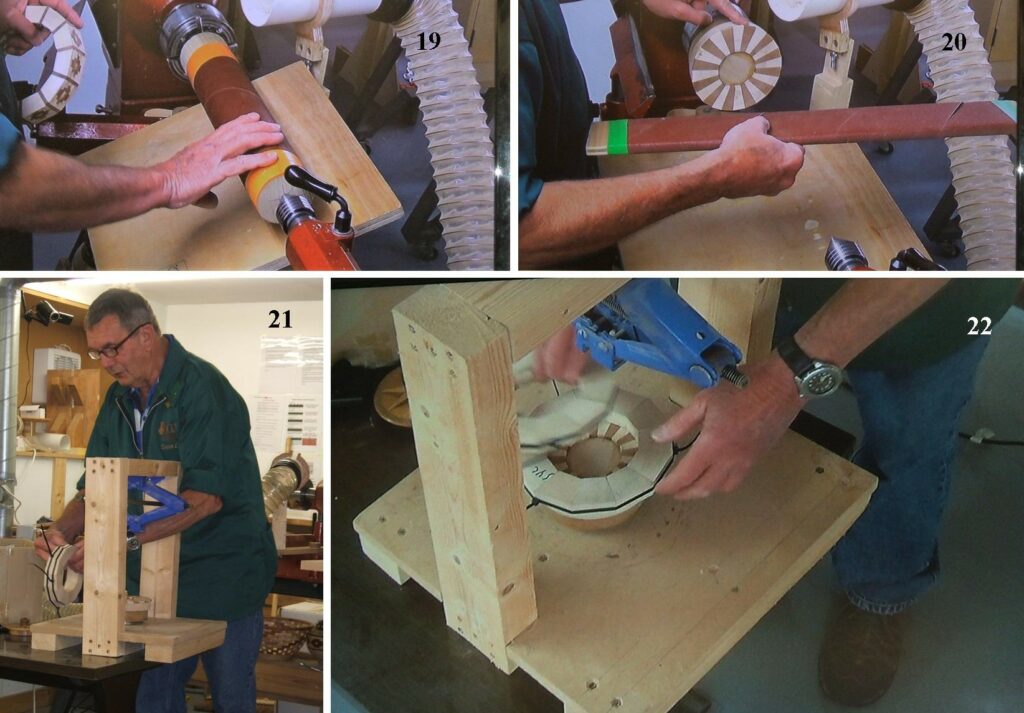
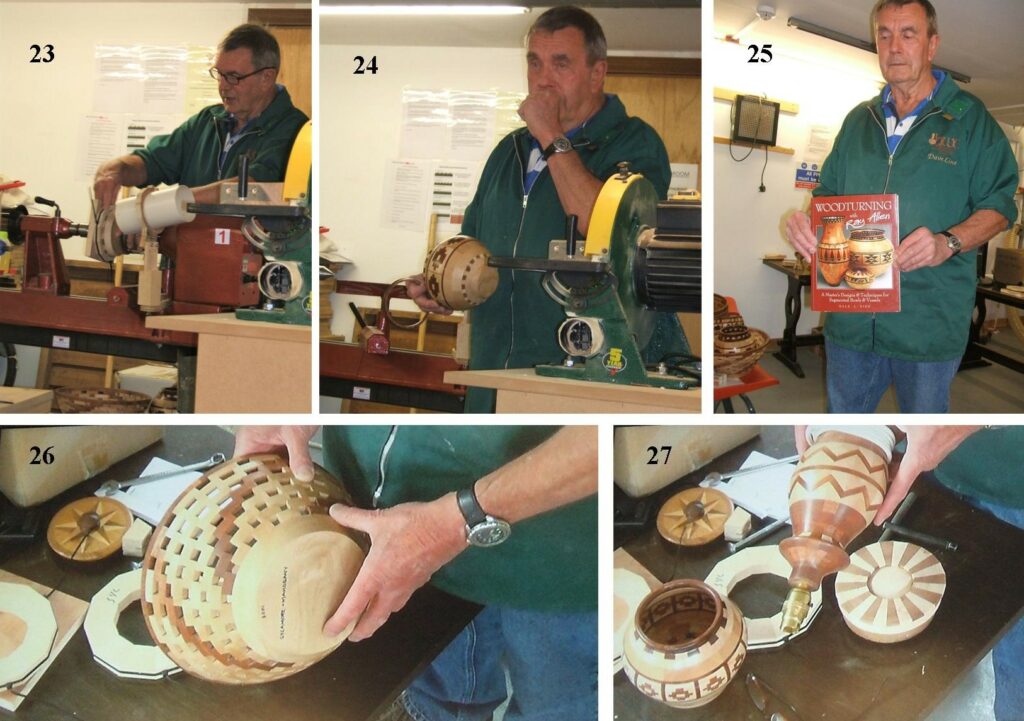
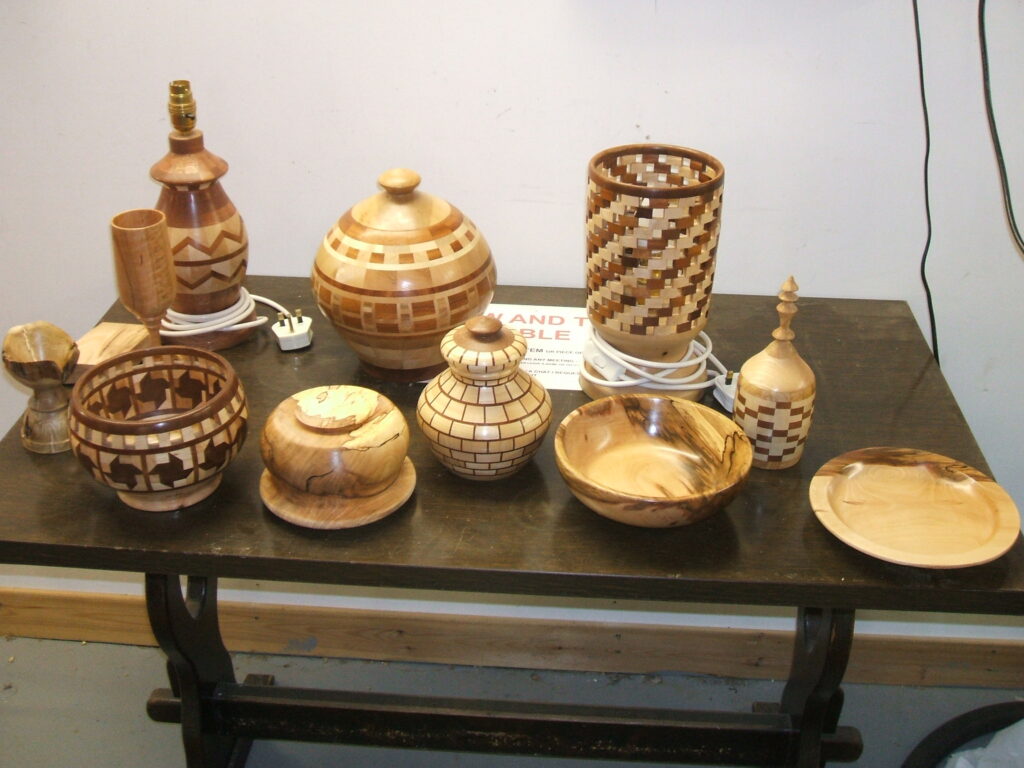
Picture 1, Here is Dave Line our presenter for the Segmented Turning, Dave is holding up a very good book on Segmented Turning by Ray Alan, in addition to what he learned from John Ruickbie he recommended this book to anyone looking to start Segmented Turning. Picture 2, a selection of Dave’s work, (all the Segmented pieces) along with some other turnings brought in by other members at the meeting.Pictures 3,4,5, & 6, are all examples of Dave’s work, the clock being the easiest to do. Dave would go on to explain how the feature ring on item 5 & 6 was made.In this sequence of pictures Dave explained how to work out the number of individual pieces were required, he starts with a drawing of the item he is to make, (picture 7), blown up for clarity (picture 8). Picture 9, is working out the sizes of each component part and Picture 10, is working out the number required of each piece to make a featured ring.Dave explained this piece of equipment was his main purchase, but even it needed some modifications, Picture 11, shows the wood extension Dave fitted to the sliding bevel in order to make it work. Picture 12, here Dave is explaining why the sliding bevel needed extending. Picture 13, Dave is explaining how the parts of the feature ring was shaped. Picture 14, Dave explained the sliding bevel was not that accurate and that he used slips of paper to adjust the angles ever so slightly.Picture 15, shows a single ring segment cut and held by cable ties, he explained that there needed to be no gaps showing on any of the joints. Picture 16, shows a feature ring made and glued up. Picture 17, Dave explained that he used a backing plate for the chuck mounting, this would be glued onto the piece he was working with in order to not have any screw holes, the backing plate would be removed later. Picture 18, Dave went on to explain the assembly of the rings on any item.Dave went on to explain that the ring segments needed to be dead flat and he went on to explain how he achieved that. A few purpose built items he made to get the rings flat and also a press for the assembly. Picture 19, shows his system using the lathe to get the rings flat, Picture 20, another simple gadget again used to get the rings flat, Picture 21, his home made press made using a car jack as the press. Picture 22, here Dave is showing how the press was used.Picture 23, Dave explained that the lathe could be used for part of the assembly, and he demonstrated how this was done, the down side was that this then tied up the lathe for a while to allow the glue to take effect. Picture 24, was one of Dave’s mishaps he had noticed a small defect, he went to rectify it only for the item to come off the lathe and it hit the floor knocking the top ring off and cracking the bowl in several places, Picture 25, here Dave is showing a book on Segmented Turnings that he recommends. Picture 26, here Dave is showing an open Segmented bowl and explained how this was made. Picture 27, shows another example of Dave’s Segmented work, he explained the diagonal patterns were much more difficult to do.Picture 28, shows one segment of a feature ring and there could be up to a dozen of these pieces required, each segment, there are 17 pieces of wood to make up this small segment. Pictures 29,30 & 31 all show the star or compass points shapes Dave sets into the bottoms of some of his items, he explained exactly how they were made.Another look at some of Dave’s Segmented work. The non segmented work were made by Alan Smith and Errol Levings.
That concluded the meeting on Segmented Turning, we do hope you enjoyed Dave’s presentation and we look forward to possibly seeing some more of our members taking up this art.
The members showed their appreciation by giving Dave a huge round of applause at the end of his presentation and I have to agree this was possibly one of the best presentations by any of our members that I can recall. Well done Dave the club values your input.
The turn out for this meeting was less than usual, the Black Isle Show was on at the same time and we put the attendance down to that, but thanks go out to all those who did attend.
This website uses cookies to improve your experience. We'll assume you're ok with this, but you can opt-out if you wish.AcceptRead More
Privacy & Cookies Policy
Privacy Overview
This website uses cookies to improve your experience while you navigate through the website. Out of these, the cookies that are categorized as necessary are stored on your browser as they are essential for the working of basic functionalities of the website. We also use third-party cookies that help us analyze and understand how you use this website. These cookies will be stored in your browser only with your consent. You also have the option to opt-out of these cookies. But opting out of some of these cookies may affect your browsing experience.
Necessary cookies are absolutely essential for the website to function properly. This category only includes cookies that ensures basic functionalities and security features of the website. These cookies do not store any personal information.
Any cookies that may not be particularly necessary for the website to function and is used specifically to collect user personal data via analytics, ads, other embedded contents are termed as non-necessary cookies. It is mandatory to procure user consent prior to running these cookies on your website.