Report on our meeting 05-01-2023, Demonstration by John Ruickbie.
Our meeting on Thursday 5th January 2023 was a demonstration by John Ruickbie, John was to demonstrate the making of a Natural Edged Clock, he would use 3 separate pieces of wood to make his clock, a main piece that held all the clock parts, a smaller base piece and a cover piece to hide the clock movement.
The main piece was cut from a log leaving the bark on the front, as was the base piece, the back piece was machined to fit the recess for the clock movement, but it could also have been made as simply a cover plate held with a couple of screws, John did have another clock with him that had that feature, John said he preferred the back piece to be made to fit the recess.
John started his presentation by talking about the pieces of wood he was to use, also the clock components and how they were to be used, he emphasized the importance of getting the clock movements and the hands from the same source so that all the components would be compatible, the length of the shaft on the movements was important, John used movements with a shaft length of about 15mm.
I got quite a few pictures during John’s presentation they can be viewed as a timeline in the making of the clock, if you follow Johns procedure you should end up with a very presentable clock. Here are the pictures along with some text.
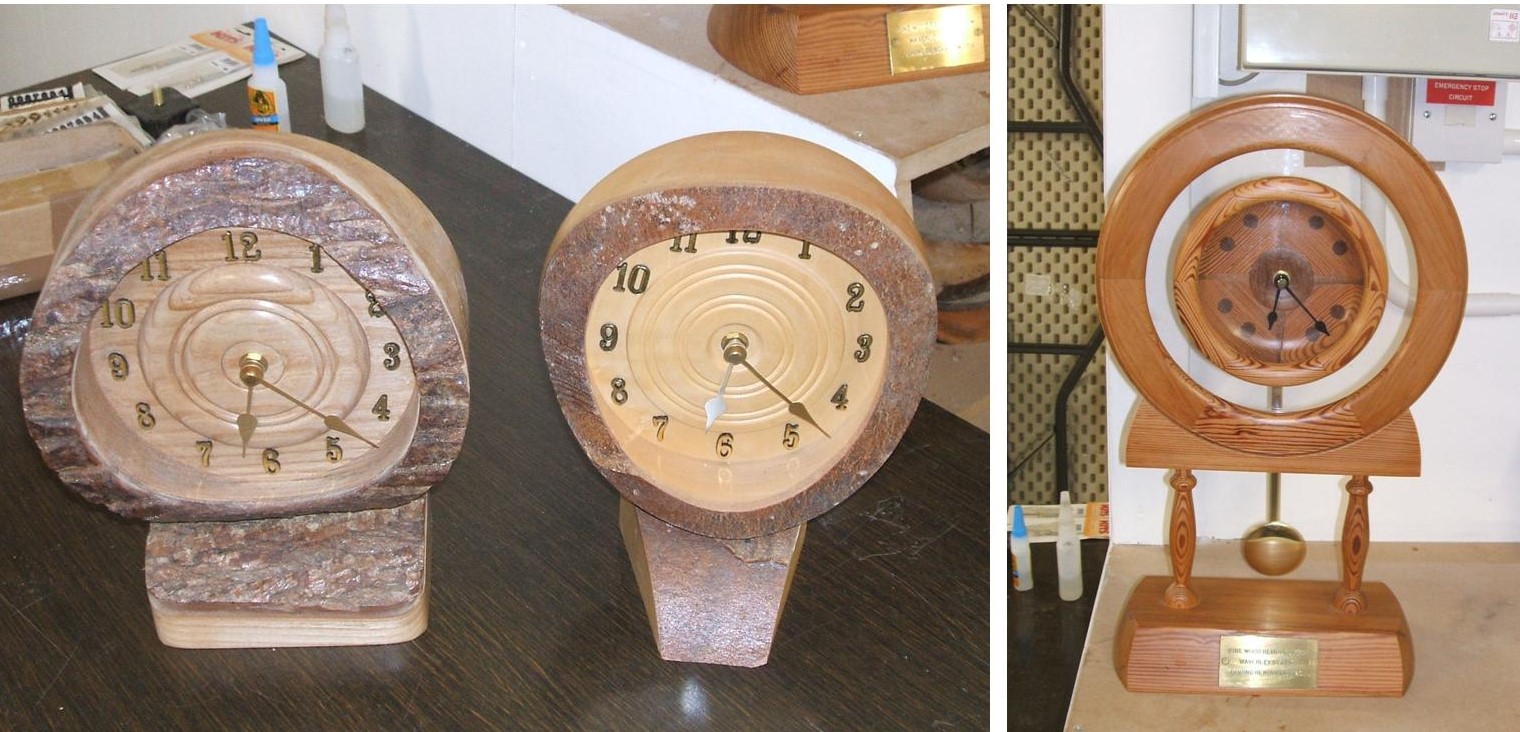
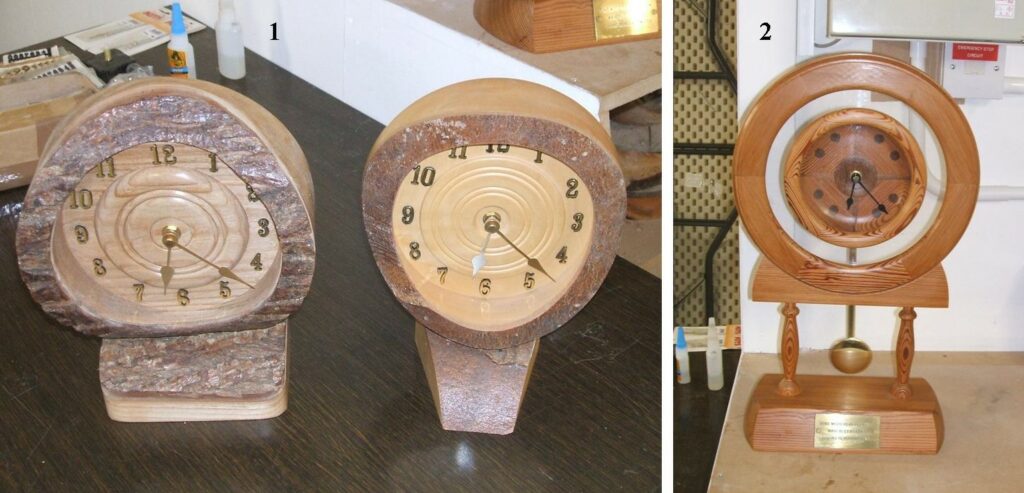
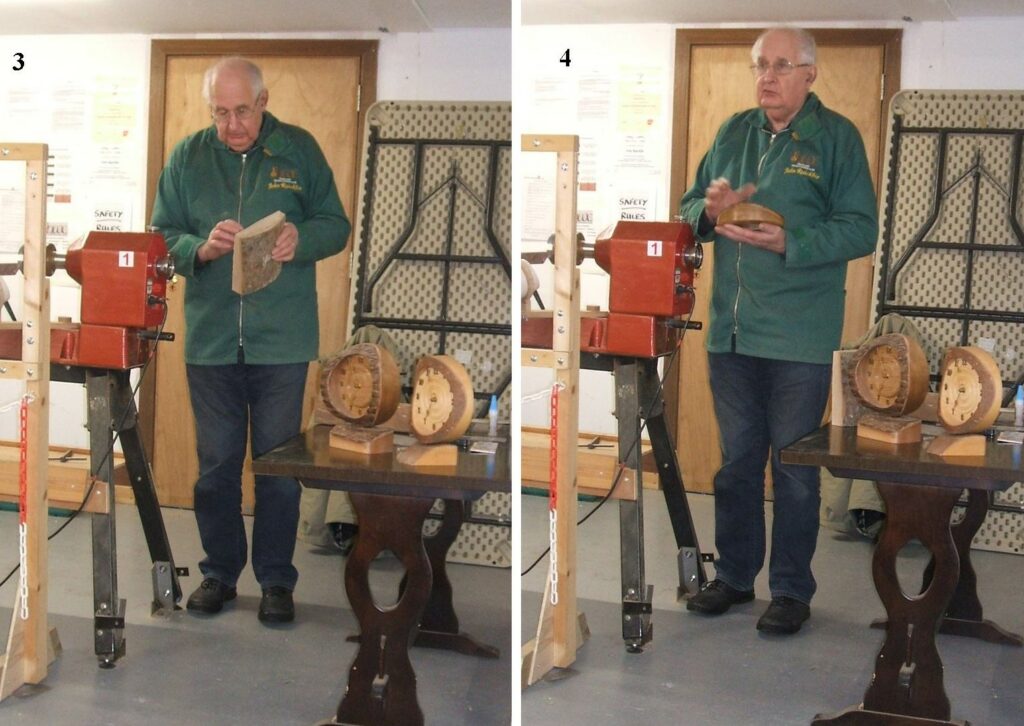
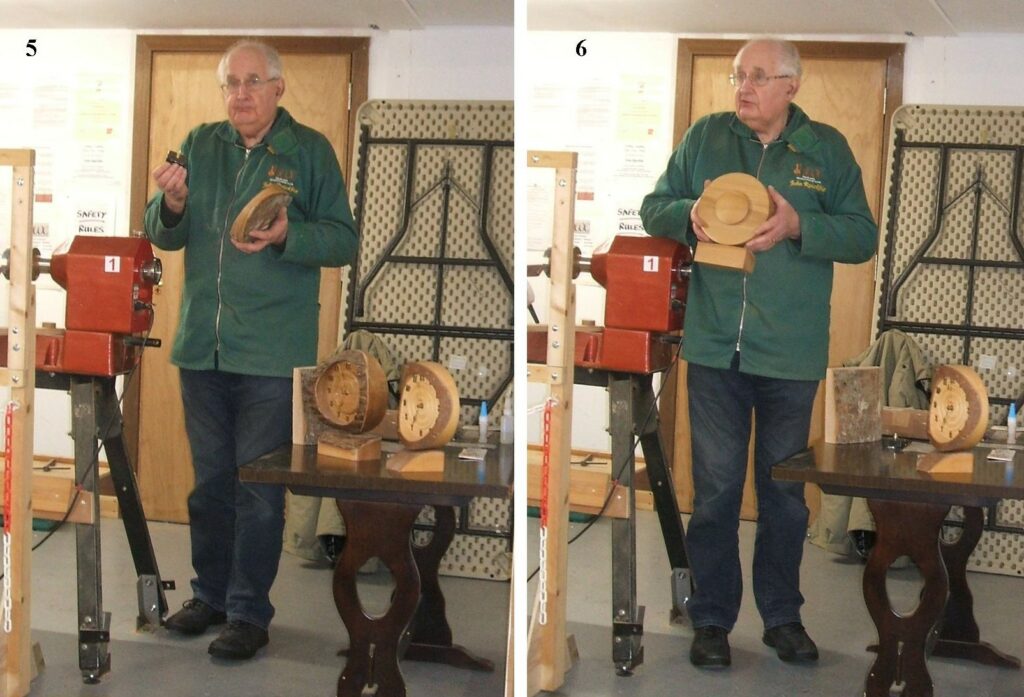
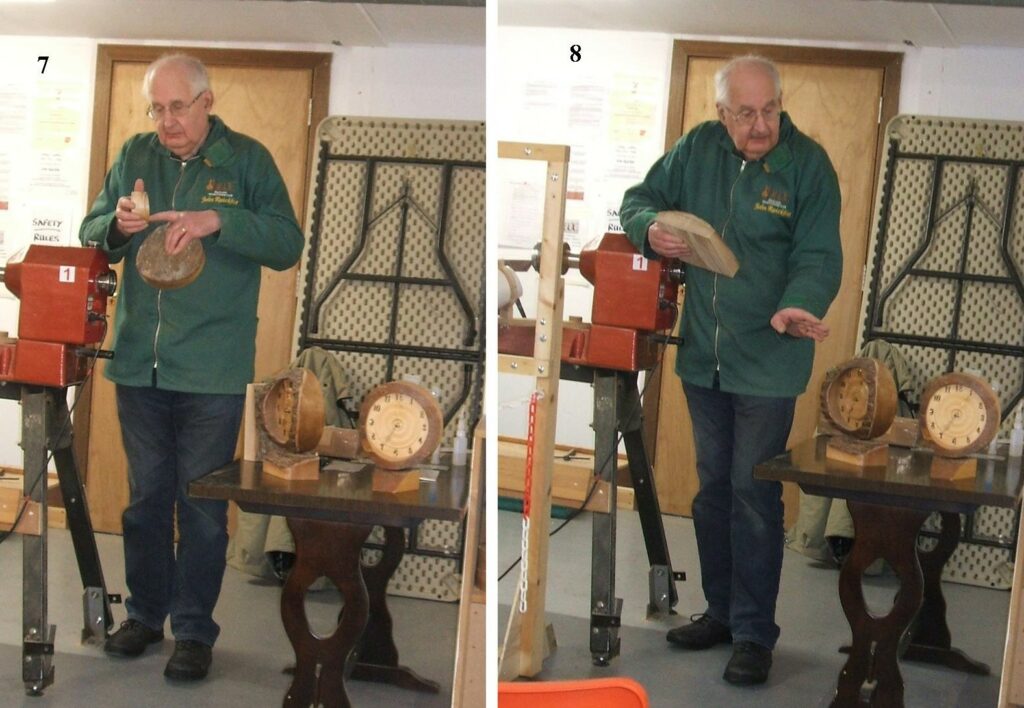
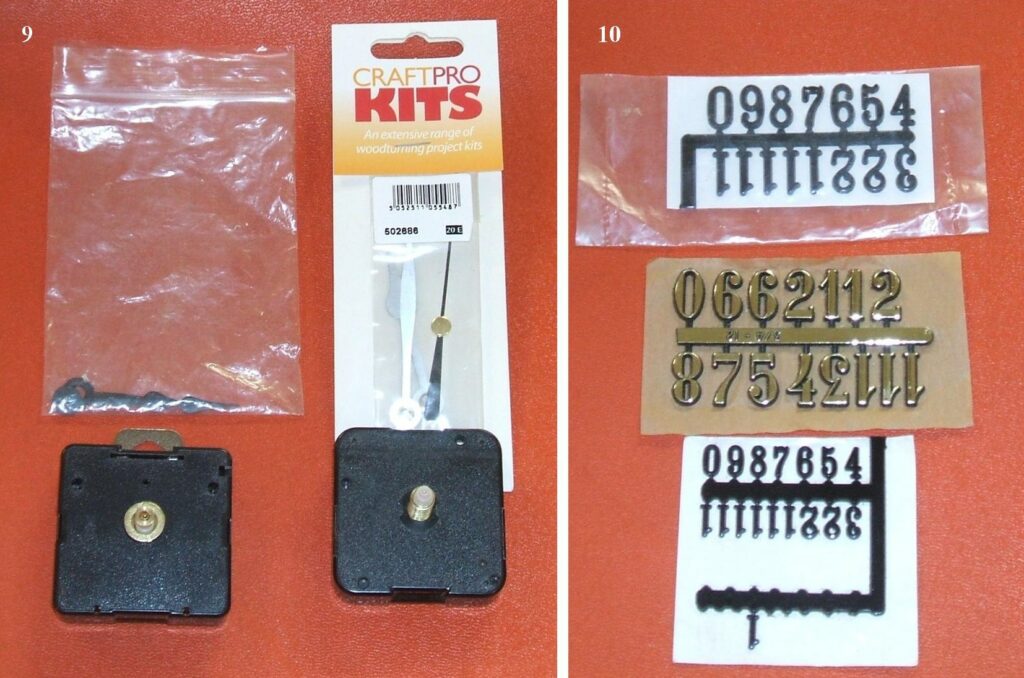
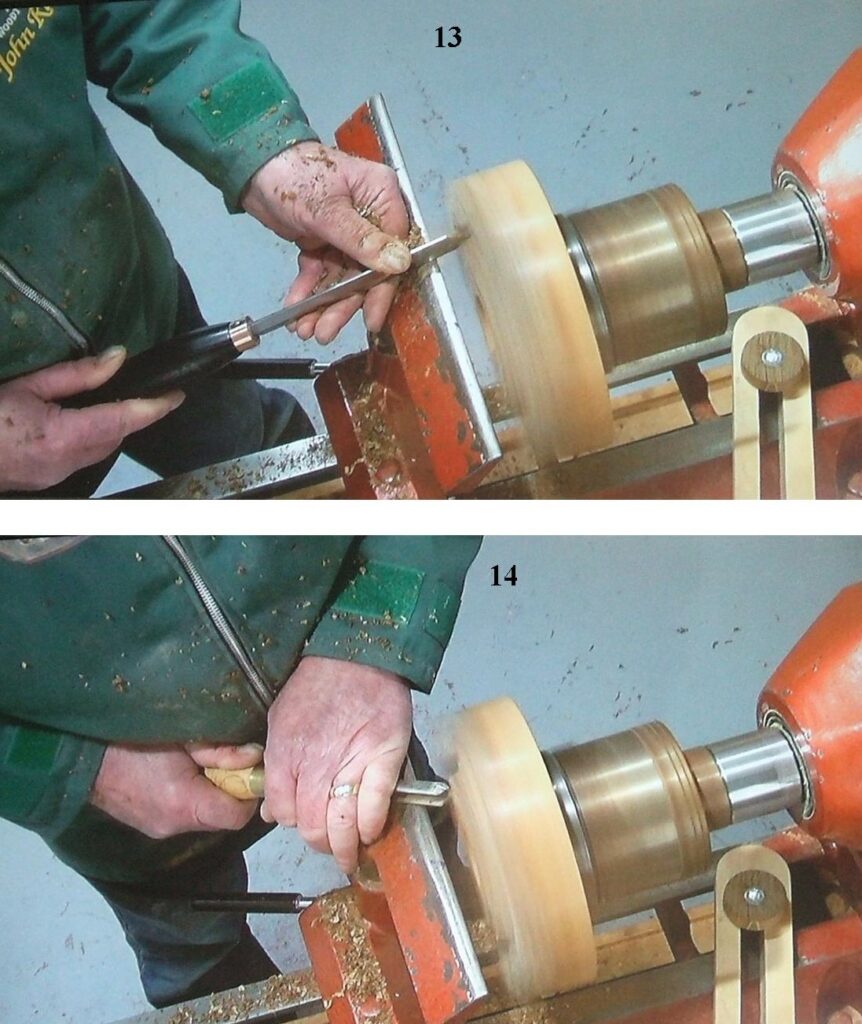
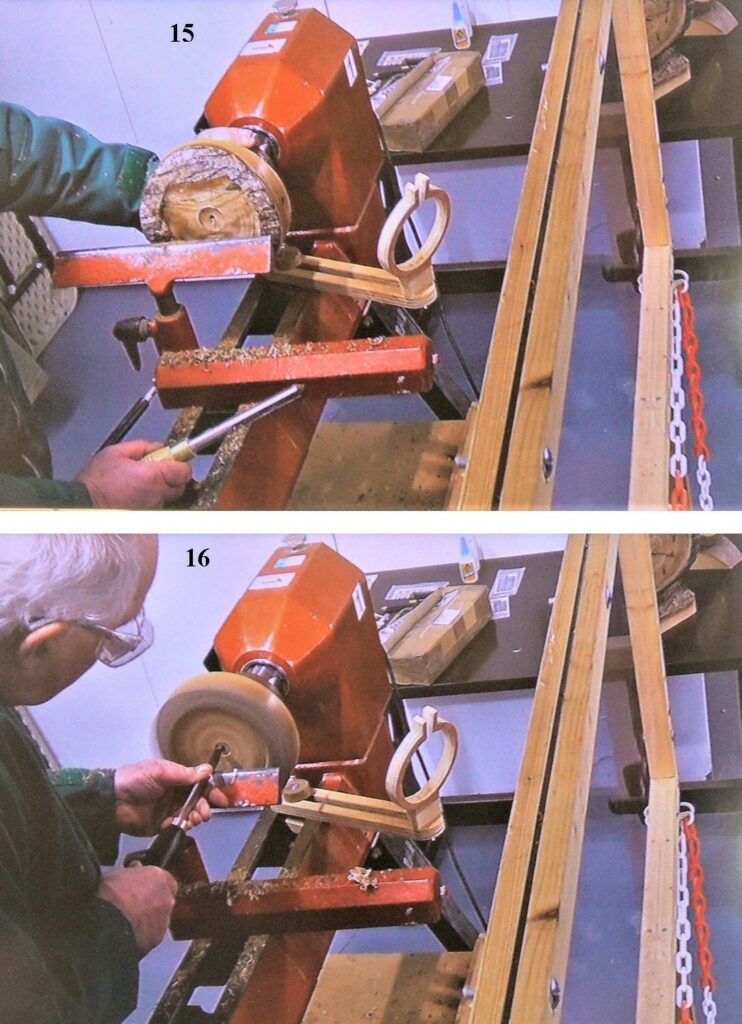
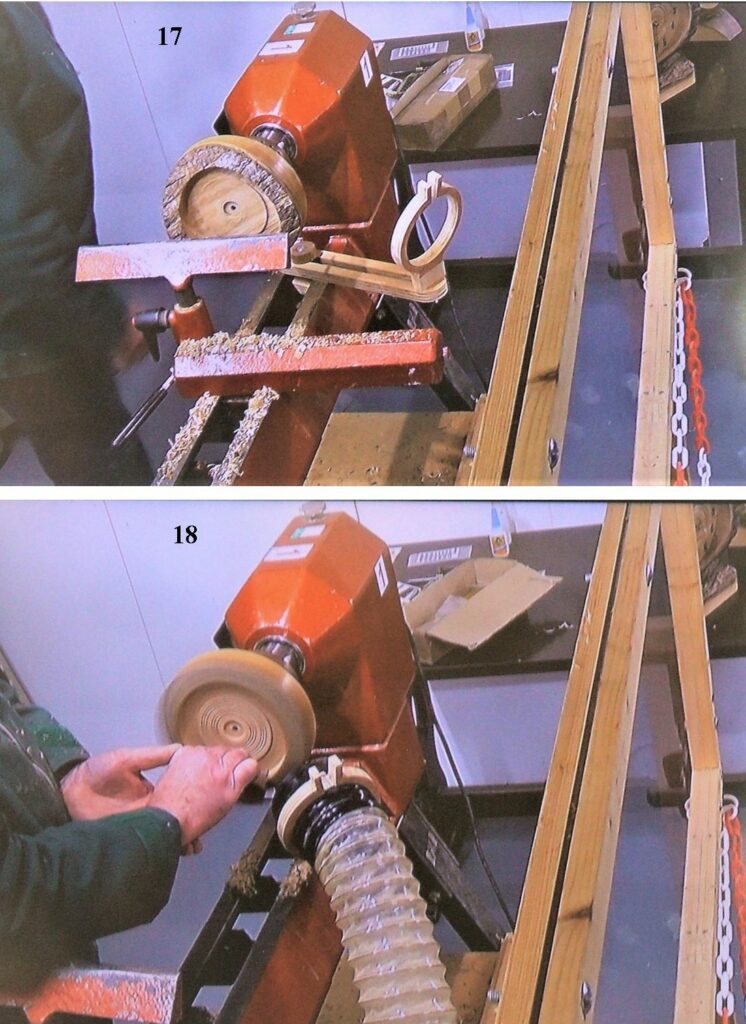
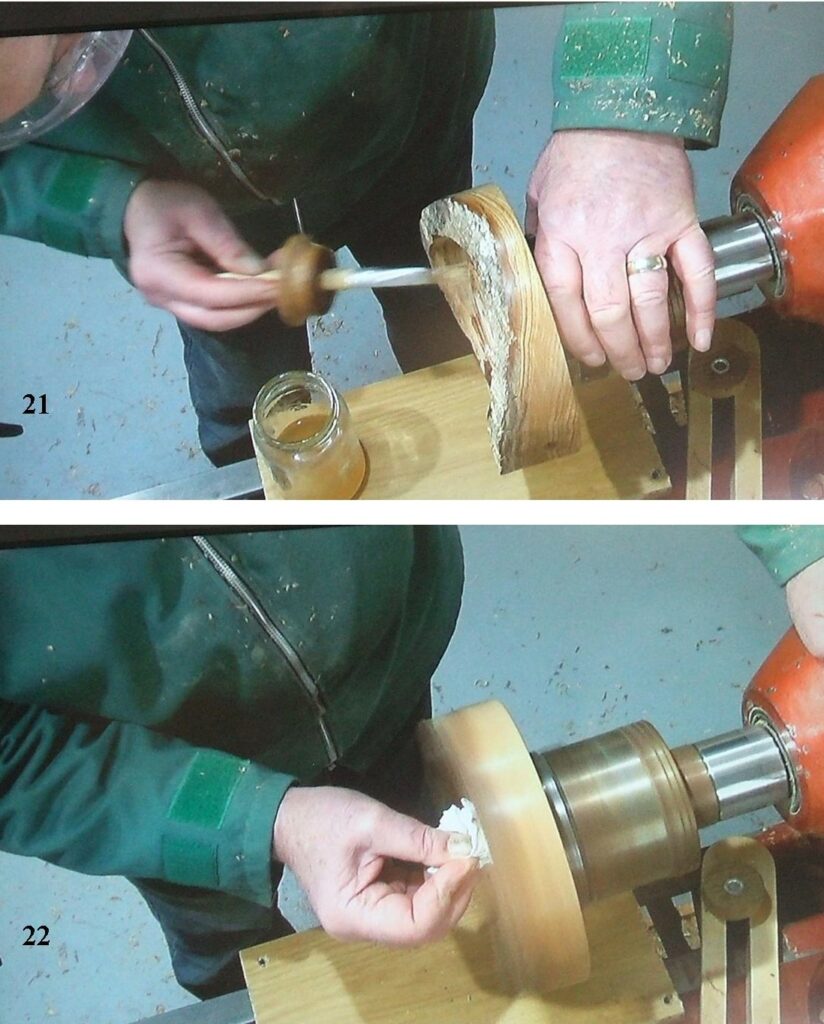
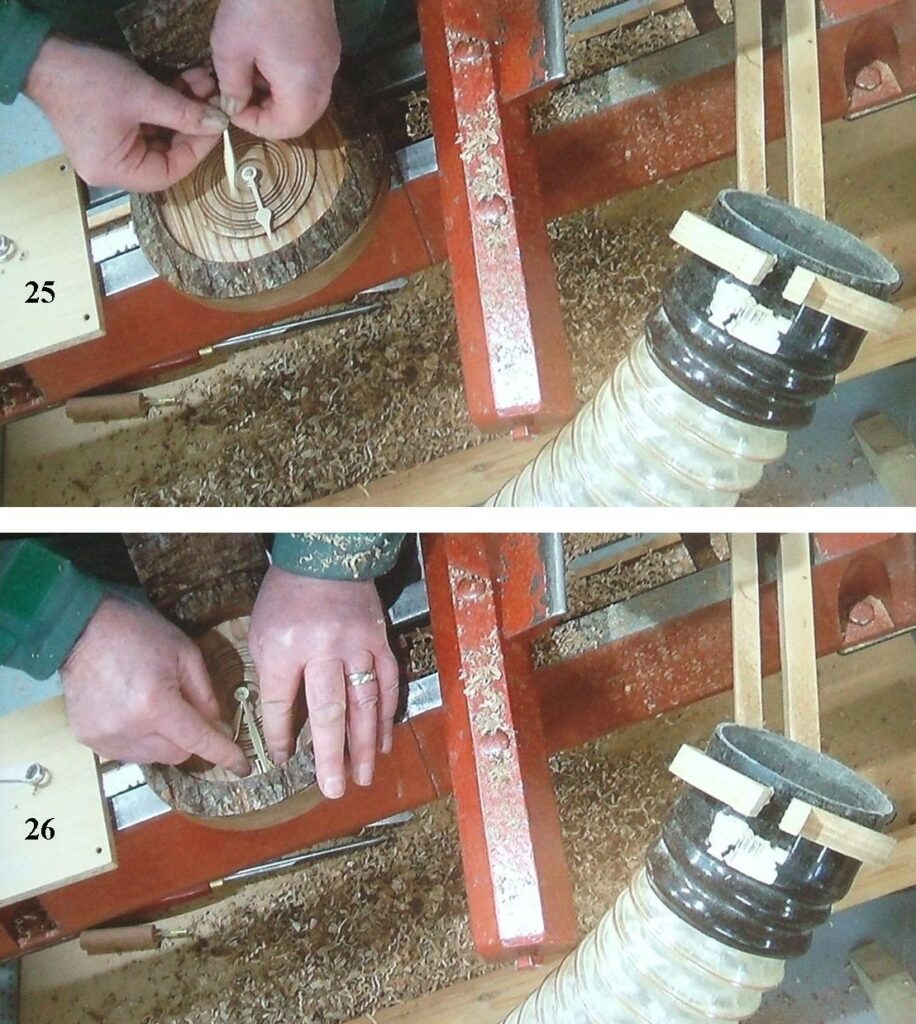
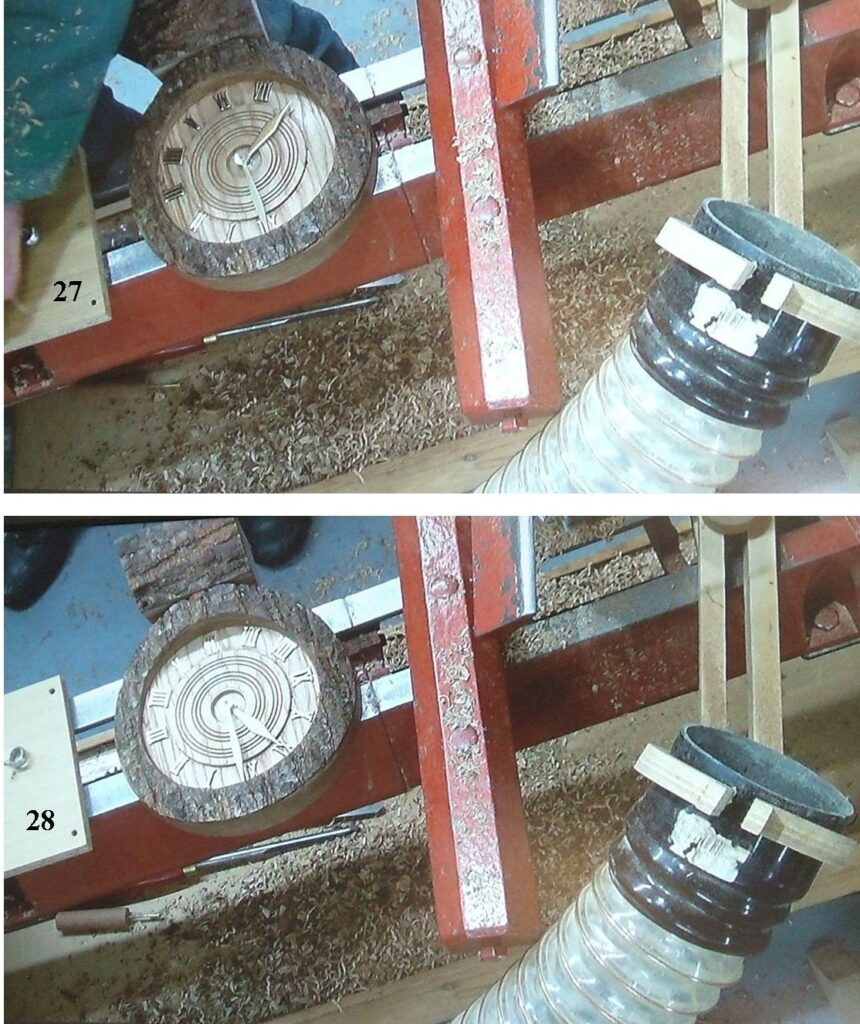
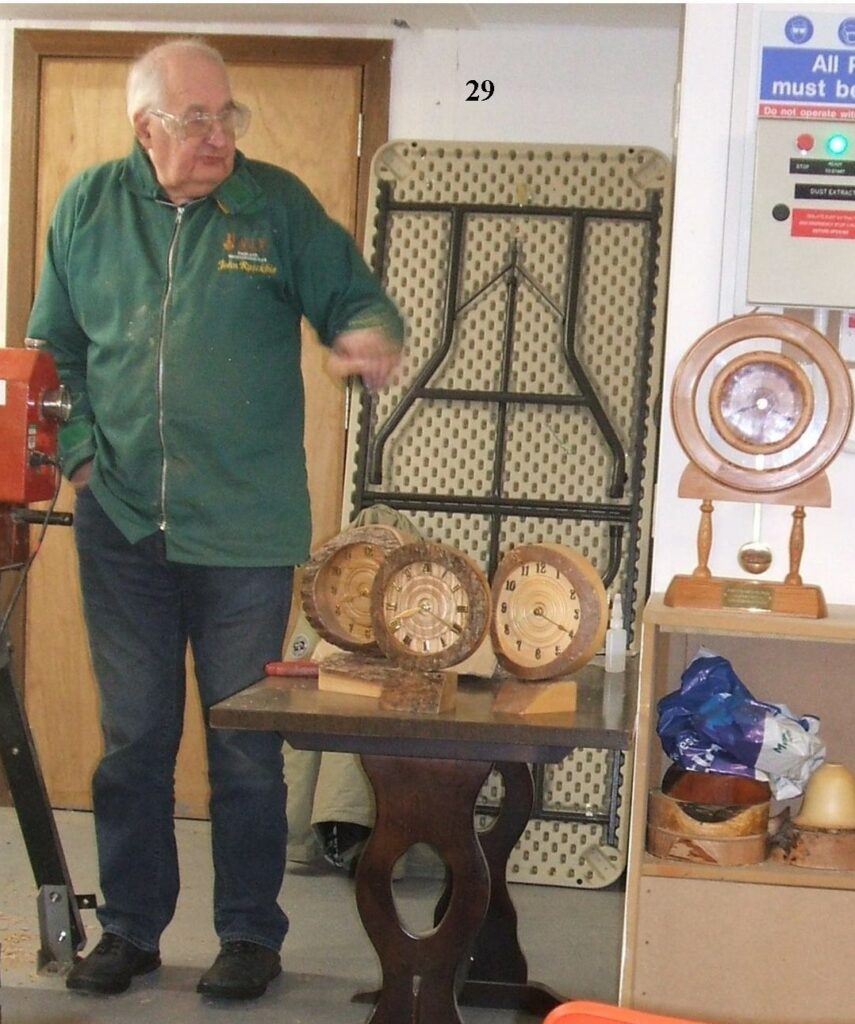
Picture 1, this is the type of clock John was to make, these 2 were made as examples for his demonstration. Picture 2, another clock that John made, this was made from salvaged timber.Picture 3, John has shown a piece of timber that would be suitable for this type of clock. Picture 4, John explained the hazards when using wood that still had the bark on, careful use was the order of the day, he also went on to explain what woods were best suited of Natural Edged Turning.Picture 5, Here John is showing the type of movement he would be using for his clock, and also how it would be fitted. Picture 6, John explained that he preferred to hide the movement by way of a cover plate or insert, here he is showing the back of a clock with a cover insert, these are just push fitted.Picture 7, Here John has a cover insert that he had made earlier and is explaining how it is fitted. Picture 8, Here John is explaining the importance of getting the clock piece at the right angle to the base piece, John joined the 2 pieces with a dowel, care needs to take place when drilling the holes to get the clock in the right position.Picture 9, John spent some time discussing the movements and the hands, explaining that it’s best to get both from the same supplier as all the hands and movements are not compatible, Picture 10, a selection of peal and stick clock numbers, these are also available in Roman numerals.Picture 11, John had used a pin chuck to hold the blank to machine the back and the side, also to cut the recess for the movement and the chuck jaws. now he has mounted the blank ready to cut the hole for the shaft. Picture 12, The thickness of the wood where the shaft goes is very important, it has to allow for the rubber washer and the threaded nut all within the parameters of the shaft, here John is using a home made device to get the depth he requires. You will see that the hole for the dowel has already been drilled.Picture 13, Using a parting tool or a bedan tool, John has made the first cuts into the face of the clock, care needed here as it’s so very easy to damage the bark at this stage, once it’s off it’s very hard to put back on. Picture 14, John now using a bowl gouge to remove the wood in the centre, this needs to be taken down to the depth of the shaft hole.Picture 15, the face recess being formed, still a ways to go. Picture 16, Now working on the final depth, using the hole as a guide to the depth required.Picture 17, the clock recess now down to the correct depth. Picture 18, John did some decoration on the face, now sanding, again care is needed when sanding areas that have natural edges.Picture 19, John used a small tool for the decoration on the face. Picture 20, more sanding, lightly on the decorated areas but firmer on the side areas but be careful here, remember the natural edges.Picture 21, applying some sanding sealer to the face of the clock. Picture 22, applying a wax finish to the face and sides of the clock.Picture 23, making the back cover insert, care needed her too not to overtighten when working the outside, it could easily be split. Picture 24, fitting the clock movement, John used a ring spanner to tighten the retaining nut.Picture 25, now John is fitting the hands, hour hand on first then minute hand and set both to 12 o’clock, judge as centre vertical. Picture 26, fitting the numbers, move the minute hand round 1 hour then place the 12 under the minute hand, the hour hand will be in the right place for fitting the 1, move the minute hand round by 1 hour every time until all the numbers have been fitted. The number were peel and stick, but you may wish to put a dab of super glue under each.Picture 27, fitting the number progressing well. Picture 28, numbers fitting complete.Picture 29, John’s finished clock is the middle one, he used a dowel for fixing on the base applying a little bit of super glue.
That completed John’s presentation, it was well received by all those watching and a show of appreciation was afforded to John.
The turnout for our first meeting of the new year was a little subdued, we will be hoping for a better turnout at our next meeting on the 19th February 2023, that meeting is going to be more of a social event with a quiz being the main part of it.
This website uses cookies to improve your experience. We'll assume you're ok with this, but you can opt-out if you wish.AcceptRead More
Privacy & Cookies Policy
Privacy Overview
This website uses cookies to improve your experience while you navigate through the website. Out of these, the cookies that are categorized as necessary are stored on your browser as they are essential for the working of basic functionalities of the website. We also use third-party cookies that help us analyze and understand how you use this website. These cookies will be stored in your browser only with your consent. You also have the option to opt-out of these cookies. But opting out of some of these cookies may affect your browsing experience.
Necessary cookies are absolutely essential for the website to function properly. This category only includes cookies that ensures basic functionalities and security features of the website. These cookies do not store any personal information.
Any cookies that may not be particularly necessary for the website to function and is used specifically to collect user personal data via analytics, ads, other embedded contents are termed as non-necessary cookies. It is mandatory to procure user consent prior to running these cookies on your website.