
Our meeting on Thursday 14th March 2024 was a demonstration by Alec Mutch on the use of Pebeo Paints in your woodturning. This was a solo demonstration by Alec who introduced the currant club to the use of these paints, it had been demonstrated before by me and others, but with a lot of the current membership being rather new to woodturning, Alec felt it was time to demonstrate the use of these paints again.
He introduced the use of Pebeo Paints by passing round a couple of examples he had made and went on to explain what they were all about and how to use them. He explained that these were oil based paints that were also reactive when used properly. He also explained that whilst using these paints the final look after the paints had dried may not look anything like it did when the paints were applied, he also said it could take up to a week for the paints to dry due to the depth of paint being applied, it was very important to get the depth of the paint to about 2mm deep in order for the reactive nature of the paints to work, and that the reactive nature of the paints would start a soon as it was applied, it was also very important to keep the painted areas on a level surface whilst drying, and that they do benefit from being taken into a slightly warmer atmosphere than is the case in most of our workshops.
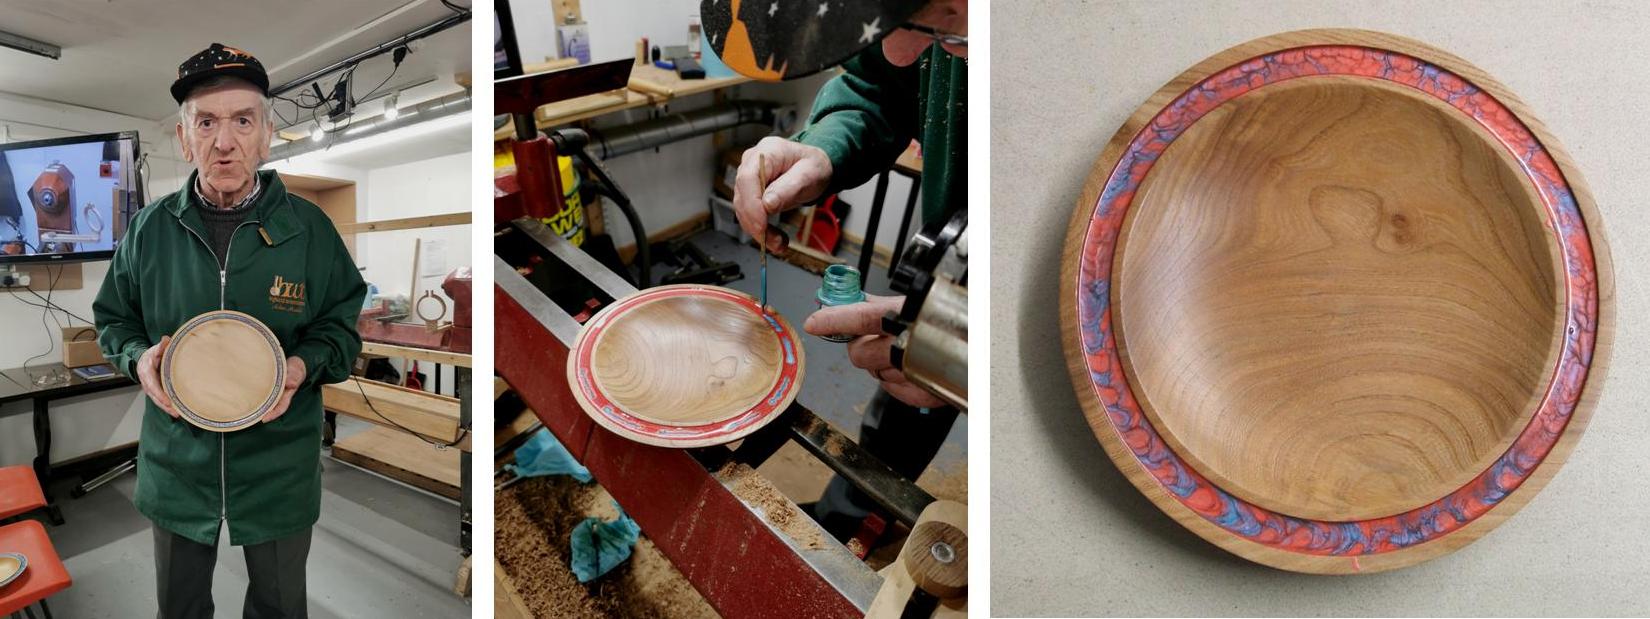
Here are a few pictures as a timeline on the making of a shallow plate that had the rim painted using Pebeo Paints. The pictures were all taken by Susan Drew, she seemed to sense when to take the pictures as these were all taken at just the right time to follow what I was doing.
Now for the pictures, I have added some text for your information, to all of the pictures.
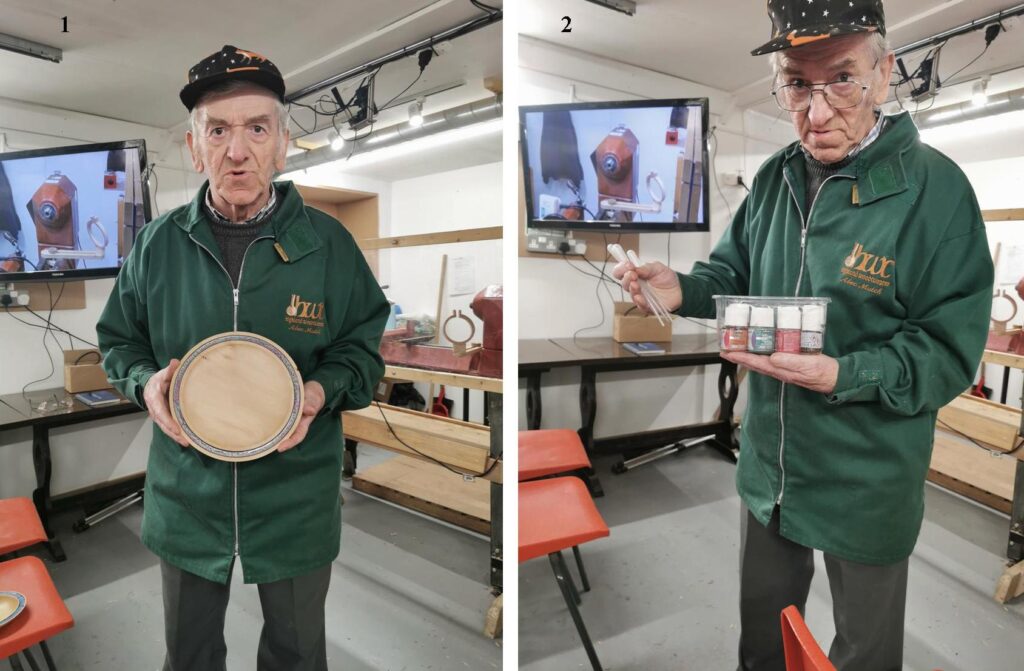
In picture 1, I am showing the club members a shallow plate with the rim decorated using Pebeo Paints, 2 colours of paint were applied, a base coat of Lavender with Lime Green on top and given a stir using a toothpick hoping to create a Mother of Pearl effect, and it worked. Picture 2, here I am showing the different types of Pebeo Paints available, these are, Vitrial, Moon, Ceramic and Prisme, I explained when each of these paints could be used and the effect that they bring. Also in my right hand are some pipets, these are used to apply the paints as they are what we call flooded on, you need a depth of about 2mm in order for the paints to react.
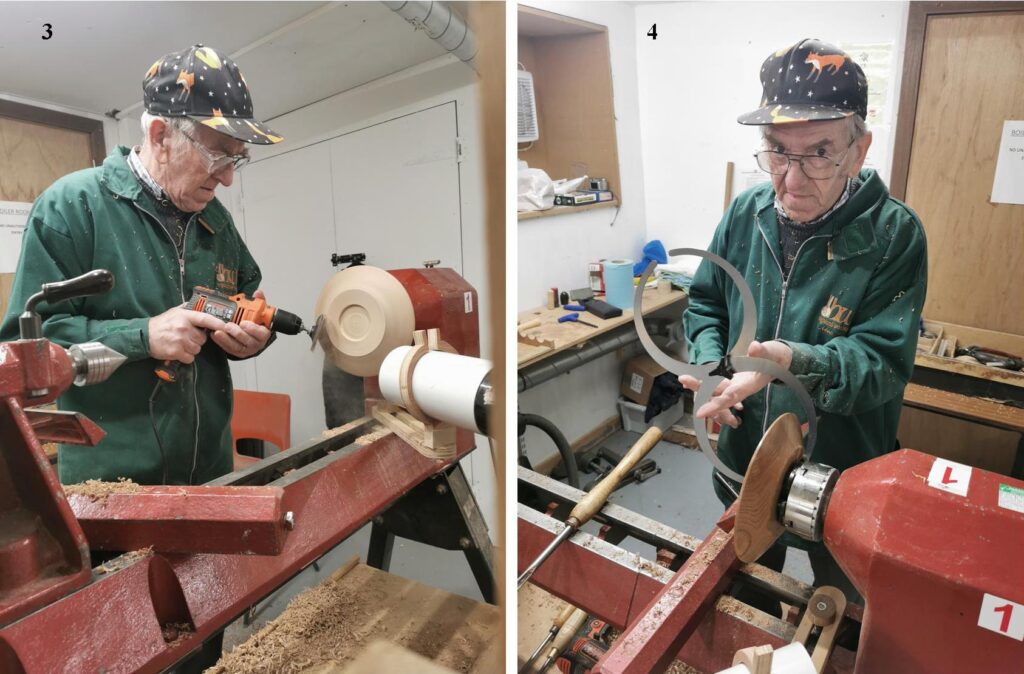
Now for the turning of a shallow plate that I was to decorate, Picture 3, here I am sanding the underside of the plate. Picture 4, having turned it around and taking out the inside it’s important to know where you are in relation to the thickness of the area above the chuck recess, a good way to measure this is to use a double ended callipers, a tip for you, make the chuck recess a little larger than the jaws when closed, this leaves you with a gap that you can slide the callipers into the gap in the jaws and get a very accurate measurement as shown in the photo.
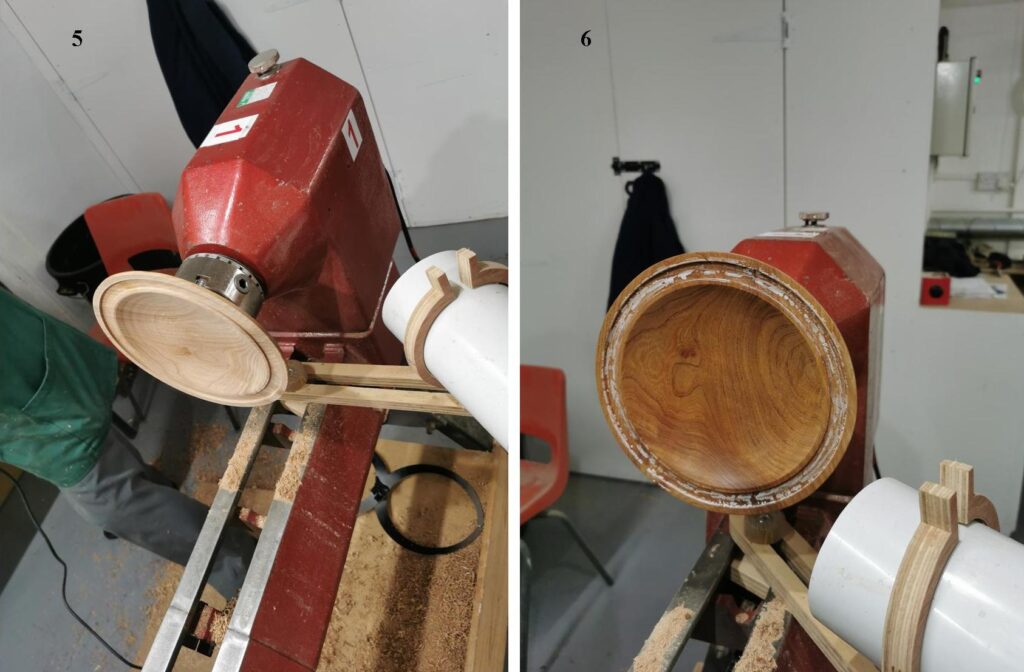
Picture 5, this shows the inside of my shallow bowl complete with the rim cut to a depth of 3 mm and about 12mm wide, the whole of this face will get sanded, sealed then flattened using steel wool. Picture 6, In order for the paints to not seep through the grain of the wood I used a piece of a candle to wax the area where the paint had to go, this picture shows the remnants of the candle after I applied the candle to the rotating piece, this would now be spun again and using the back of a piece of sandpaper held against the waxed area until it melted into the wood, once complete the Painting can begin.
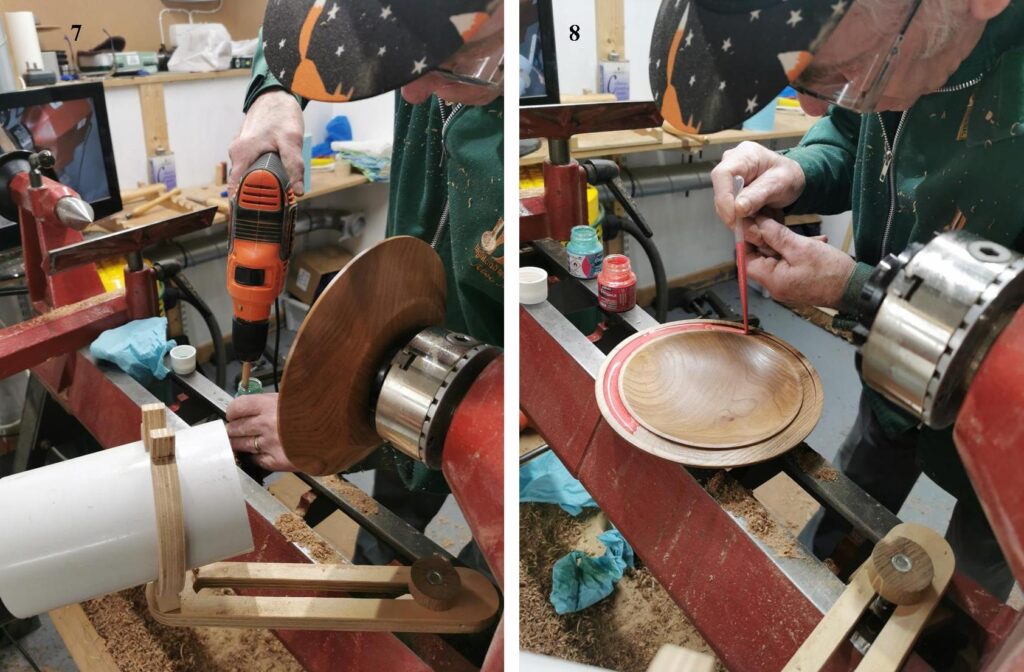
Picture 7, In order for these paints to work they need to be stirred a lot, by hand this could take several minutes, I use a power drill and a piece of wood flattened at one end to make a stirrer, start the drill slowly until you get it going without the paint coming out of the jar, increase the speed as required, a couple of minutes is all that it should take for each jar, if using more than 1 colour, stir both before starting to apply. Picture 8, Here I’m using a red base coat, being applied by the use of the pipet, try to avoid over spill but if that does happen don’t try to remove it now just leave it until it’s dry and it will peal off quite easily.
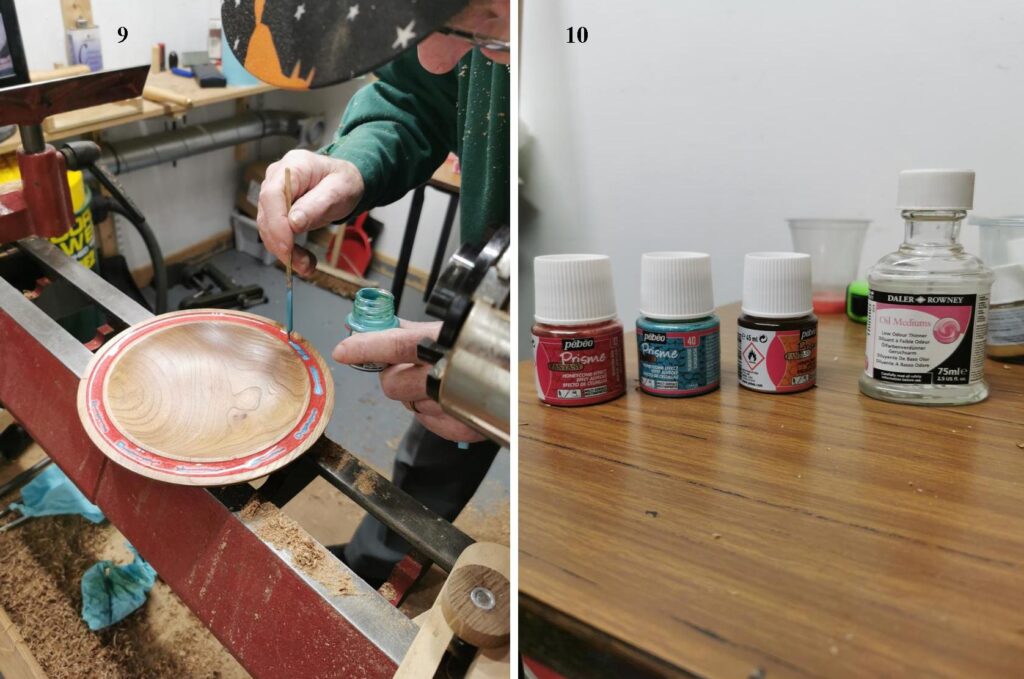
Picture 9, here I am applying the green on top of the red, just streaks as you can see and it will partly disappear into the red, don’t worry about that at this stage. Picture 10, some of the Pebeo Paint jars, also in the frame, a bottle of oil based thinners, I use this to clean the pipets.
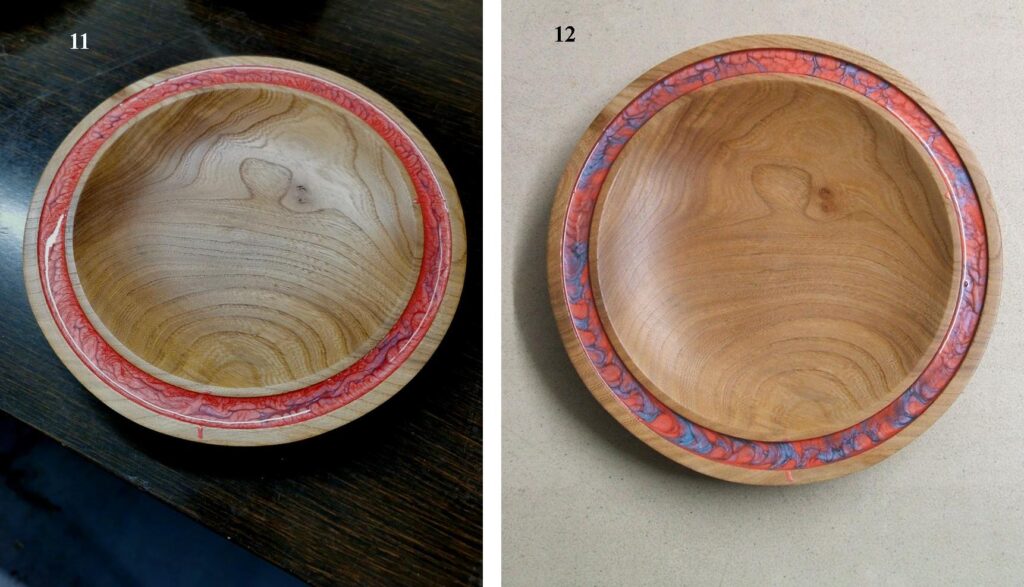
Picture 11, Susan took this picture right after I had placed it on the table, it would not get moved again until it was dry. I had given it a little stir and as you can see the green/blue has almost disappeared, however by the time the meeting had tidied up and the members were already making their way home the paints were already showing signs of reacting. Picture 12, This is the reason this post is later than usual, I knew I would be in Dingwall on Monday so a quick dash to our clubhouse in Munlochy and I would see the outcome of the Pebeo Paints, I was not disappointed the change was quite dramatic. I left the plate in the clubhouse for you all to see at the next meeting.
That conclude my demonstration in the use of Pebeo Paints. My thanks to Susan Drew for the excellent pictures.
Our next meeting is on the 28th March and it will be another solo demonstration organized by David Hobson who has invited Mark Sutton to be our demonstrator, Mark was one of the founding members of this club.