Report on our meeting 14-10-2021 Texturing by Errol Levings.
Our meeting this week, Thursday 14th October was a demonstration by Errol Levings on the subject of texturing your work pieces. Errol brought a few different texturing tools to the demo along with some pieces he had made earlier. He went on to explain what the tools did and what he used to create some of the items he had on show. He told everyone that he wasn’t going to make anything in particular, the demo would be more benefit to everyone he he just showed what the tools can do on various pieces of wood. Errol went on to say this was very much a learning curve for everyone including himself.
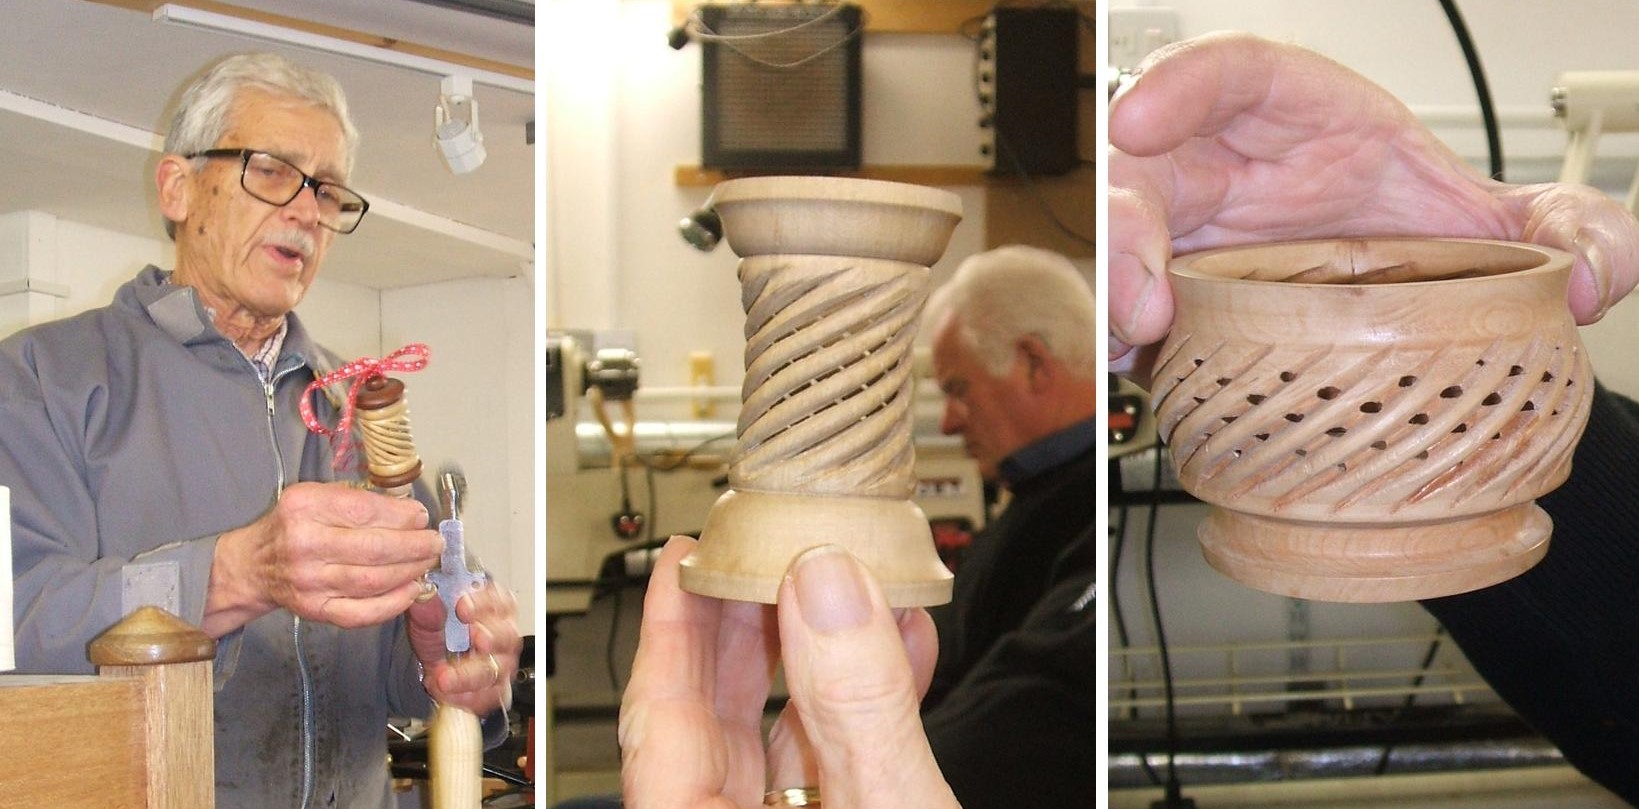
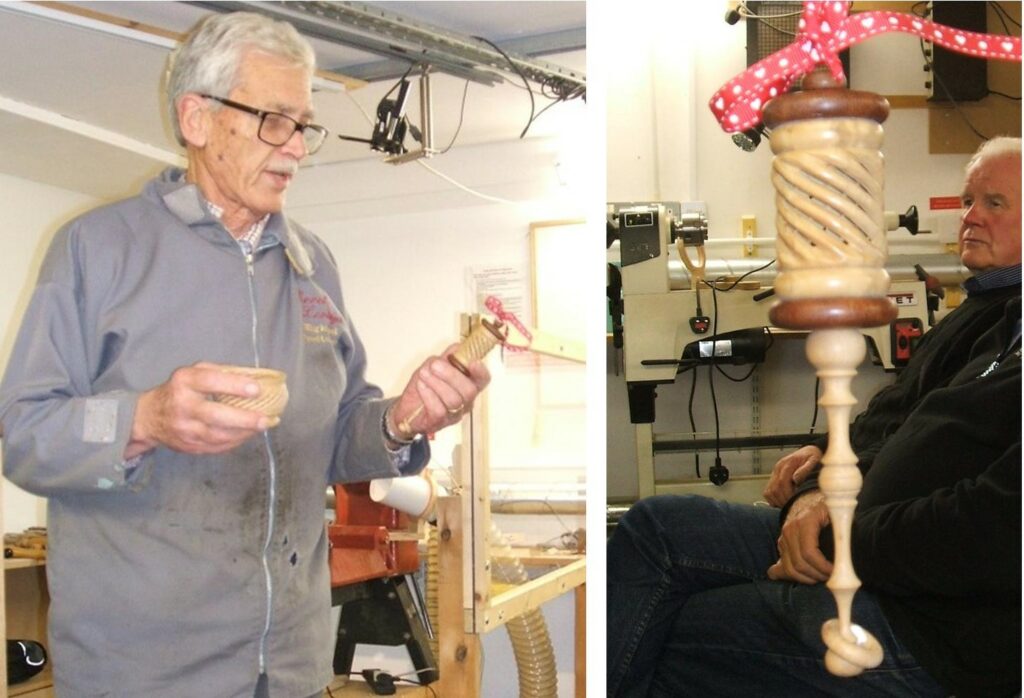
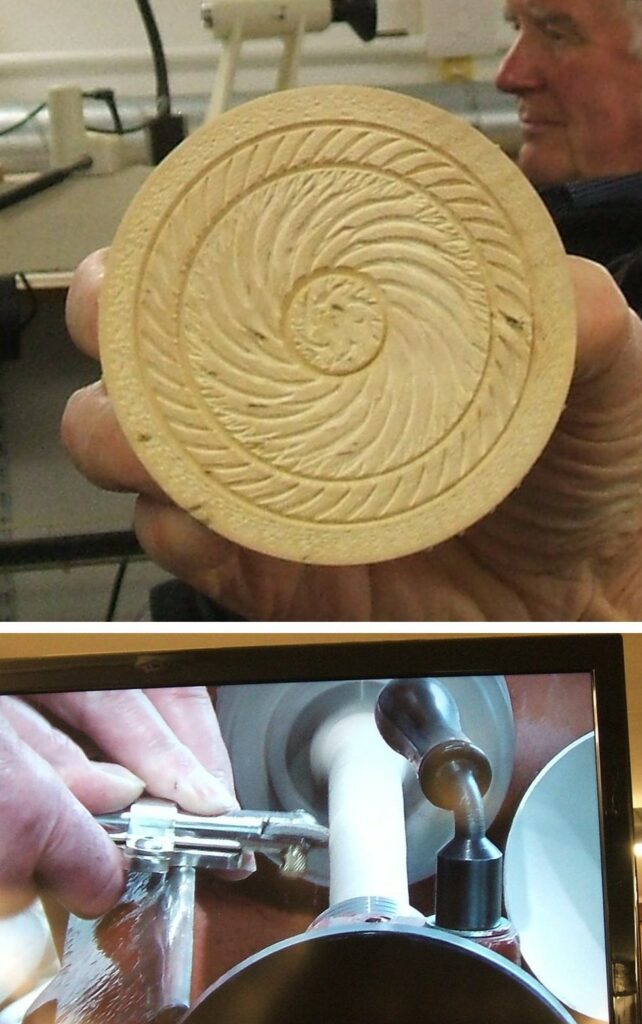
Now to take you through some of the photo’s I took to record what Errol did.
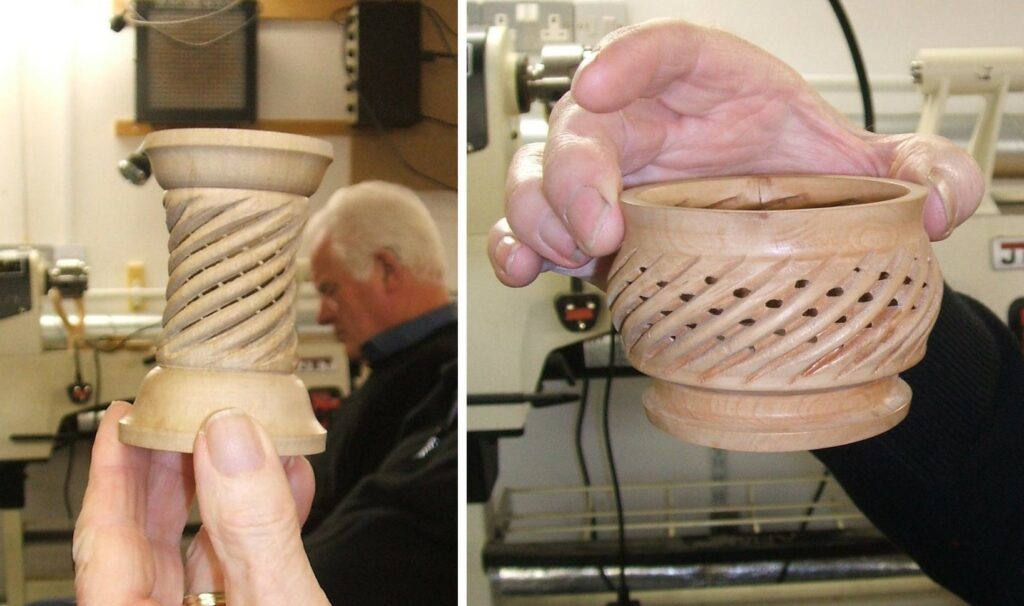
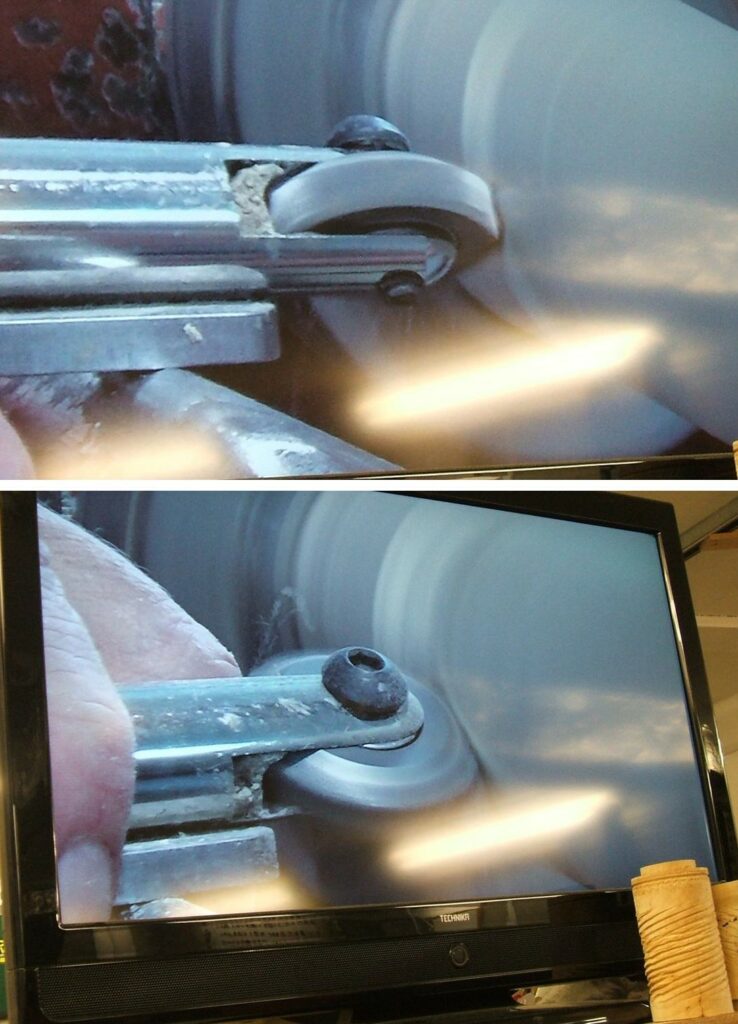
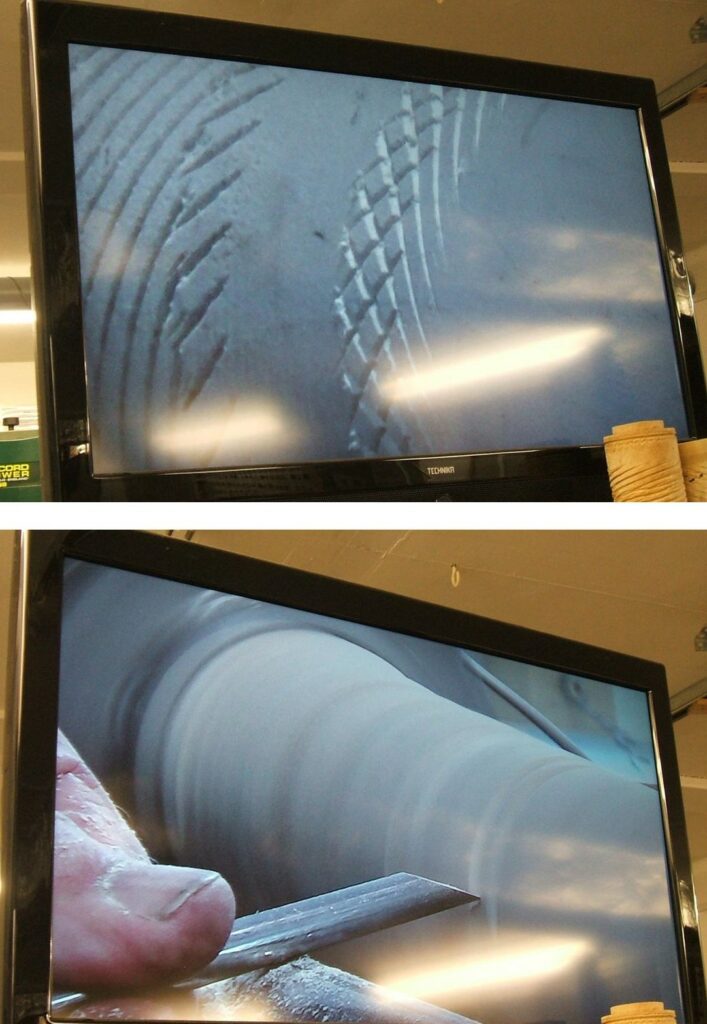
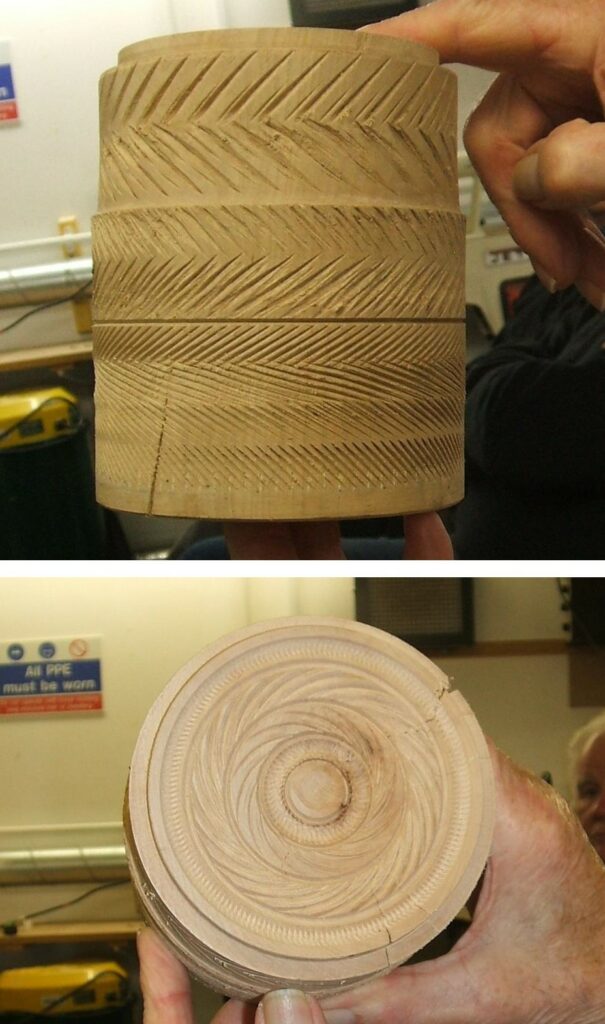
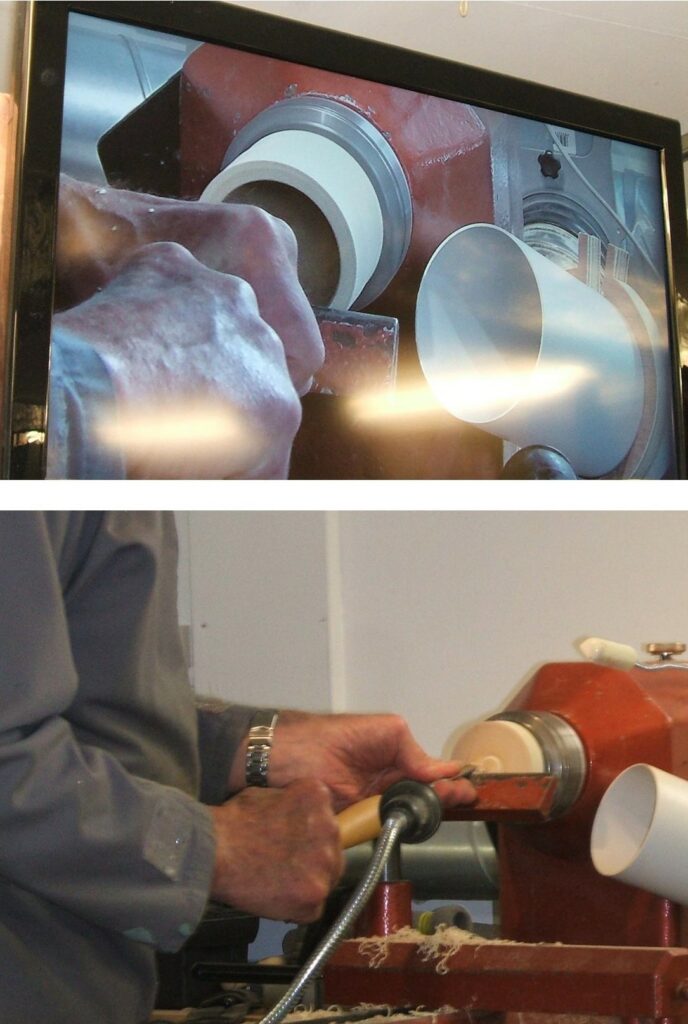
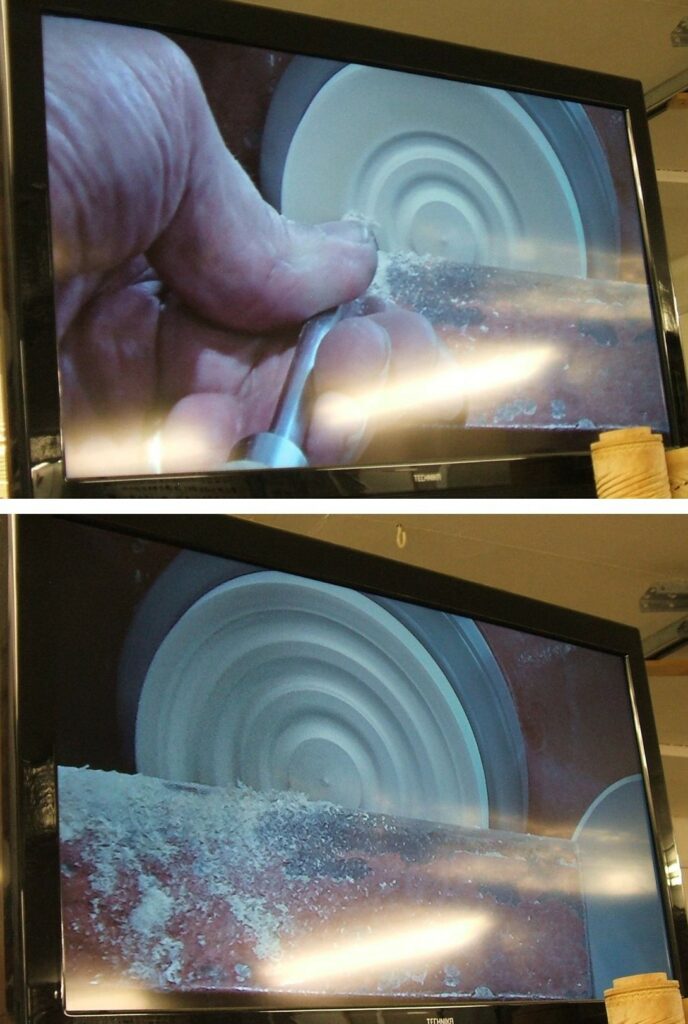
Left, Errol started by talking about what the texturing tools can do and also showing a couple of finished item he had made earlier. Right, a closer view of one of the items Errol had to show.Two more of the items Errol had on show, Errol explained that there were great differences on how the wood works when using the texturing tools, he had items made from Box, Holly and some other woods, all had their own advantages and disadvantages, it was to be a trial and error to see what worked best.Here we have Errol showing how the tools work, you will see that he uses different angles with the tools, each different angle will produce a slightly different design.Top, showing how the tool should be used. Bottom, a different tool for texturing, one that you can use without the heavy support, it gives you more freedom to use this in a variety of angles, achieving an infinite variation on the finished design.Top, the finished designs being achieved by using different angles. Bottom, creating a cove to carry the texturing.Both these pictures show the wide variety of designs that can be achieved by the various texturing tools.Top, Errol demonstrated some internal texturing, this would give you a cross over effect as seen in some of his examples. Bottom, working on what could be a lid to a box, Errol cuts a series of coves.Top, now working on the 2nd cove on a box lid. Bottom, Now with 3 coves cut it was time to texture these coves. For the centre part, Errol was hoping to create what’s known as the flower design. His first attempt did not work out well, but the next picture shows that he did get the flower very well.Top, a lid for a box, textured using 4 different designs, including the flower in the centre. Bottom, Here Errol can be seen using the texturing tool on a piece of wood held between centres, showing that almost anything is possible using these tools.This picture shows exactly what can be achieved by using the texturing tools, this one had texturing on both the outside and the inside, this gave the item a spiral on the outside that was then complemented by a spiral on the inside creating the penetrations to great effect.
I hope those of you who were present at Errol’s demonstration found this interesting and hopefully some of you will go on to experiment with texturing tools.
Our next meeting is on the 28th October, it will be a demonstration from David Ross, and David is going to make an ornament using a sea urchin in the design. We hope you will all be there.
This website uses cookies to improve your experience. We'll assume you're ok with this, but you can opt-out if you wish.AcceptRead More
Privacy & Cookies Policy
Privacy Overview
This website uses cookies to improve your experience while you navigate through the website. Out of these, the cookies that are categorized as necessary are stored on your browser as they are essential for the working of basic functionalities of the website. We also use third-party cookies that help us analyze and understand how you use this website. These cookies will be stored in your browser only with your consent. You also have the option to opt-out of these cookies. But opting out of some of these cookies may affect your browsing experience.
Necessary cookies are absolutely essential for the website to function properly. This category only includes cookies that ensures basic functionalities and security features of the website. These cookies do not store any personal information.
Any cookies that may not be particularly necessary for the website to function and is used specifically to collect user personal data via analytics, ads, other embedded contents are termed as non-necessary cookies. It is mandatory to procure user consent prior to running these cookies on your website.