Report on our meeting 20-01-2022, a demonstration by Alec Mutch.
Our club meeting on Thursday 20th January 2022 was a demonstration by myself (Alec Mutch) on toy or puzzle making. I was to make a couple of items, the first being a child’s spinning top, the second being a little puzzle item. Both these items had been demonstrated at our club in the past but with new members joining every year I felt it was time to repeat some of the items that had been demonstrated before.
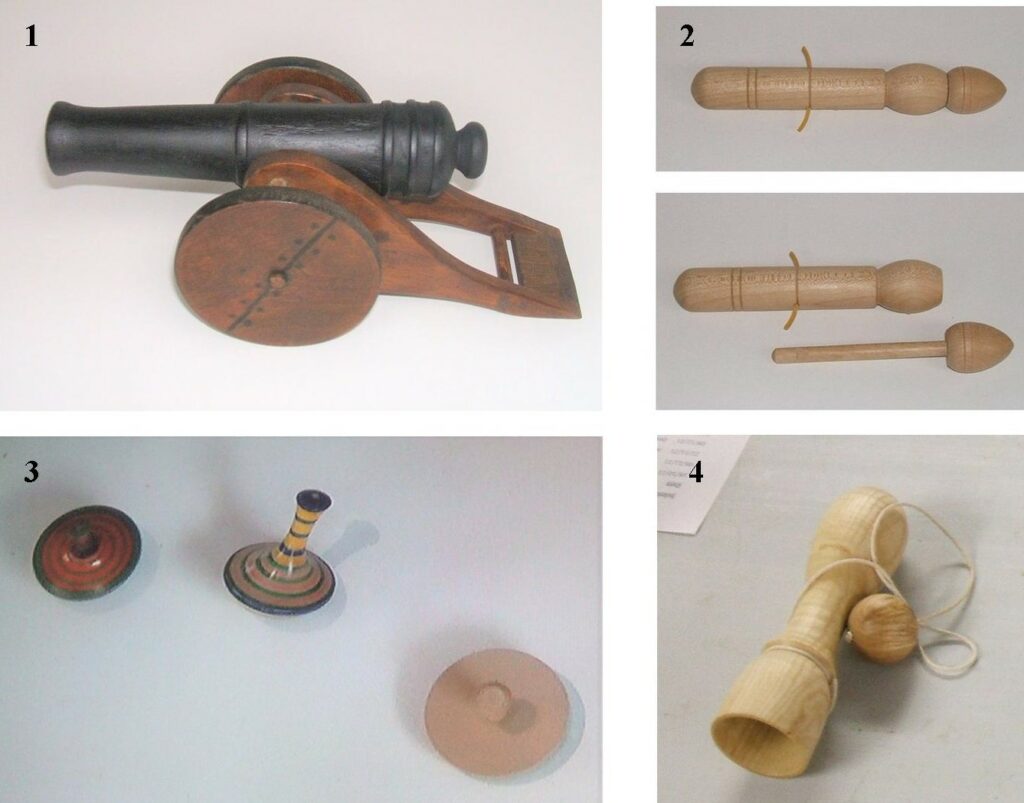
Before starting the actual turning I showed the members a few items that I had made in the past, the first being a toy cannon, next was a spinning top that actually worked, the next item I showed was a cup and ball toy, I demonstrated unsuccessfully how it worked, (well it does need a lot of practice) I put it out to the crowd sitting, I don’t think any of them were any more successful than me, lastly I showed them a little puzzle item and showed what it did, as it was a puzzle I put it out to the crowd to see if they could work out how the puzzle worked, some had seen it before but kept quiet on how it worked for those who had not seen it, they were all finally let in on the secret.
Here are a few pictures taken at my demonstration along with some text to go with them, I hope this will help you to be able to follow how they were made if you were to make any of them. Most of the pictures in this presentation were courtesy of Mike Day.
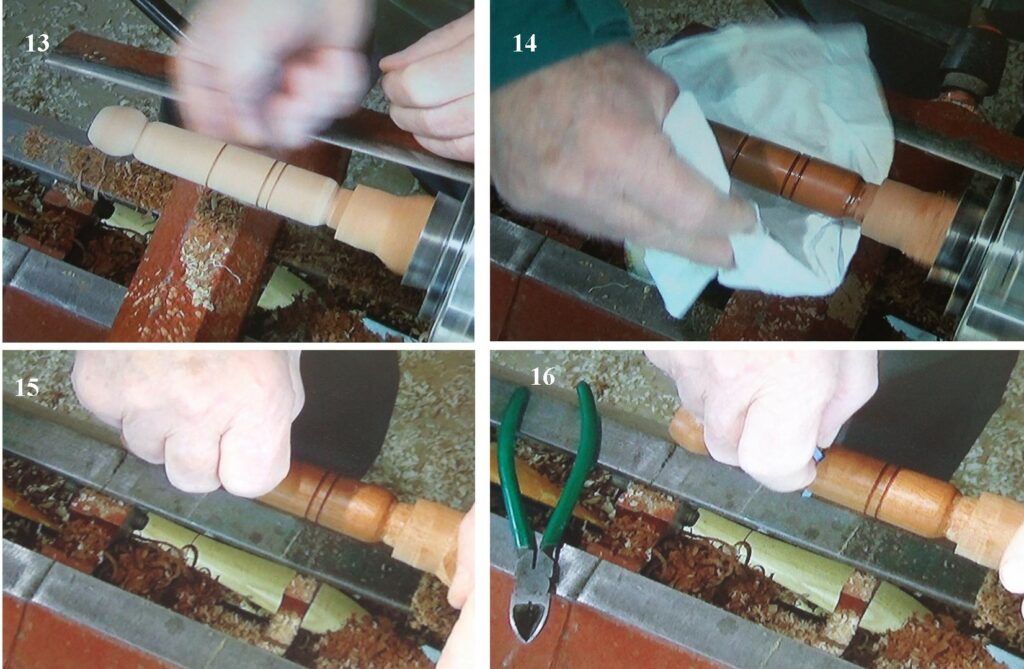
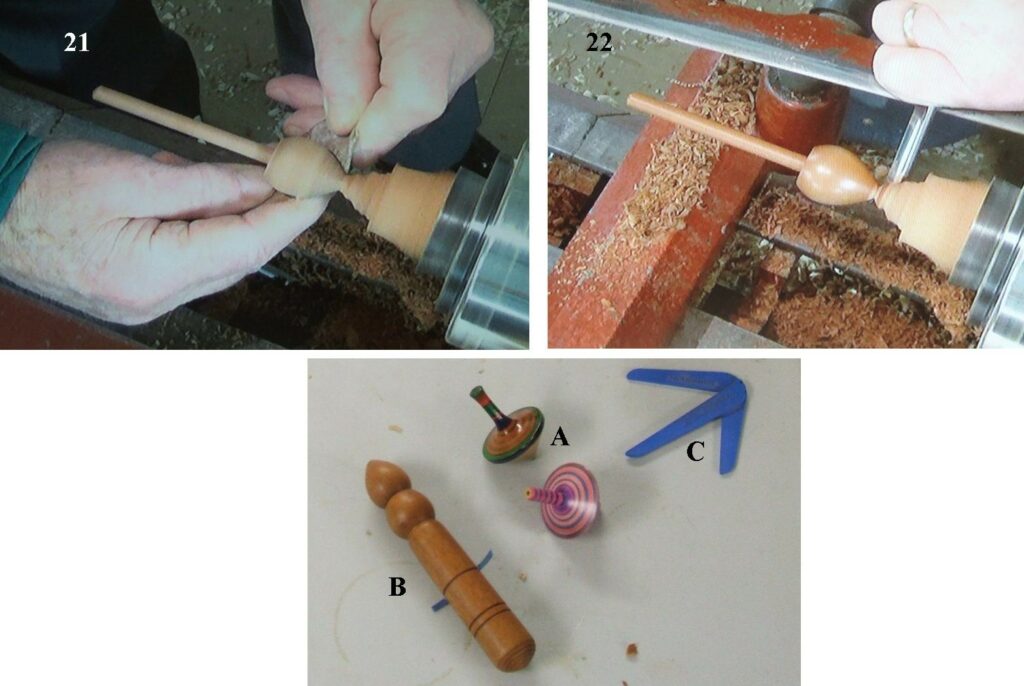
1, is the toy cannon. 2, is my little puzzle item. 3, a few spinning tops. 4, the cup and ball toy.I started with the child’s spinning top. 5, A blank of Holly wood being used, the tighter the grain on the wood used for spinning tops the better, and Holly fits that bill beautifully, here I’m using a roughing gouge to take the blank down to the round. 6, The blank now almost to the round. 7, here I’m reducing the stem of the spinning top down to the size required, keep this fairly straight and not too long, about half the overall length is about right. 8, the stem turned and the shape for the main part of the spinning top now being formed.9, the final shape complete apart from just the cut off area, I then used a few different colours of felt tip pens to do the colouring, this is done with the lathe running but at a very slow speed, a variety of colours can be used and applied at the same time. 10, the colouring complete, I then applied a coat of sealer/gloss lacquer from a spray can, again with the lathe still at the low speed, the sealer/gloss lacquer will take quite a few minutes to dry so set it aside still attached to the rest of the blank and part off when dry. 11, this was the first piece of the puzzle item, a blank of Mahogany about 30mm square by about 150mm long, here I’m using the roughing gouge again to bring the blank to the round. 12, the main part of the puzzle item now turned to my own design, her I’m just starting to drill the hole for the 2nd part, this should be about 8mm in diameter by about 100mm deep.13, here I can be seen sanding the main part of the puzzle, use a very fine grade sanding medium and keep it on the move to avoid leaving scratches from the sanding. 14, I applied a coat of sanding sealer, here I can be seen rubbing it in. 15, here I’m inserting the little pieces of rubber band held in by super glue. 16, the 2nd piece of rubber band now installed, the deception is now complete on the main part.17, the 2nd part of the puzzle item now being mounted on the lathe, also the same wood and size as the first piece. 18, Put the thin part of the turning to the tailstock end, the reason for that is it will need to be trial fitted as you go along, here I’m using a roughing gouge to bring it down nearly the desired thickness, a final cut or two with a spindle gouge or skew will finish the size. 19, sanding the thin part, again keep it on the move, and sand to a smooth finish. 20, the rest of the shaping now in progress, I pre fitted the thin part with the main part, then marked out the corresponding thickness of the main part on the bulbus end of the 2nd part to make them match up, now I’m forming the fine slope required to make the puzzle work.21, sanding the bulbus part, watch for the colours changing as you sand, the finer the sanding medium the darker your work will look, all you have to do is keep it looking uniform, any white or pale lines appearing are defects. 22, I sealed and polished this part, now I’m parting it off with a fine spindle gouge, sand and seal where it was parted off, your puzzle item should now be complete. “A” a couple of completed spinning tops. “B” the puzzle item complete. “C” A little plastic tool to get the centre to any square piece of wood, I got this free with a woodturning magazine a long tome ago.
That completes my programme for this meeting, I do hope you enjoyed it if you were there at the meeting, and if you were not there, I hope you can follow the time line here to make one of each for yourself.
Our next meeting is our AGM (Annual General Meeting) on the 3rd of February 2022, you are all invited to attend, this will be your chance to put forward any new ideas for the future should you wish to do so. The whole committee will be up for re-election by you the members, some will be dropping out where others may be elected. the meeting will start at 6.45pm as usual, all will be seated, tea and coffee will be available as will our usual raffle, Covid restriction that are still in place will apply, wearing a mask, sanitizing and signing in being the main conditions. We hope to see a very good turnout, it’s in your own interests to be there if you wish to put anything forward.
This website uses cookies to improve your experience. We'll assume you're ok with this, but you can opt-out if you wish.AcceptRead More
Privacy & Cookies Policy
Privacy Overview
This website uses cookies to improve your experience while you navigate through the website. Out of these, the cookies that are categorized as necessary are stored on your browser as they are essential for the working of basic functionalities of the website. We also use third-party cookies that help us analyze and understand how you use this website. These cookies will be stored in your browser only with your consent. You also have the option to opt-out of these cookies. But opting out of some of these cookies may affect your browsing experience.
Necessary cookies are absolutely essential for the website to function properly. This category only includes cookies that ensures basic functionalities and security features of the website. These cookies do not store any personal information.
Any cookies that may not be particularly necessary for the website to function and is used specifically to collect user personal data via analytics, ads, other embedded contents are termed as non-necessary cookies. It is mandatory to procure user consent prior to running these cookies on your website.