Report on our meeting 25-11-2021 Demonstration by David Hutcheson.
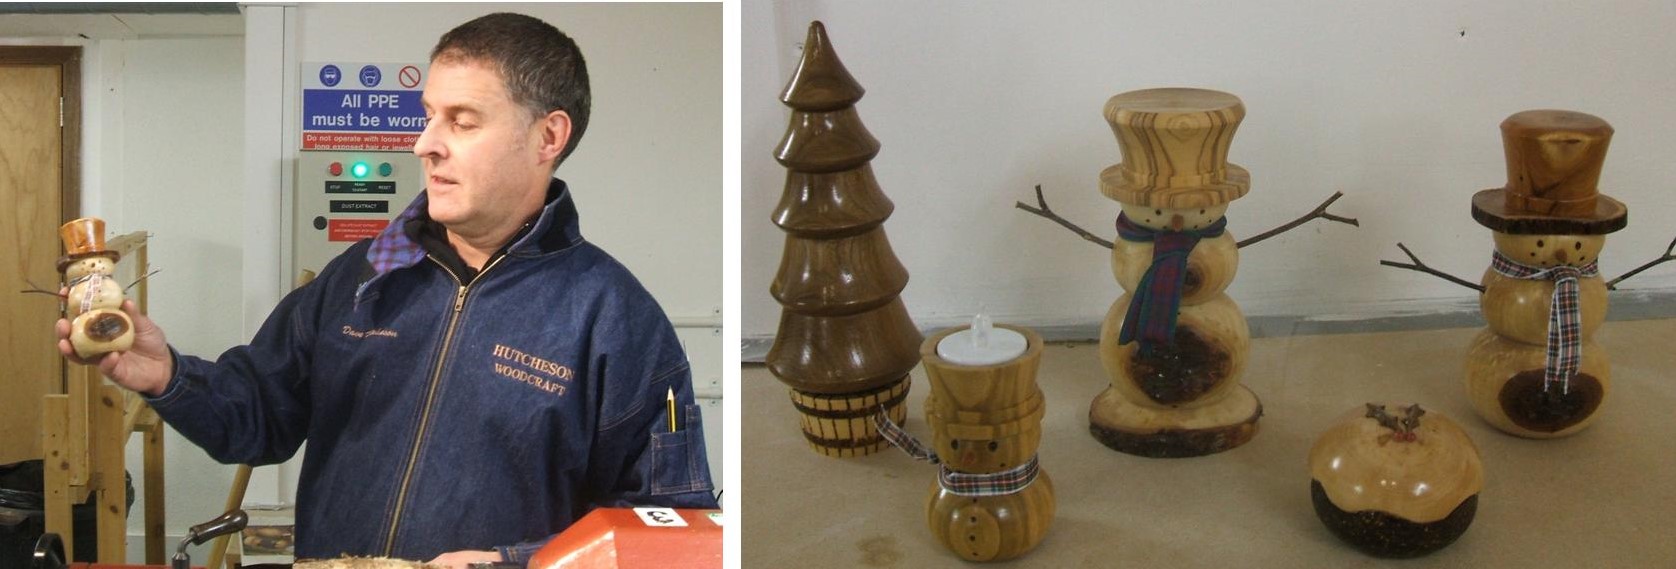
Our meeting on Thursday25th November 2021 was a demonstration by David Hutcheson, David’s theme for the evening was to be making Christmas decorations, he had brought along a few examples of Christmas decorations that he had made, one of which was a snowman. It was to be another snowman that David was to make.
Here are a few pictures along with some text to help you understand how David went about making his snowman decoration.
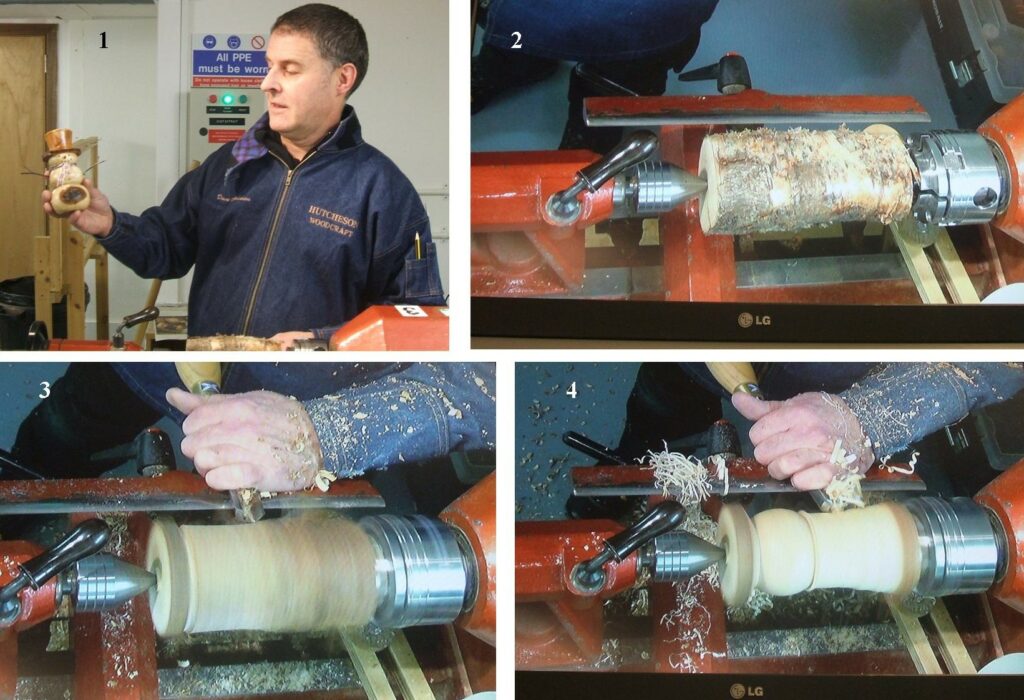
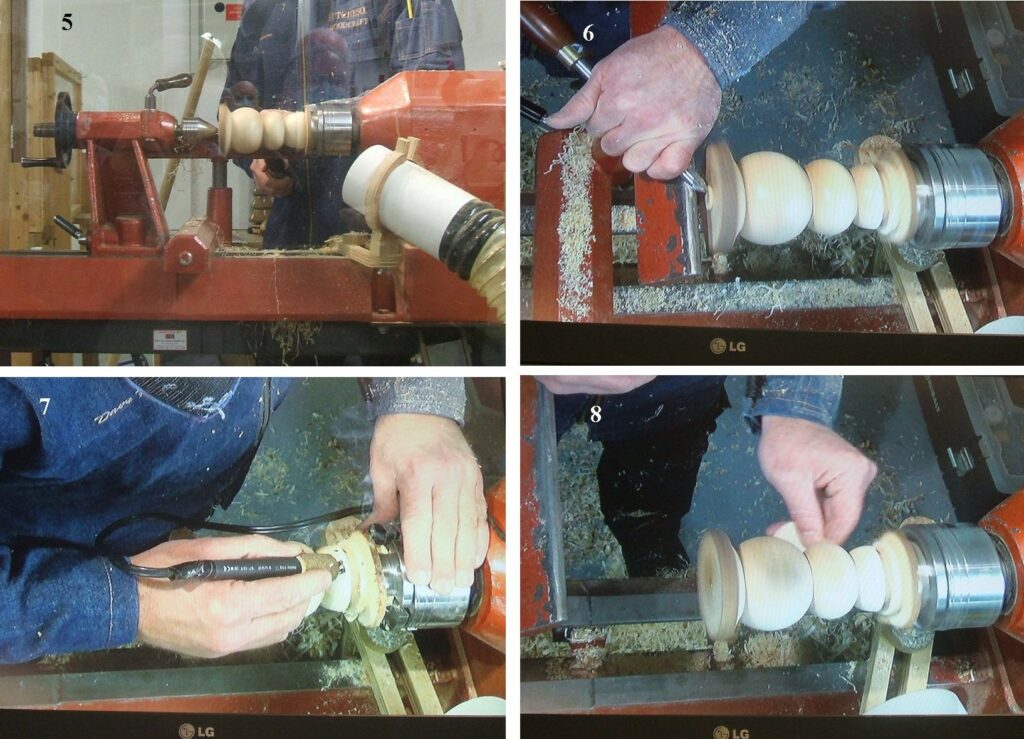
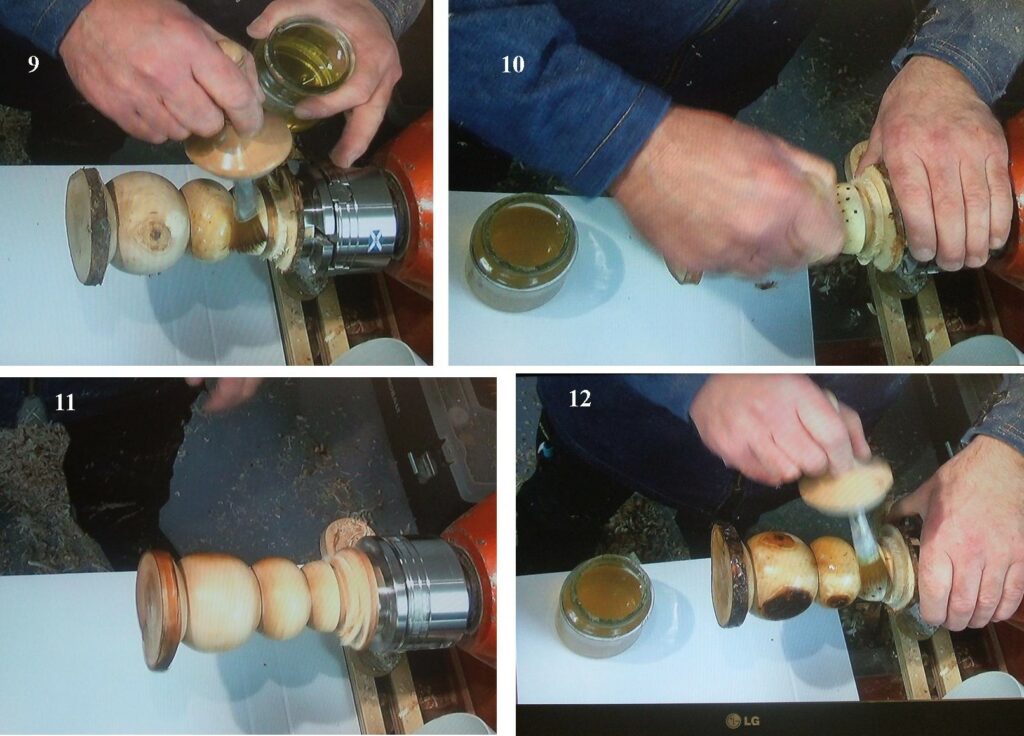
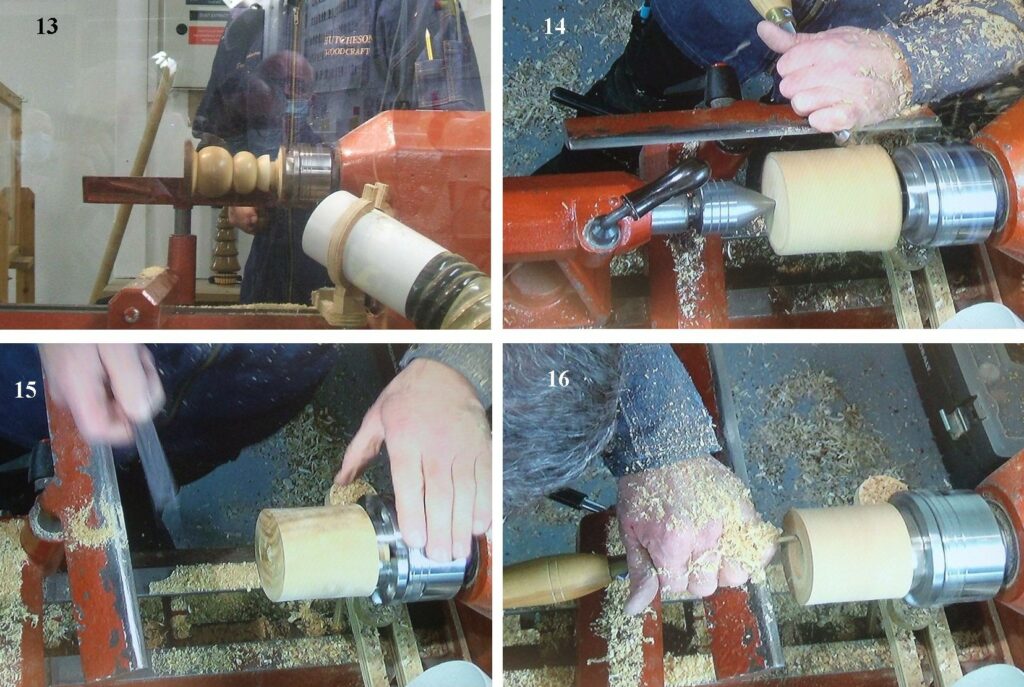
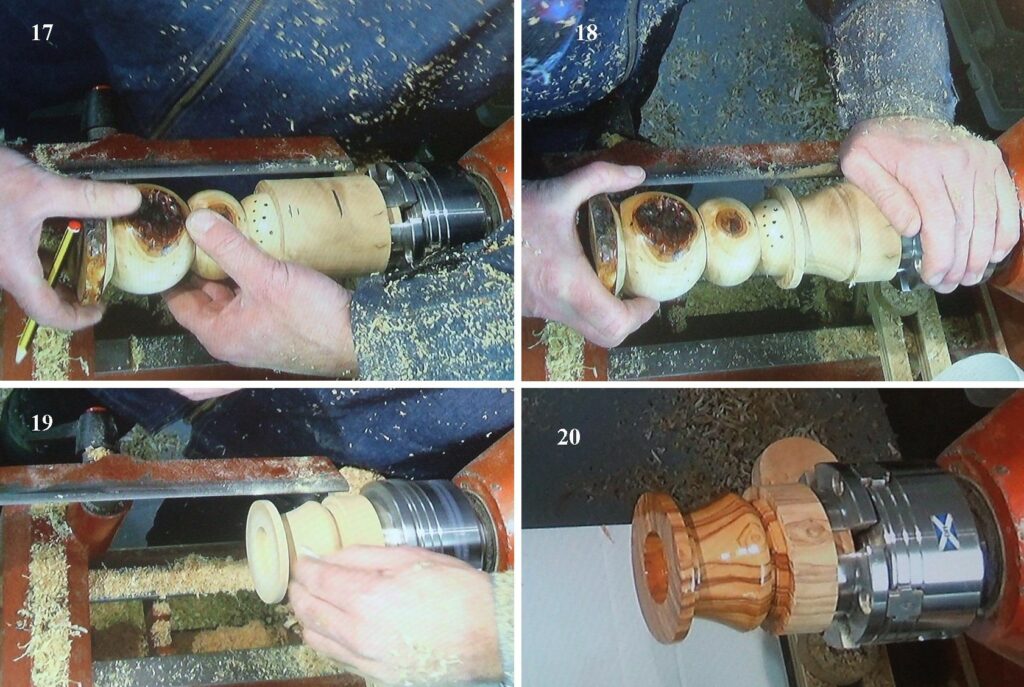
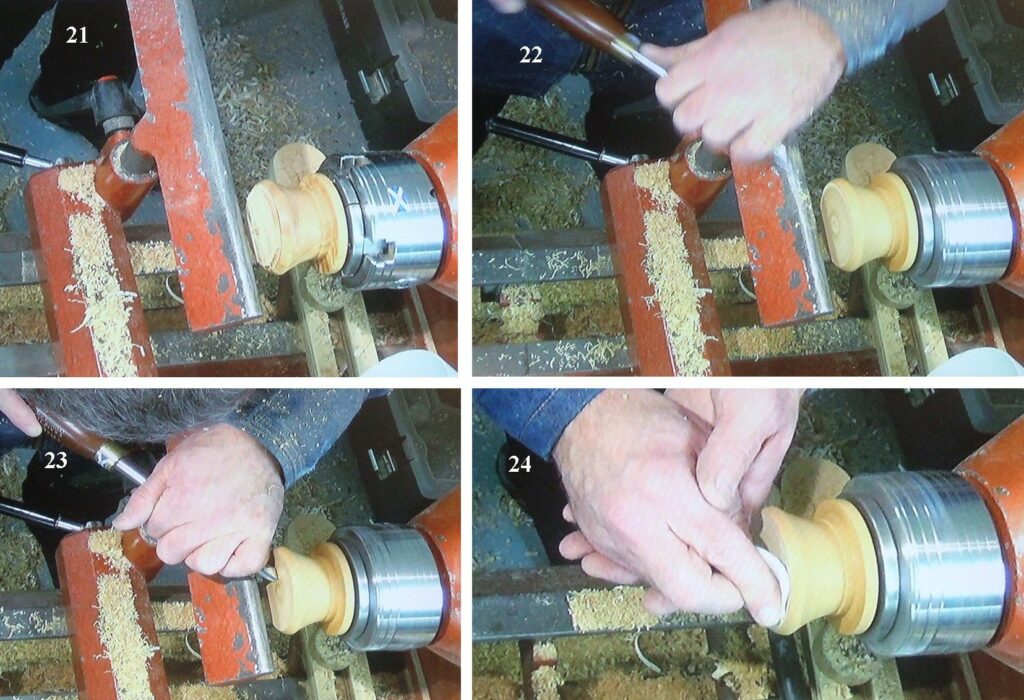
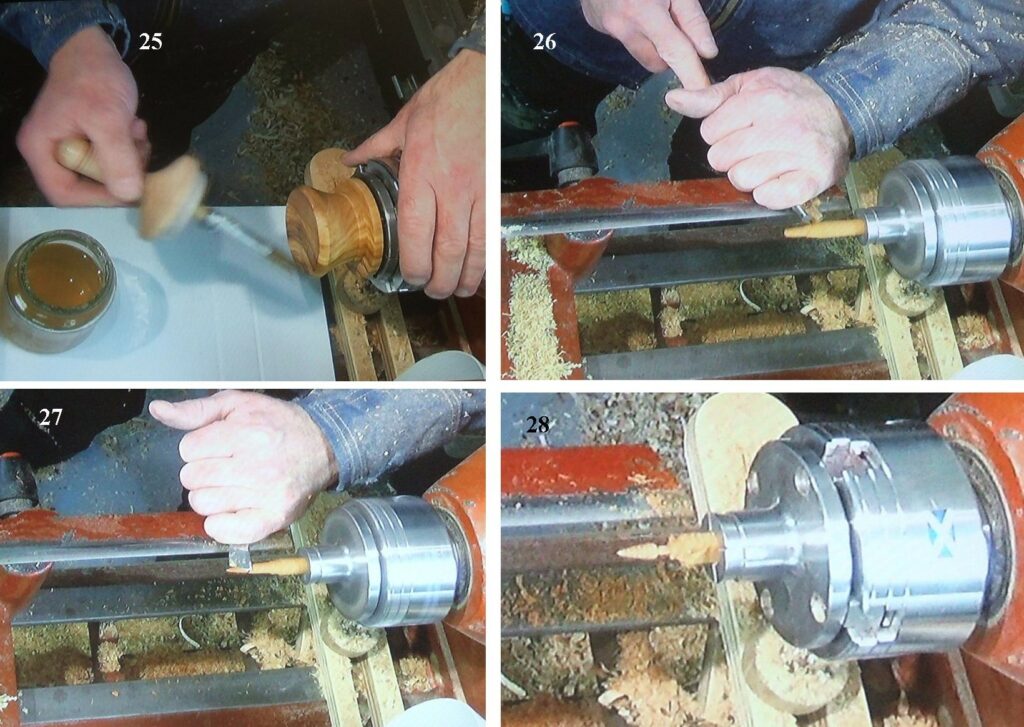
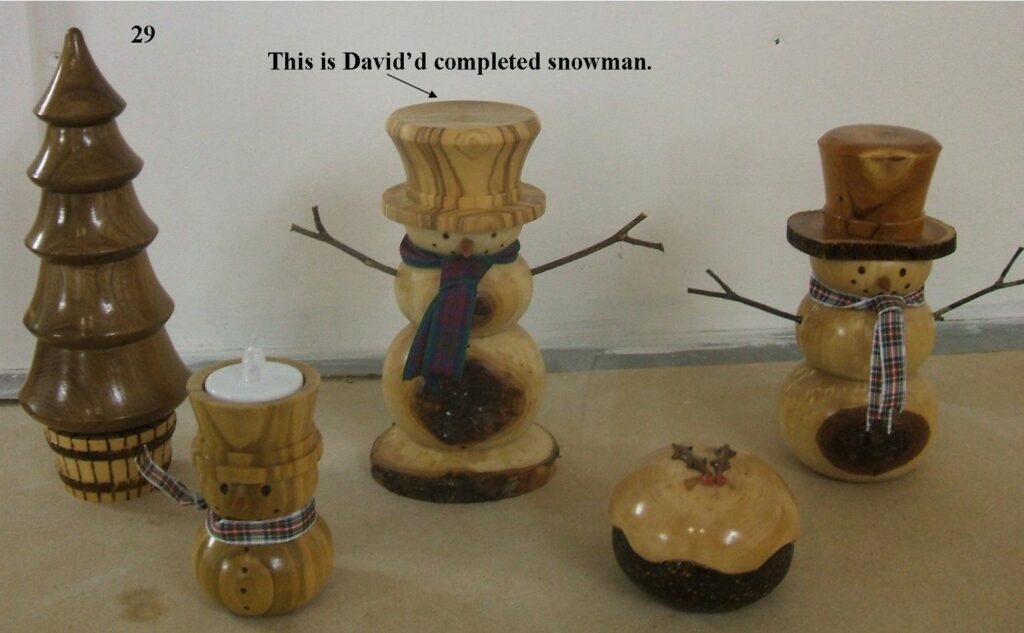
1, here is David Hutcheson making his introductions by showing the members present a snowman decoration he had made , it was to be another snowman that he was about to make. 2, David chose a birch log for the body of the snowman. 3, David making the first cuts using a roughing gouge. 4, Still with the roughing gouge, David begins to make the shapes for the snowman’s body.5, The snowman’s body taking shape. 6, David cleans up the base making it slightly concave to allow it to stand correctly. 7, David used a pyrography tool to create the eye’s and mouth. 8, Here David can be seen sanding the body.9, David is now applying the sanding sealer with a soft brush. 10 & 11, Rubbing back between coats, David would apply another coat of sealer.12, the 2nd coat of sealer being applied. There would also be a coat of Melamine applied as the final finish.13, Having sealed and polished the body, David is now turning the top spigot that will be the seat for the hat. 14, The blank for the hat was now mounted and David can be seen taking the first cuts, the wood is Olive Wood. 15, The blank now rounded off and the bottom squared ready to make the recess to fit the spigot on the body. 16, the recess now being formed, several trial fits may be needed to get the right fit.17, Here David is trial fitting the body to the hat, it needs to be in flush and with a good fit. 18, Here David is checking to see the extent of the hat’s overhang and height, good proportions are needed here. 19, David was happy with the fit and shape, so now he is doing the sanding. 20, The hat with a coat of sealer applied.21, David turned the hat around to work the top, for this he used a pin chuck inside the hat recess. 22, David squared off the top of the hat. 23, Now David is cutting a slight concave shape on the top of the hat. 24, Sanding the top of the hat.26, Sanding sealer being applied to the top of the hat, the same finishing process would be applied to the top of the hat as to the rest of the turning. 26 & 27, The nose for the snowman being worked in the pin jaws. 28, the nose complete ready to seal and polish then to cut off, all that remained was to assemble the snowman, a little super glue would be used for all parts of the assembly.29, shows the finished snowman in the centre of the picture, along with all the Christmas decoration David brought along as examples of what can be made.
That concluded our journey through the making of a Christmas Snowman, We do hope you enjoyed seeing how it was made and we thank David for his demonstration.
Our next meeting is on the 9th November 2021 and that will be a demonstration by Andy Walters of Black Isle Woodturning, Andy is going to make a Tea Light Lantern.
This website uses cookies to improve your experience. We'll assume you're ok with this, but you can opt-out if you wish.AcceptRead More
Privacy & Cookies Policy
Privacy Overview
This website uses cookies to improve your experience while you navigate through the website. Out of these, the cookies that are categorized as necessary are stored on your browser as they are essential for the working of basic functionalities of the website. We also use third-party cookies that help us analyze and understand how you use this website. These cookies will be stored in your browser only with your consent. You also have the option to opt-out of these cookies. But opting out of some of these cookies may affect your browsing experience.
Necessary cookies are absolutely essential for the website to function properly. This category only includes cookies that ensures basic functionalities and security features of the website. These cookies do not store any personal information.
Any cookies that may not be particularly necessary for the website to function and is used specifically to collect user personal data via analytics, ads, other embedded contents are termed as non-necessary cookies. It is mandatory to procure user consent prior to running these cookies on your website.