Report on our meeting 02-03-2023. A demonstration by Alec Mutch.
Our meeting this week on Thursday 2nd March 2023 was a demonstration by Alec Mutch, his project was to make a small natural edged vase/cup from a newly felled log working it in end grain, the wood would be very wet and the use of a light source would be part of the demonstration.
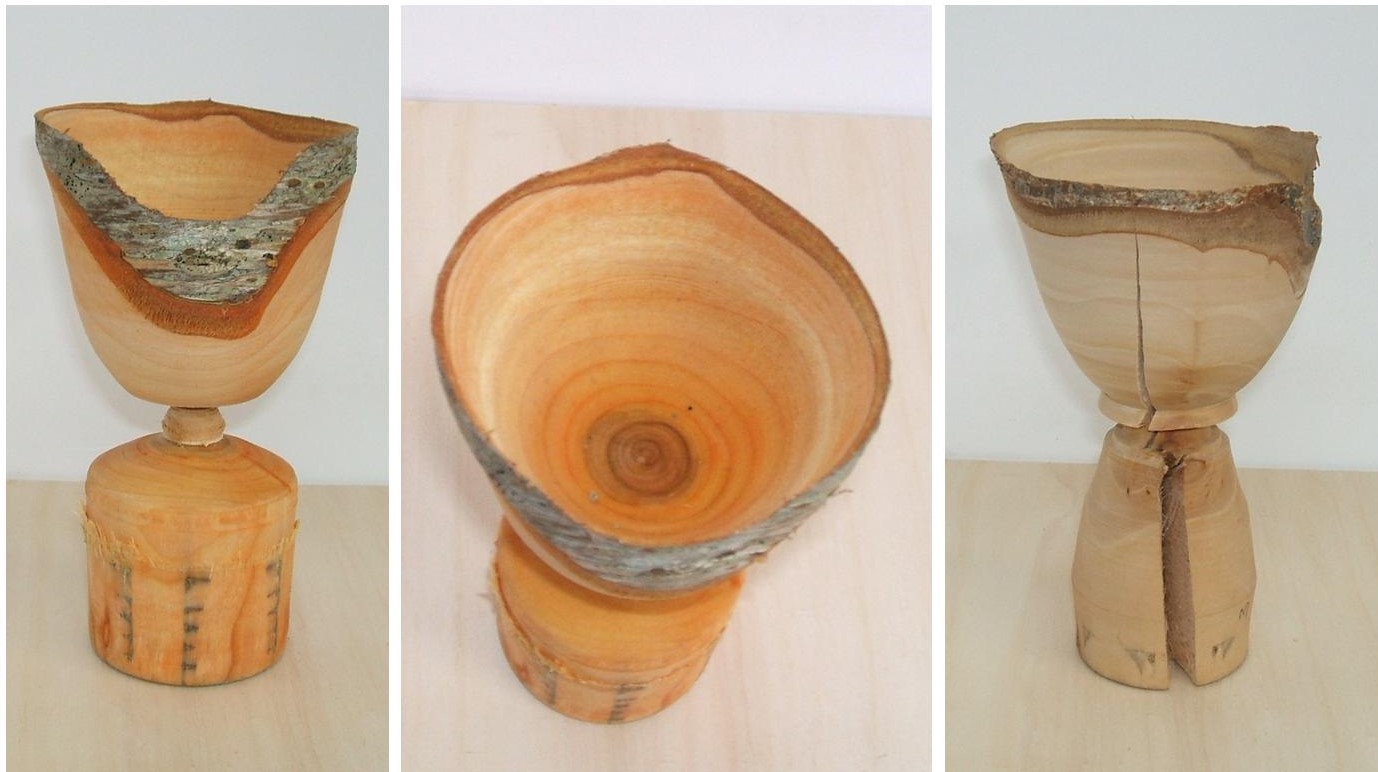
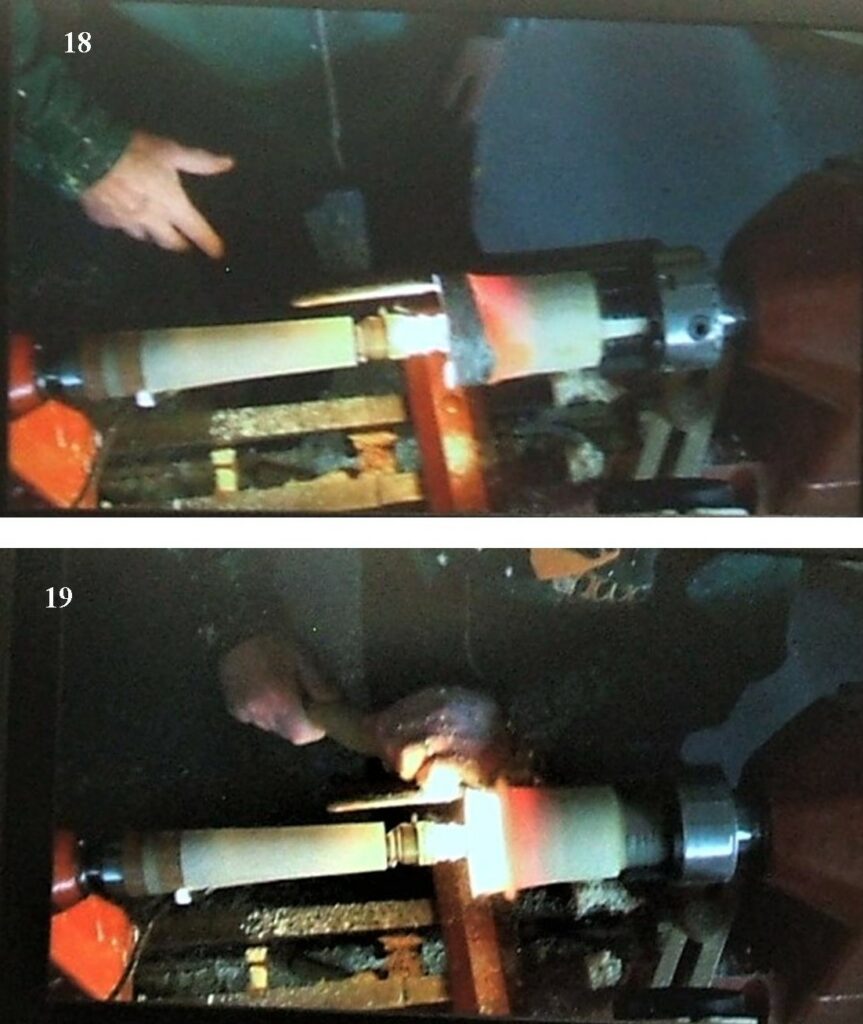
The method used required moving away from the conventional method of turning where end grain working is usually done from the centre out. On this occasion it would be worked from the edge of the log to the centre using a spindle gouge for the most part. The other important part about this turning was the cup shape needed to be done before the final shape of the cup was formed on the outside, the reason for this was that a light source would be used, placed inside the cup and using a LED lamp to light up the inside. The green wood being very wet allowed the light to glow through the wood as the side walls of the cup got thinner. For this type of turning to be a success the turning needed to be down to about 2mm in thickness for the whole turning, by watching the light glowing through the wood it’s possible to achieve a fairly constant thickness just by following the colours glowing through, it will start out fairly muted colours of pale pink but as you pare back the wood on the outside the colour will change to bright red, if you follow the colour you should end up with a side wall and base of even thickness. There is little to be gained by sanding at this point, don’t cut it free from the piece being held in the chuck, put the whole thing into a Microwave oven and give it 1 minute on defrost then leave to stand for 5 minutes, repeat probably 3 times, after this process put the item back on the lathe and sand seal and polish or if you prefer do an oil finish then cut it free, hand sand the base.
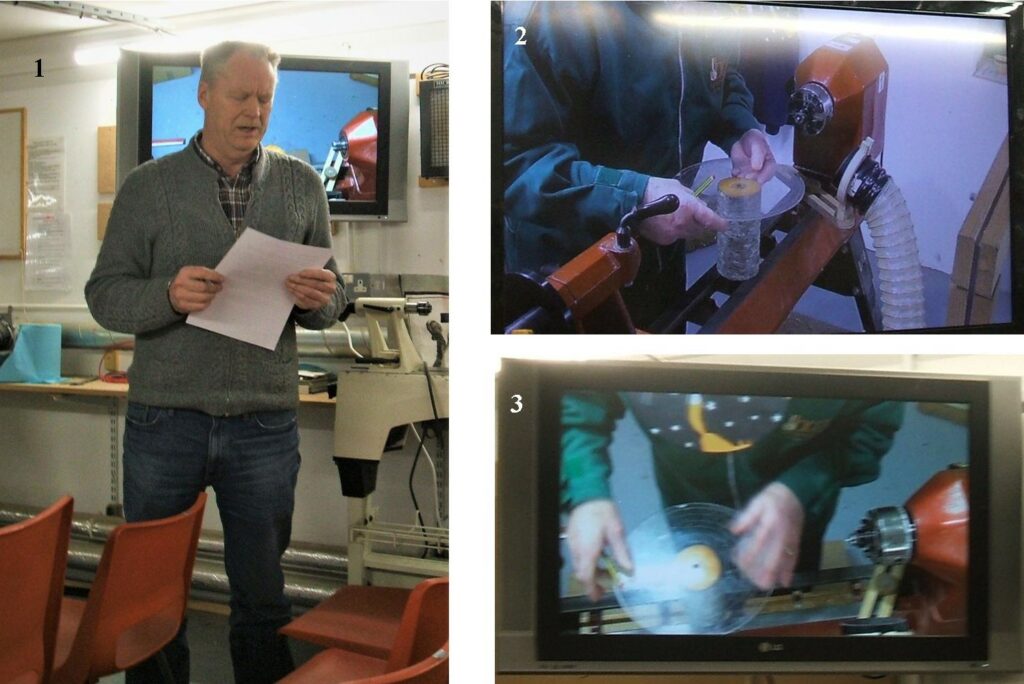
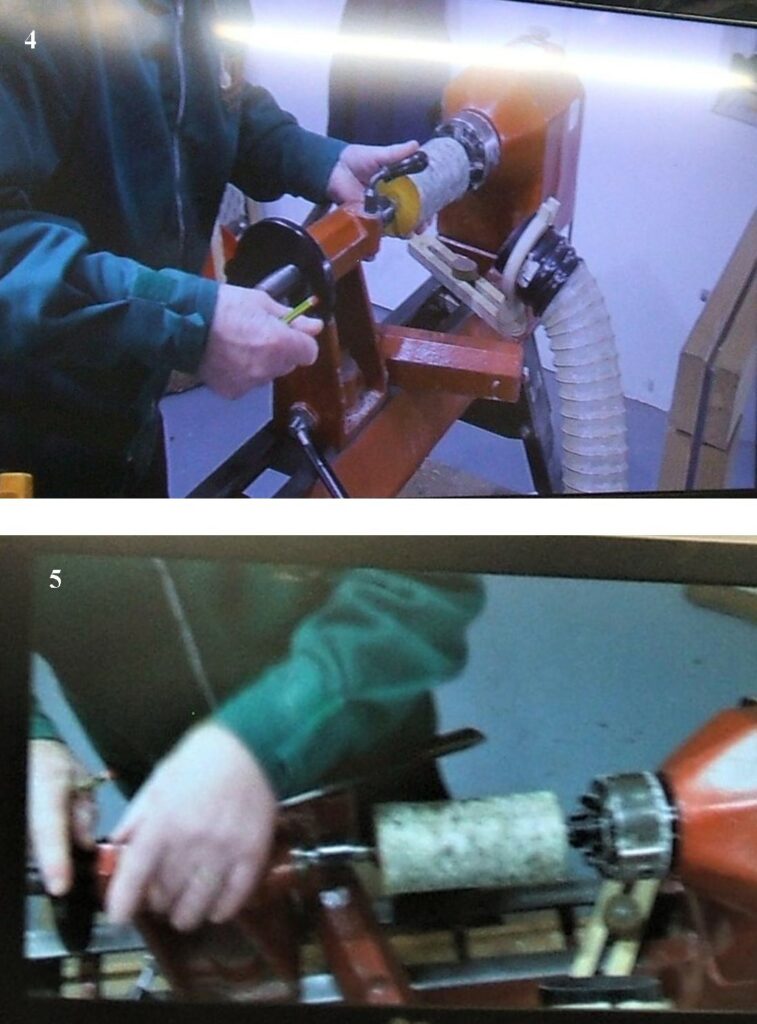
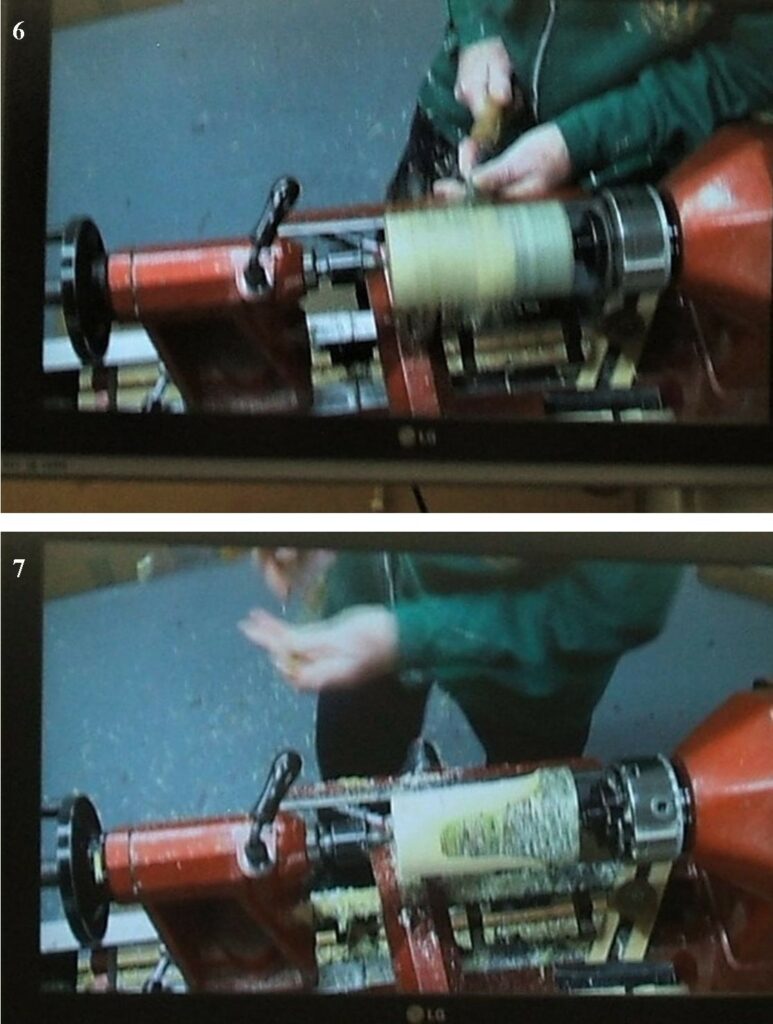
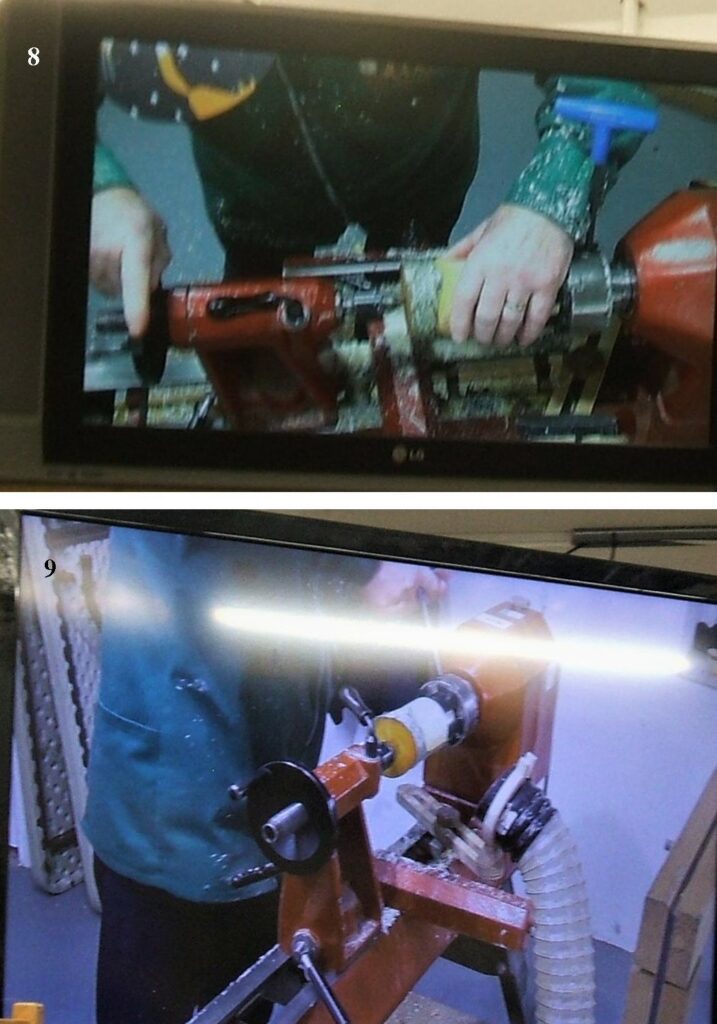
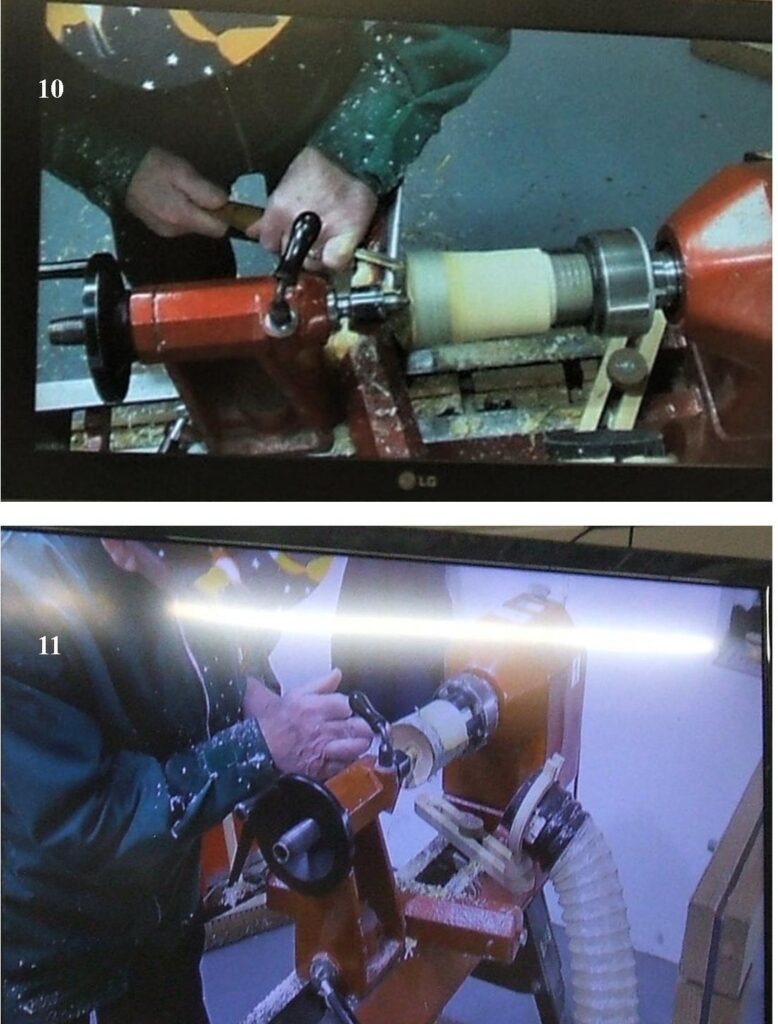
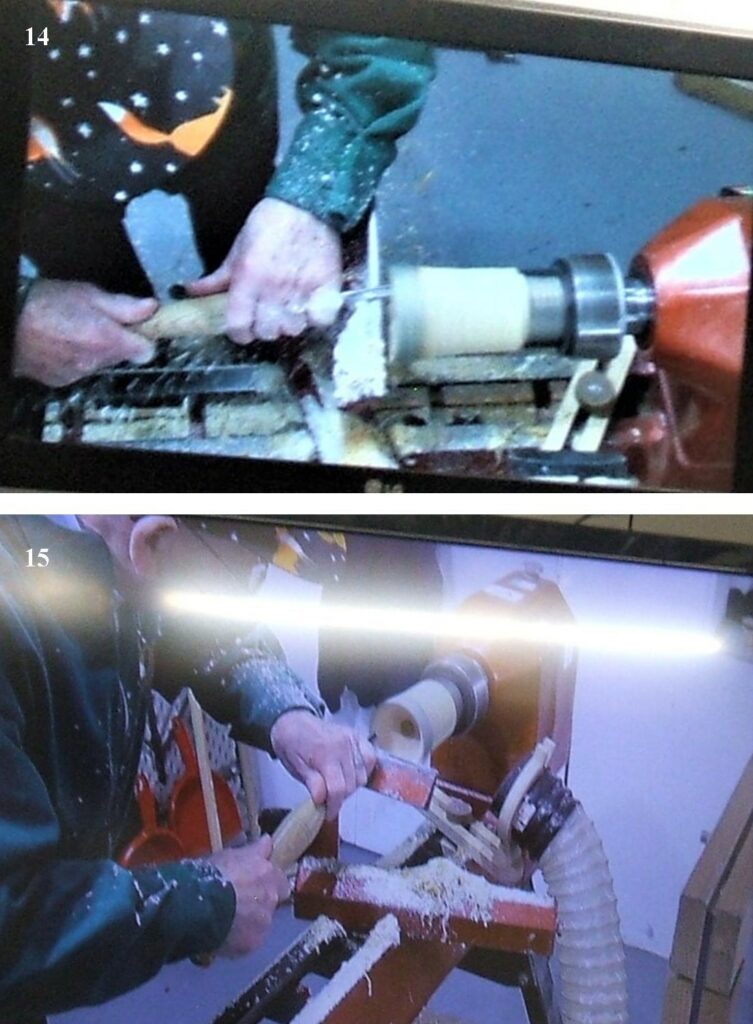
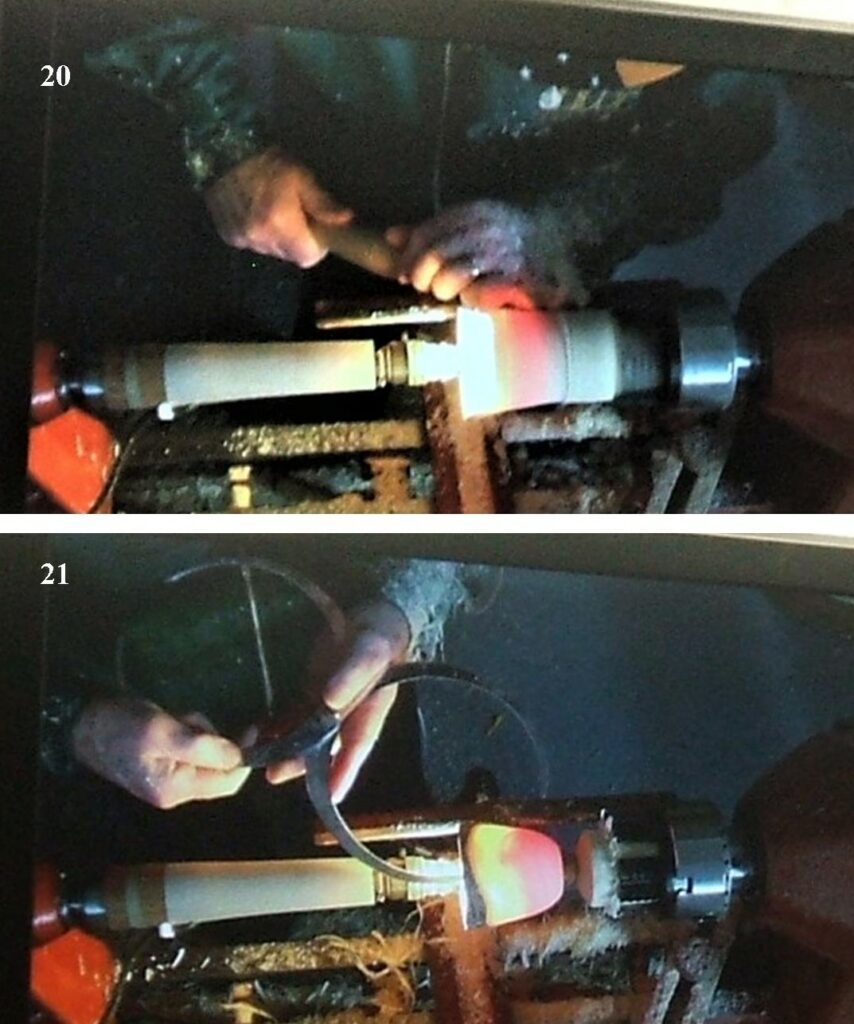
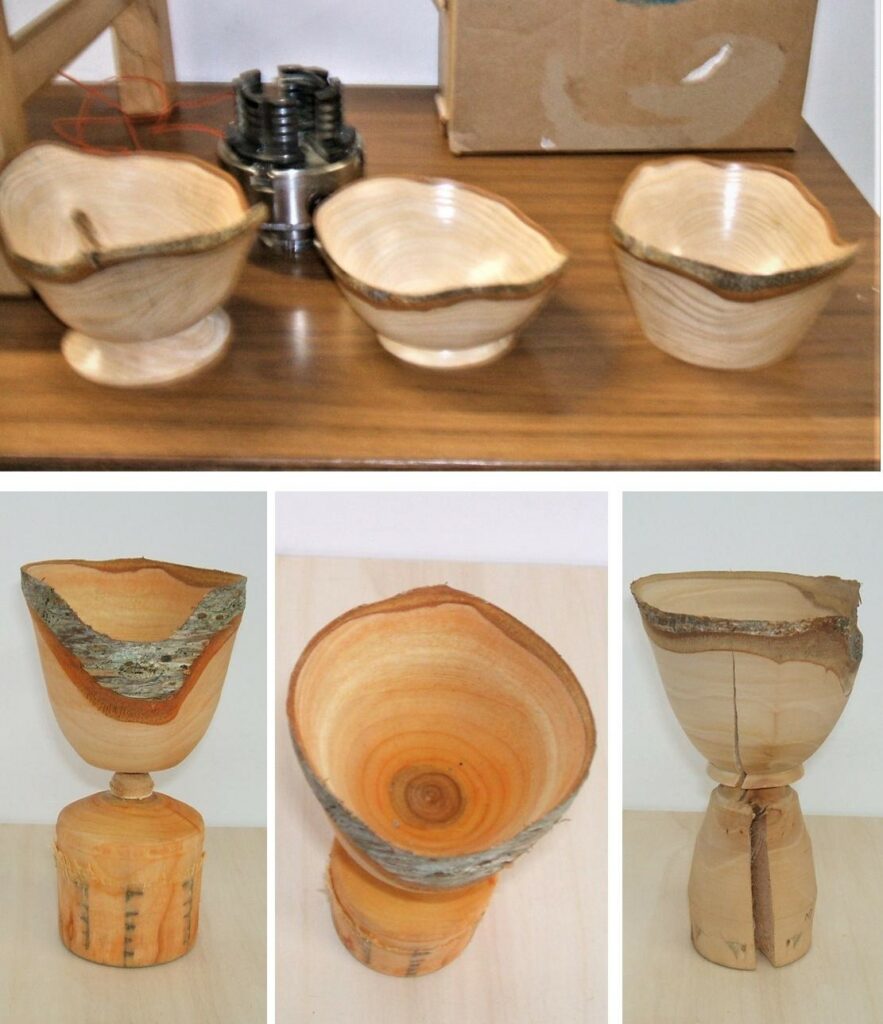
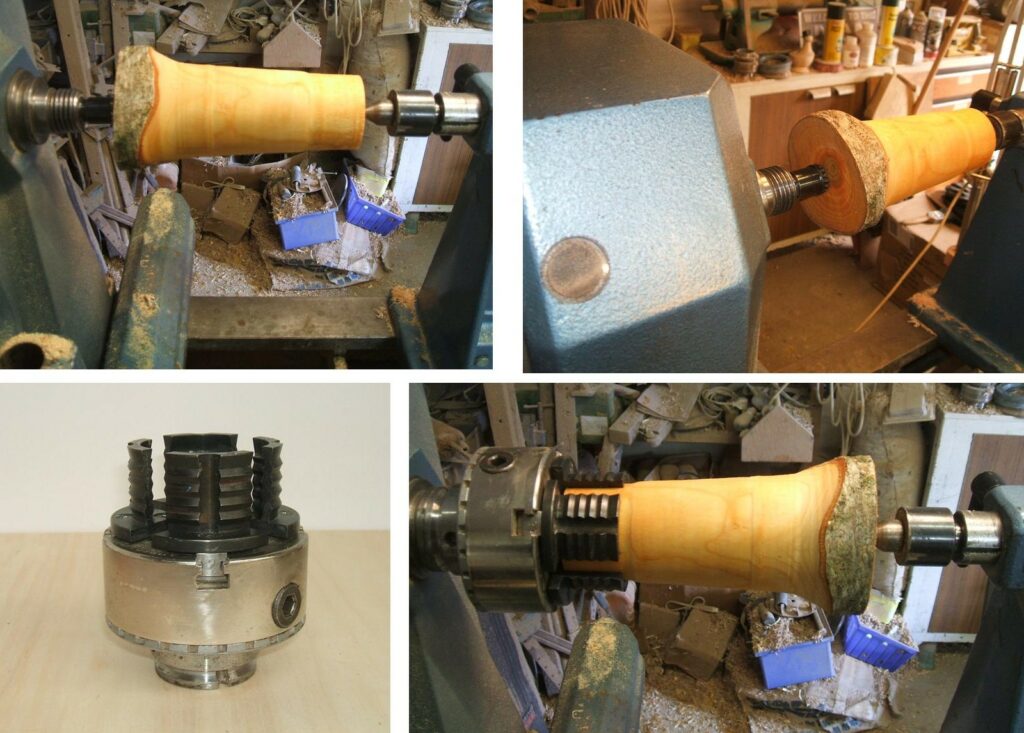
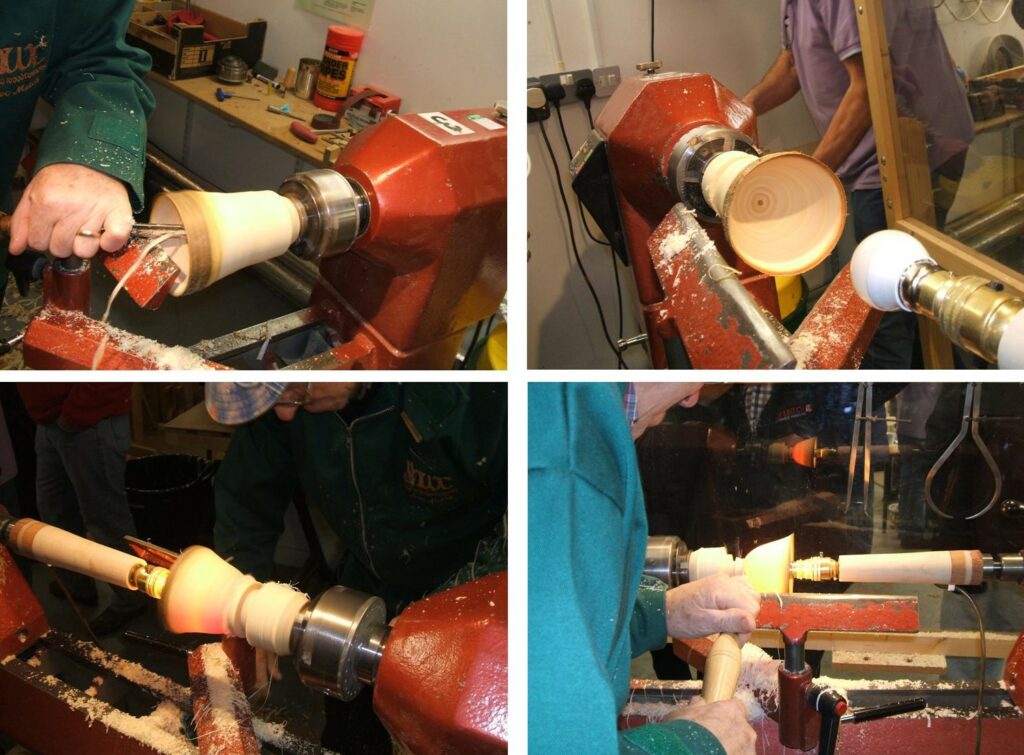
1, Here Geoff Potter did the introductions as I was the demonstrator for this meeting. 2 & 3, Here am I starting to lay out the centres on the piece of wood I was going to use, a very simple piece of equipment, a disc of perspex with a central hole and some guiding lines.4 & 5, mounting the blank on the lathe, a steb centre at the chuck end and a revolving centre at the tailstock end.6, making a start on removing some of the bark , leave 20mm of bark untouched at the chuck end. 7, the bark removed and the tailstock end now down to the size required to fit in the jaws of the chuck. 8, the blank now turned round and being mounted in the jaws of the chuck, I use a set of shark jaws for this type of turning. 9, the blank mounted between centres and here I am tightening the chuck.10, starting to cut the inside with a spindle gouge, keep the tailstock in place for the first few cuts. 11, the tailstock now to be removed.12, tailstock now taken away and the tool rest being repositioned to continue the inside. 13, using a small spindle gouge to continue the cuts inside, these were all done from the lip to the centre.14, continuing to cut the inside with a small spindle gouge, 15, still on the inside, care needed when starting the cut, keep the bevel running.16, checking the wall thickness with a double ended callipers, was about 6mm. 17, bringing the whole of the inside down to 6mm, the reduction to 2mm will be done from the outside.18, with the light source in place you can see the glow through the wood. 19, using a sharp spindle gouge I continued to pare the outside down following the colours.20, the outside almost there, just the base to be worked. 21, the base now worked, here I’m checking the wall thickness once again, now down to about 2mm.Top picture, Here are some more examples of end grain turnings I had made. Bottom left, the Vase/cup I worked on today, Centre, another view of the same Vase/cup, this item is now ready to go into the Microwave oven. bottom right, an earlier example that did not survive the Microwave oven, you can expect to get a success rate of about 80% using the Microwave method, you could leave it to dry naturally in which case it would take a few weeks.
Here are a couple of supplementary pictures of the process.
Top 2 pictures show how the wood is held initially, bottom left, the chuck with the jaws I use for this type of work, bottom left, the blank held by the shark jaws.Top left, cutting the inside. top right, the inside done, the light source being positioned. bottom left, the effect the light has on the wood, bottom right, following the light to complete the outside.
Most of the pictures taken by Nick Simpson.
The turnout was good, and the club members did participate in many questions.
Our next meeting is on the 16th March 2023, it’s a SHOWTIME meeting, bring and show the items you have made recently or over the years, you are allowed more than one item to show, infact, more the merrier.
This website uses cookies to improve your experience. We'll assume you're ok with this, but you can opt-out if you wish.AcceptRead More
Privacy & Cookies Policy
Privacy Overview
This website uses cookies to improve your experience while you navigate through the website. Out of these, the cookies that are categorized as necessary are stored on your browser as they are essential for the working of basic functionalities of the website. We also use third-party cookies that help us analyze and understand how you use this website. These cookies will be stored in your browser only with your consent. You also have the option to opt-out of these cookies. But opting out of some of these cookies may affect your browsing experience.
Necessary cookies are absolutely essential for the website to function properly. This category only includes cookies that ensures basic functionalities and security features of the website. These cookies do not store any personal information.
Any cookies that may not be particularly necessary for the website to function and is used specifically to collect user personal data via analytics, ads, other embedded contents are termed as non-necessary cookies. It is mandatory to procure user consent prior to running these cookies on your website.