Platters virtual meeting 14-05-2020

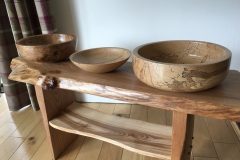
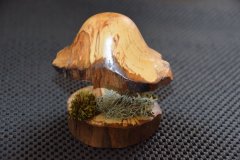
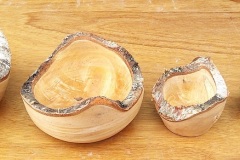
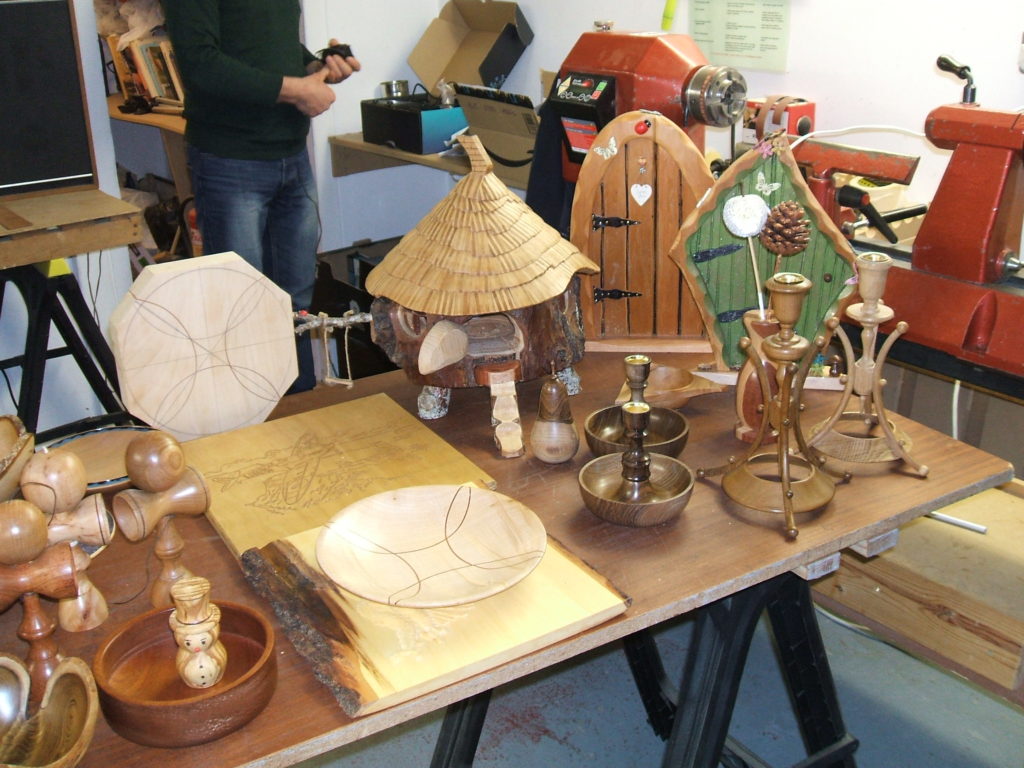
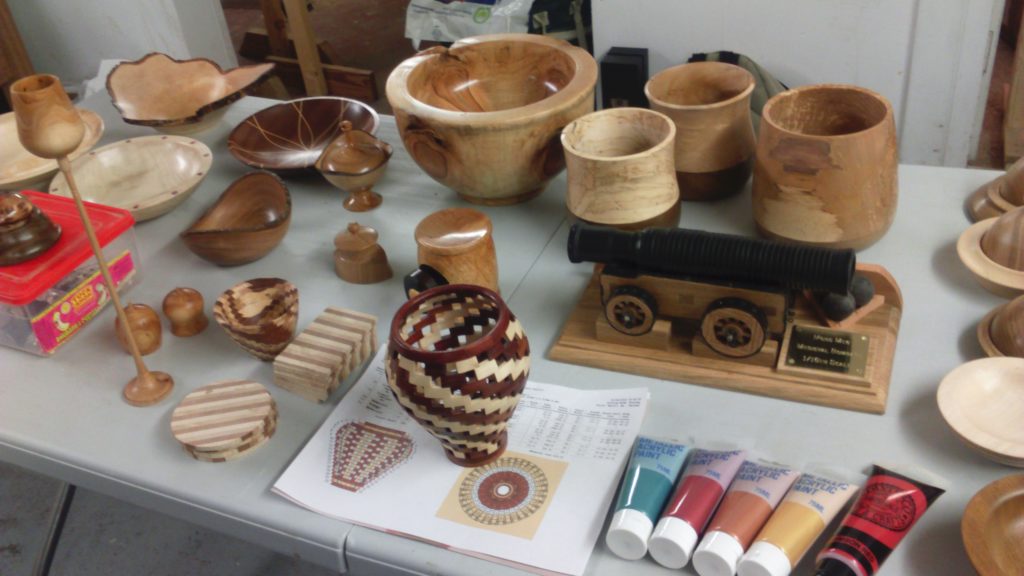
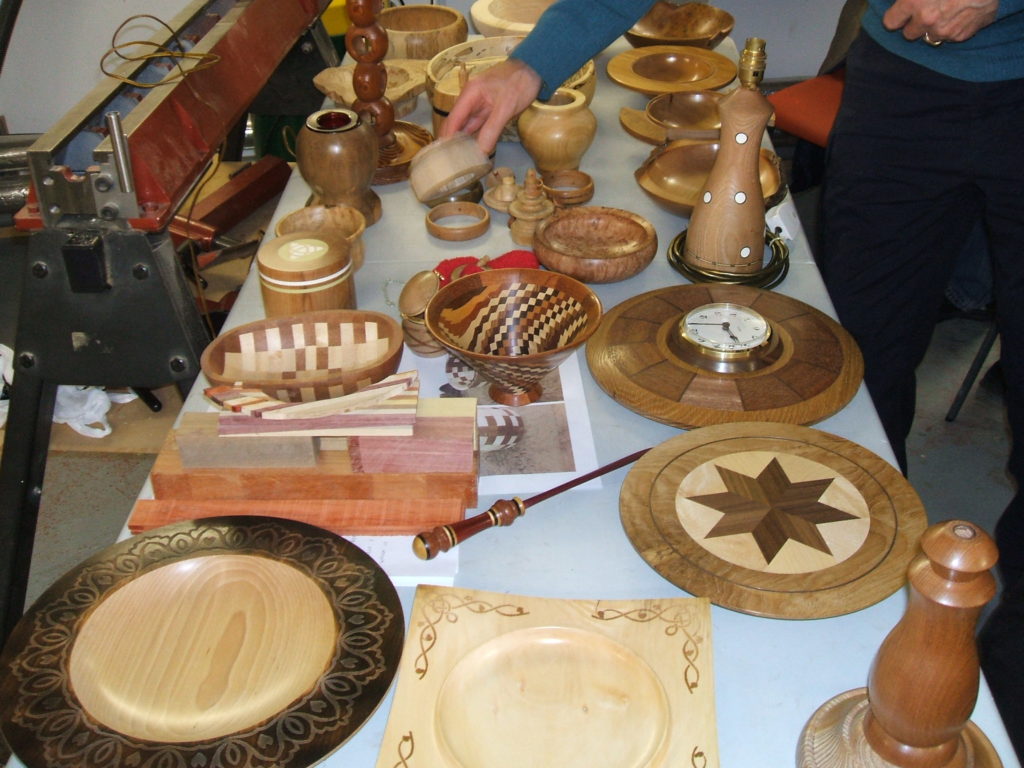
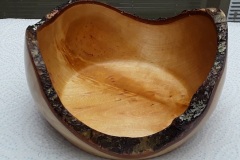
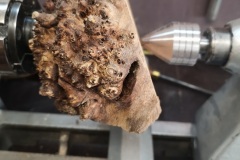
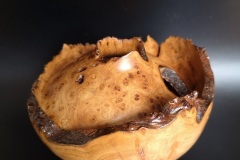
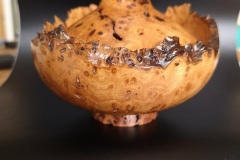
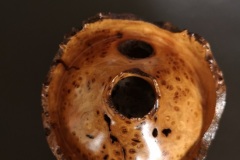
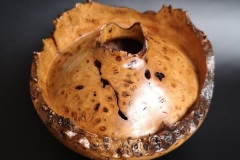
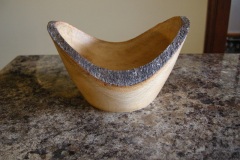
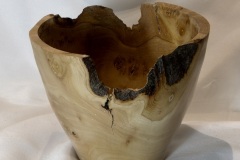
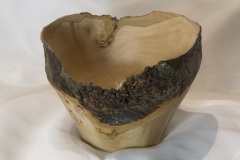
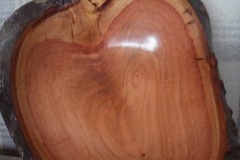
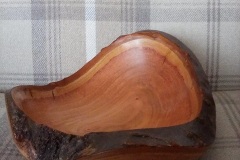
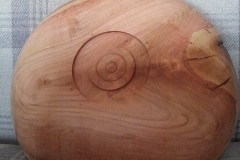
This Thursday 14th May 2020 would have been our meeting where platters were on the programme, it was to be organised by Peter Lawrence, however this meeting will now be done virtually over the internet and not at the clubhouse, to take part you need to make a platter or two, then photograph it or them and send the pictures to me along with some information, such as , type of wood used, size of item made and anything that may be of interest to the rest of the members. The platter can be made from any wood in any size and even laminated or decorated if you prefer. Below are some examples of platters that I have made over the years.

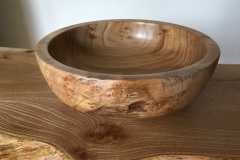
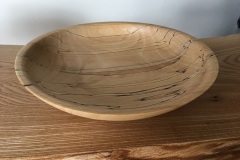
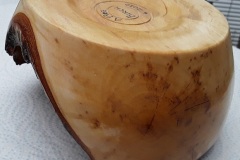
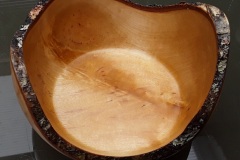
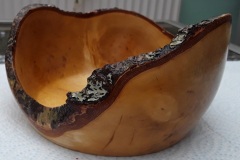
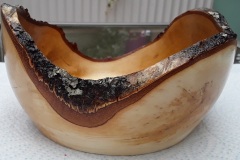
This platter was made from a piece of Wych Elm and measured 325 mm in diameter by 50 mm deep, Wych Elm is quite easy to recognize as it has these pale green streaks throughout the wood.
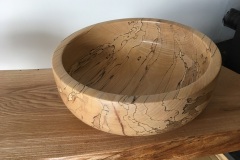
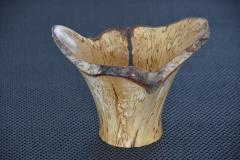
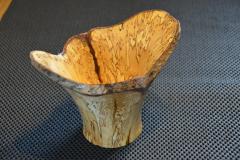
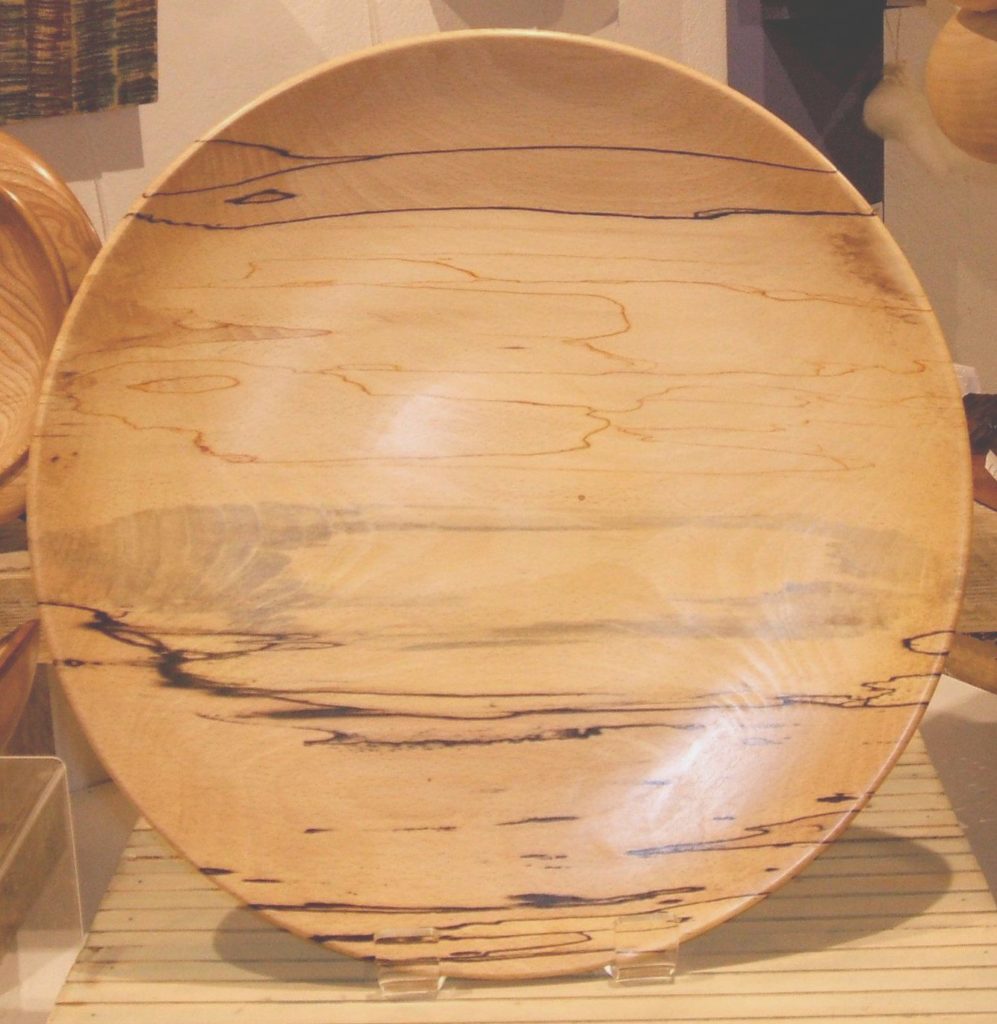
This large platter was made from Spalted Lime and measured 400 mm in diameter by 60 mm deep. The spalting turned this rather plain looking wood into something much more interesting, almost landscape like in appearance.
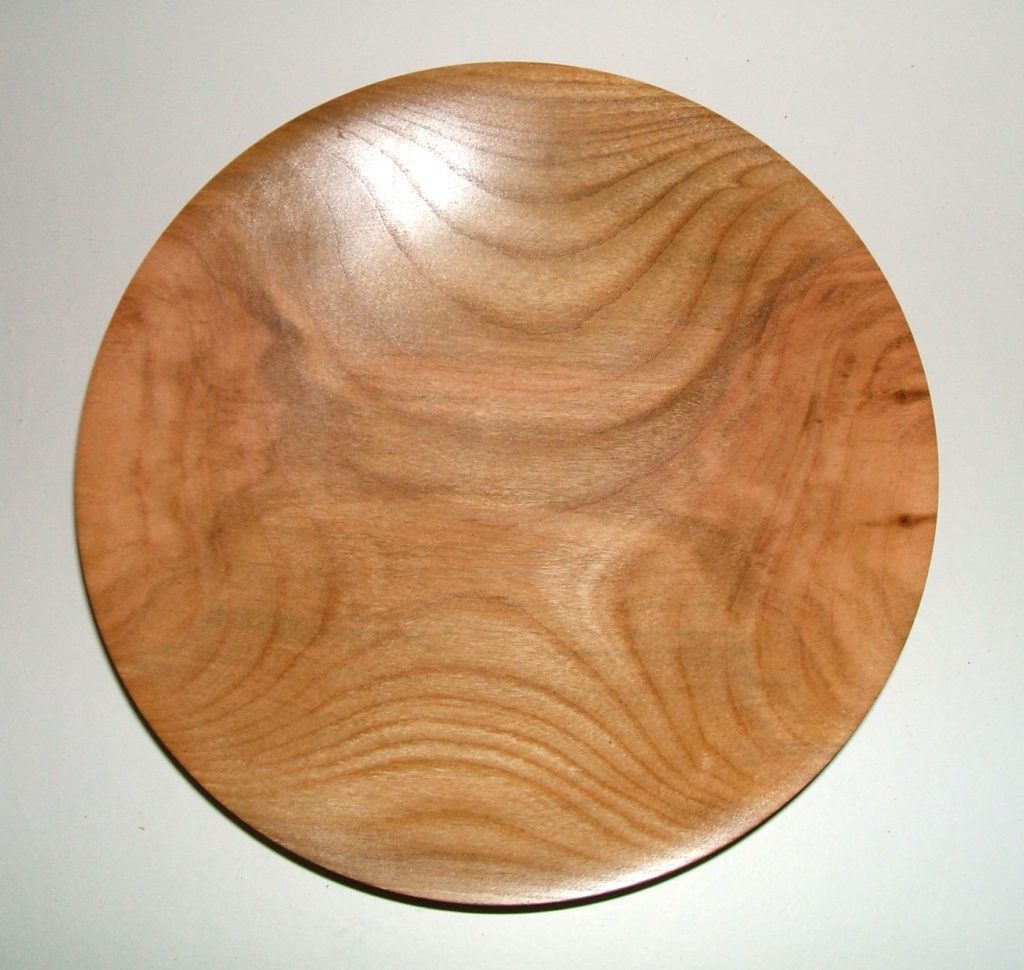
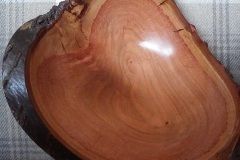
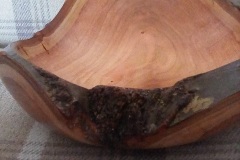
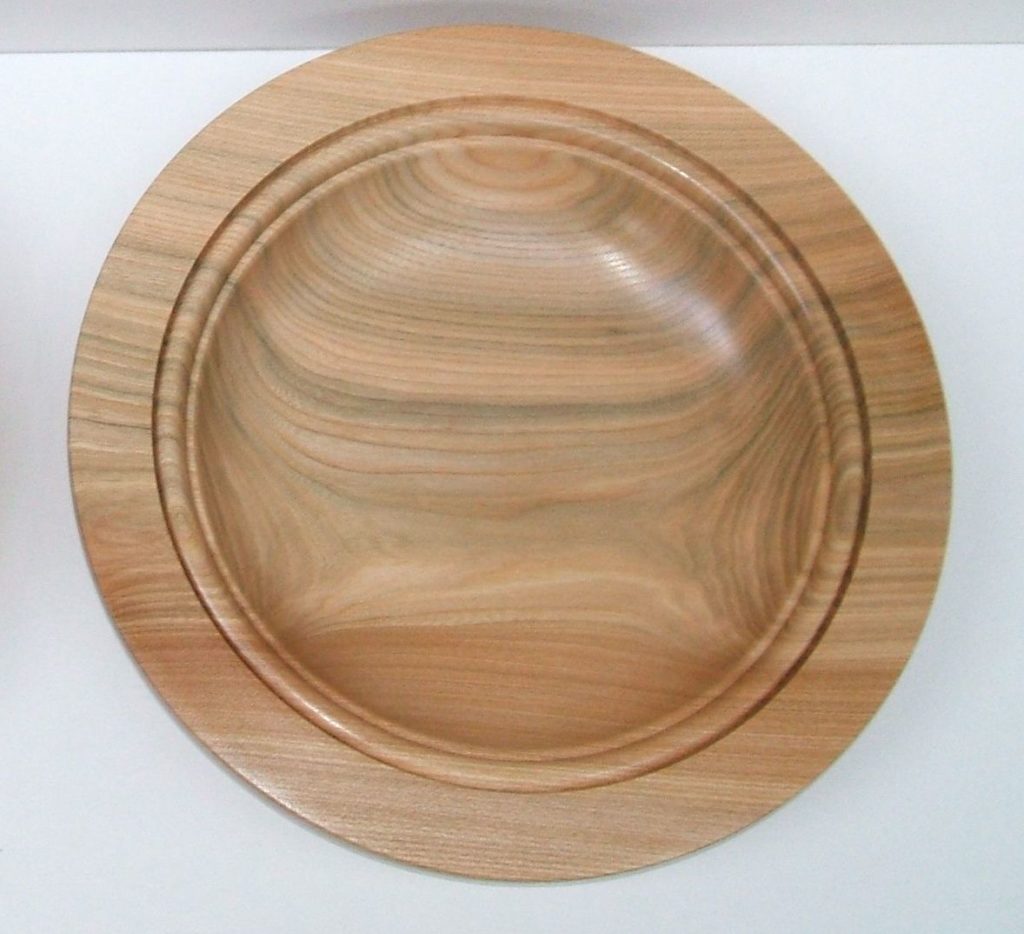
This platter although quite a bit smaller than the others was made from a piece of Native Cherry, the grain structure was so nice that I kept the design to an absolute minimum, it measured 250 mm in diameter by only 30 mm deep.

You are more than welcome to use any of my designs as an example for your platter but what we really want to see is for you to come up with your own design.

All pictures and text to arrive by Thursday 14th May 2020 and should be sent to me by email at,

a.j.mutch4321@btinternet.com

I have one more piece of information to pass on to you all, after the Prime Minister’s address on TV tonight nothing much in Scotland has changed, we are still under lockdown, our first minister has only relaxed the amount of exercise you can do, we are still all expected to stay home. As the lockdown situation changes we will be advising you of what we are doing to comply with the government regulations in regards re-opening the club. To that end we have already formed a sub committee, a task force to look into how we can open safely again, I am chairing the task force with Geoff Potter recording all meetings as secretary, John Ruickbie dealing with all safety matters as our safety rep, Nick Simpson dealing with all matters medical and Peter Lawrence representing the membership. As soon as we know anything you will be informed.

Do remember the clubhouse remains closed and do try to stay safe.

Members pictures 08-05-2020

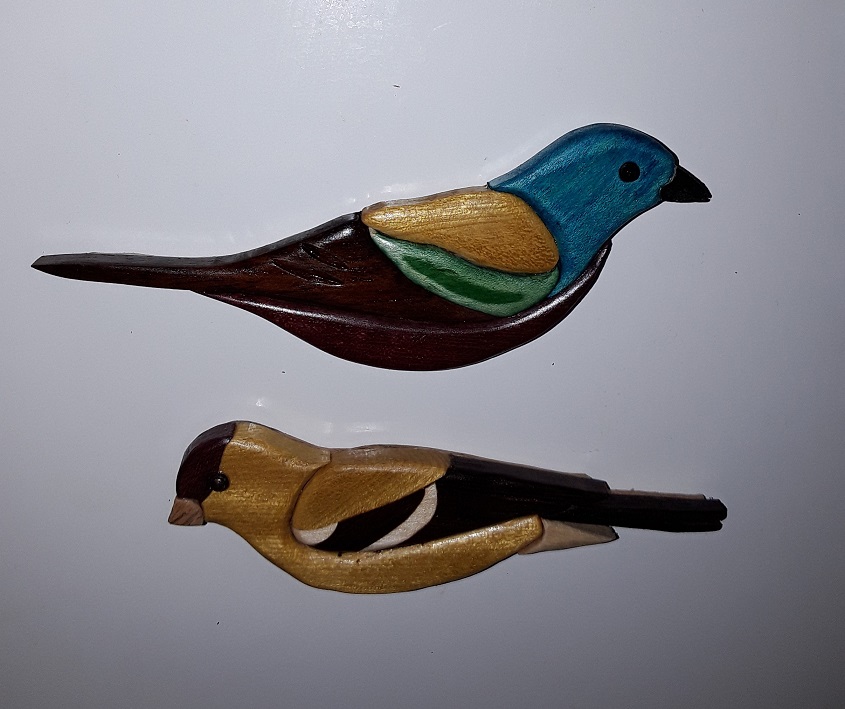
Just in today a picture from John Ruickbie, John’s usual work is mainly woodturning and that often consists of mainly laminated work pieces, however John admitted to me today that due to the lockdown he was running out of suitable woods for woodturning, this has led him down a different road where he has made use of a lot of very small pieces of wood in a wood craft called Intarsia, for those who are not familiar with Intarsia it’s very similar to that of Marquetry the main difference is that the Intarsia is cut 3 dimensional, where as the Marquetry are all cut very thin and all the same thickness. This is an art that requires a very good knowledge of shape and form and most of all very accurate cutting,

This is what John had to say about his picture,

I have attached a photo of my first attempt at intarsia they are fridge magnets and as you see use very little wood but require very accurate cutting. Some parts are natural wood others are coloured using spirit stain. They are assembled on a thin backing board with rare earth magnets inserted.

Regards John Ruickbie.

These are John’s Intarsia fridge magnets.

These are not woodturning in any way, but we are a woodworking club that specialises in woodturning but not to the exclusion of any other type of woodworking. We are always going to be accommodating to any other type of woodwork that any of you who follow the web site and facebook pages want to show, this will include anyone who is not a member but who follows the online service.

Please keep sending me your pictures and text, I’m sure the members are always looking to see what other members are doing.

Remember the clubhouse remains closed.

Servicing the Super Nova Chuck 04-05-2020

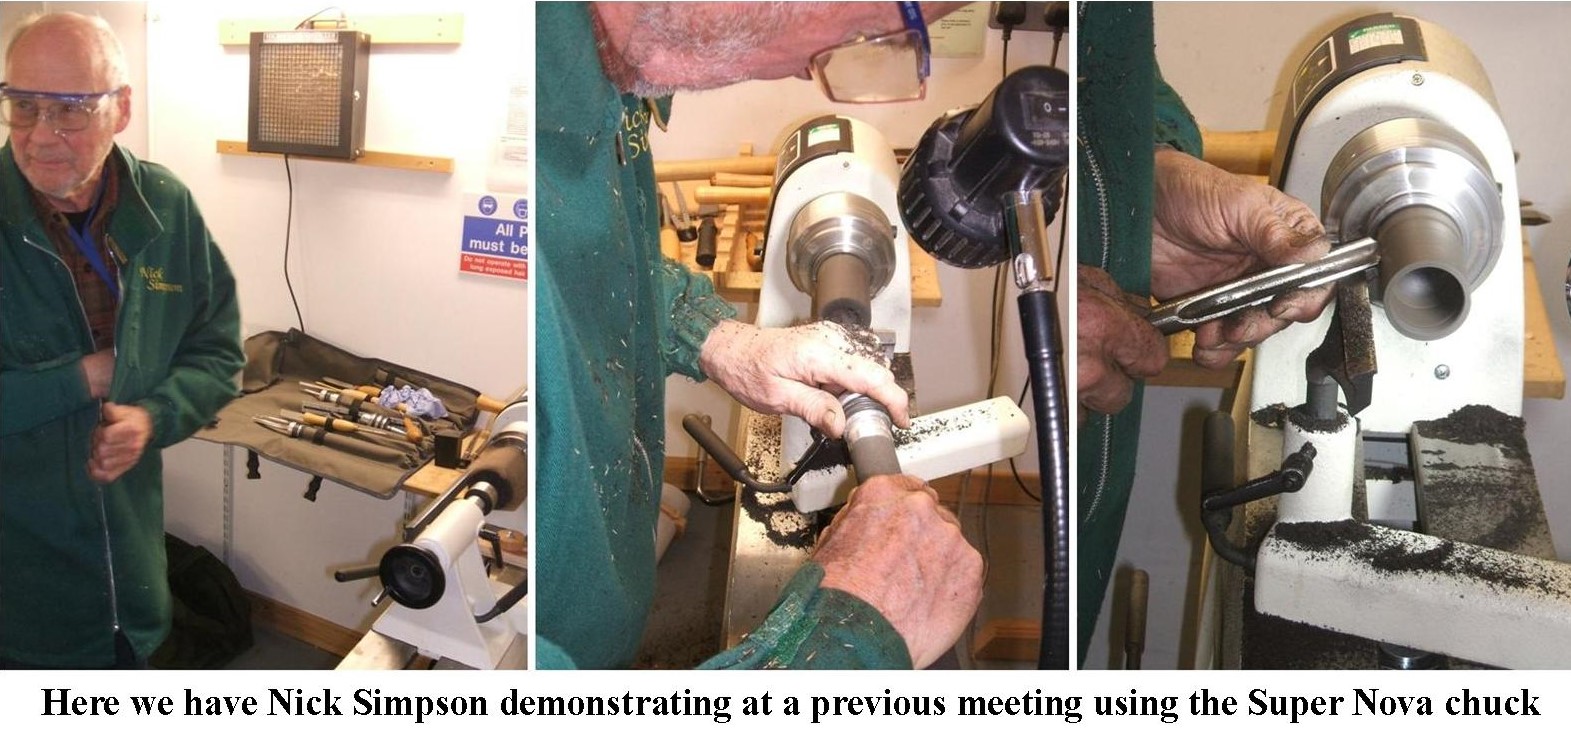
As most of you will be aware some servicing of some of the club equipment has been carried out whilst under lockdown. This is being done by Nick Simpson who brought all the bits of equipment back to his own workshop to do the servicing. Here is his report on the 2nd of the chucks he has serviced, a Super Nova 2 chuck.

Nick’s News  – Week 3

Servicing HWC Chucks – #2. Supernova 2

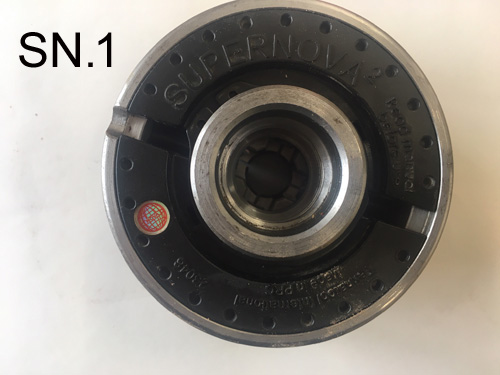
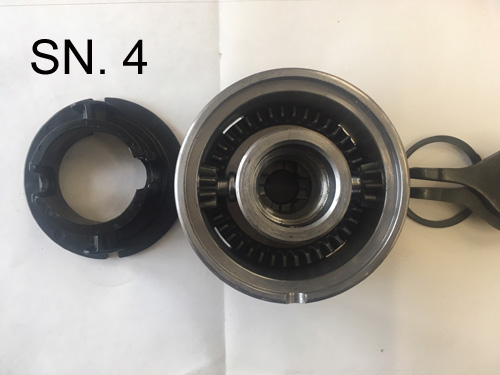
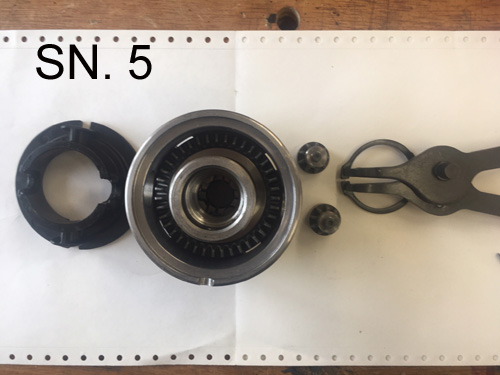
The SuperNova 2 is similar in design to the earlier Nova G2 but has a backplate which keeps the insides relatively free from dust and uses a rack and pinion drive for the scroll. It is important to clean the chuck regularly and re-lubricate. This is a simple process, which is illustrated in the accompanying photographs (SN.1-5). Details of cleaning and re-assembly are shown in the photos G2.D and F from my previous article posted by Alec on 25th April.

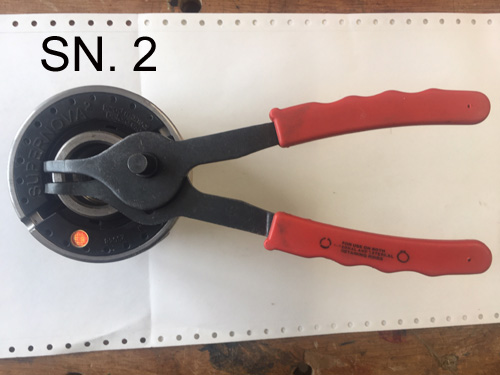
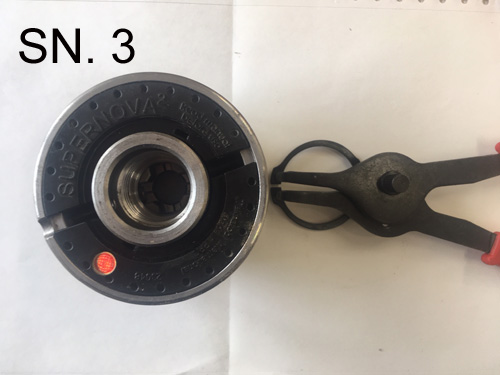
Picture SN.1 shows the rear view of the chuck when removed from the lathe. The backplate is seen in situ and is held in place by a circlip (SN. 2). The next step is to remove the circlip (SN.3). It is advisable to wear eye protection as the circlip is made of sprung steel and can ping off the pliers unpredictably. The back plate should fall out when the chuck is turned over. If it is reluctant to separate there are 2 slots which can be accessed by 2 small slotted screwdrivers and the plate can be levered off. The 2 pinions should now be exposed and withdrawn from the housing to expose the back of the scroll (SN.5). The scroll can now be removed by inverting the chuck.  Having removed the scroll, the jaw the jaw carriers may be slid out of their corresponding slots in the chuck housing. Each carrier is stamped with a numbers 1-4. For the SuperNova 2 chuck there is no need to record which slot the individual carrier came from. Now, in a well-ventilated area with nitrile gloves and eye protection, brush off all surfaces with a brass wire brush and then steep the parts in a de-greasing solvent (see G2. D in my previous report). I used paraffin but any solvent will do. Dry the parts on paper towel and leave to fully dry or to speed the process blow with compressed air using the above PPE.

Reassembly is the reverse process with certain caveats. Spray each part with lubricant prior to assembly. My preferred lubricant is PTFE spray, because it is a ‘dry’ lubricant, but any fine oil will do. Do NOT use grease of any grade. With the chuck on its back insert jaw carrier labelled 1 into any slot. Now insert all the other carriers in order 2-4 into slots in a clockwise sequence. Bring the carriers together so that their inner edges form a square and turn the whole over (G2. F of previous). You can now drop the lubricated scroll onto the jaws and with a little ‘jiggling’ it will engage with the carriers. Now replace the lubricated pinions and engage them with the teeth of the rack, replace the backplate locating the recesses over the appropriate pinion and refit the circlip and the job is complete.  JOB DONE.

Read the text and then use the corresponding numbered picture to understand what Nick has done.
You may have to look at the post on the G2 chuck servicing to follow the full procedure.

Nick is now working on the Patriot chuck, details of which will follow shortly. In the meantime I would like to thank Nick on behalf of the club members for all his good work on the servicing.

Report on our virtual Showtime meeting 30th April 2020.

Our normal Showtime meeting had to be cancelled due to the ongoing lockdown, however we made it a virtual meeting instead and invited our members to submit some pictures of the items they would have brought to the Showtime meeting. After some initial hesitancy in getting the members to take part, it all came together at the last minutes with 13 of our members submitting some 57 pictures, most accompanied by some text from the members.

I have split this into 2 parts, the first being the text or comments from each member, the 2nd a picture gallery of all 57 pictures.

Pictures 1 to 4 from Alec Macleod.

Hope everyone is well and coping ok in these troubled times. Attached are photos for showtime. Left to right witch elm burr, 10’ x 3.5’. The other two are spalted beech both from the one piece with the help of David Hay’s bowl saver. Large is 11’ x 3.5’ and the small 9’ x 2.5’. Really hope you get enough interest to keep the showtime going as I look forward to seeing what everyone is busy producing. Sorry I didn’t enter for the natural edge as I went through the bottom and ended up with firewood! All the best. 

Alec Macleod. 

Pictures 5 to 12 from Andy Smith.

Good Morning both of you and I hope you are keeping well.

Until I was furloughed recently along with a large % of the UK work force; in between 4 hours work daily from my “virtual office”, I have spent some time clearing and setting up my workshop, and have managed to produce alongside 2 bags of shavings, 

The pieces are in the attached zip files photos. I hope they are good enough to use. ( I may need to send a couple of messages due to their size.)

I have also produced various dibbers for the other half and friends to assist them in the garden during the exceptional weather we have had whilst being locked down.

As you will see there is a theme and these pieces are my first attempts at ” turning and associated wood working ” since my schooldays 50 years ago!!

I have a lot to learn and look forward to getting back to meetings which have been good source of information and knowledge for me.

Keep safe and thanks.

Andy Smith.

Pictures 13 to 16 from David Hutcheson.

Hi Alec, 

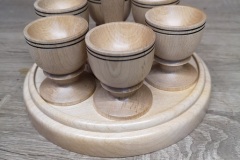
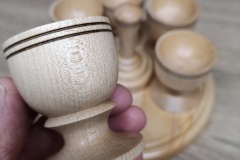
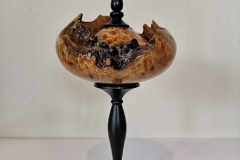
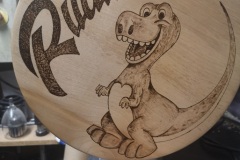
Totally forgot to send images for showtime as I’ve been busy with firewood etc. I’ve attached a few images for the boys to see. The Sycamore with the pyrography detail is for a child’s stool I’m working on. The detail is hand drawn and then burnt on and finished with melamine lacquer. The set of egg cups are in Sycamore with wire burnt lines and I find these are a great exercise in repeat turning as it’s harder than it looks to get 6 egg cups exactly the same or maybe that’s just me! Finally theres the wee elm hollow form which was saved from the firewood pile. It’s hollowed to about 3/4mm and has ebonised Ash for the stem and finial. The elm is finished with melamine lacquer and the ebonising was achieved by using chestnut finishes ebonising lacquer. I like the way the satin contrasts the gloss. Hope these are of interest and everyone is well and staying safe. 

Cheers Dave Hutcheson. 

Pictures 17 to 19 from Dave Line.

Hi Alec,

As this Thursday should have been showtime I thought I would show what I would have brought along under normal circumstances..

I made it for the Box competition but when finished decided it was a hollow form and not a box, It stands 150mm high and the lid is 90mm and 140mm Dia.

It is made from Ash with the feature ring beeing Sapele and sycamore..

It is finished with wood wax and friction polish.

Dave Line.

Pictures 20 to 23 from Errol Levings.

Just a quick show and tell from me.

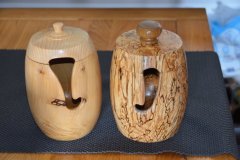
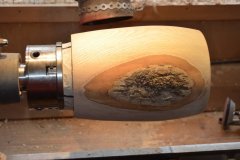
Two knitting bowls (with lids – barrels?)  On the left, single piece of pitch pine ex Fort Augustus Abbey, and still smells strongly! On the right, much spalted alder with elm handle.  My earlier knitting bowls had narrow slots for the wool thread – after seeing a ceramic knitting bowl recently, I decided the wide slot shape would be better to allow the ball to unwind more easily.  These bowls are 130×200 mm and 145x200mm respectively.  The barrel still on the lathe as I send these is the next knitting bowl in ash which will be open top.  I have left some of the bark on the sides as it looked very attractive, but had to be turned away from the top to avoid snagging the wool thread. it is approx 175 x 230mm and was quite difficult to hollow out.  It has helped me sort of master the Big Brother hollowing tool – and another lesson on the importance of keeping the cutting edge very sharp if you want any real control over the cut.
And a bit of decorated fun(gus!) This is from a branched piece of hawthorn that has spalted – it was a bit cracked and quite soft – I can’t recommend it for turning. Maybe fresher piece would be OK for turning and the wood is reasonably close grained, but this one went back to 2007 felling I came across in trying to do a bit of tidying up of my overflowing wood store.

I hope you get some more response from the members.  I am not very fond of Facebook or any of the other social media, and I suspect many of the club members are likewise minded.  I am happy with emails, though, to alert/remind me to head to the HWC web page!

Cheers

Errol Levings.

Pictures 24 to 28 from Geoff Potter.

Alec 3 photos for showtime 1. 

4 weeks ago these pieces of birch were about to break into leaf in my neighbours garden. My neighbour’s chainsaw stopped it in its tracks. He kept a large crotch and a smaller crotch for me which I quarantined for 3 days. I split the pieces with an axe and turned them still green. In fact the sap sprayed the wall behind! I used a screw chuck on the bark top side, turned a spigot or mortise on the base and completed the rough turning all at once. I have left the bases and sides about 15mm thick so I can return to finish them off when they have dried a bit. They have been in and out of a plastic bag since I turned them. They are now much drier and there is no sign yet of any cracking. Green turning is so exciting, the shavings go over your shoulder in ribbons. As usual I got carried away and the bases are a bit thinner than I intended. The bark is still on and they will end up as natural edge bowls. I stupidely turned off the spigot on the smaller ones due to over enthusiasm, so I will need to devise a jam chuck to finish those off!!

Geoff Potter

2 photos for showtime 2. Pictures 4 & 5.

This is the completed jewellery tree which I was making at the Club meeting in January, so long, long ago. The body of the tree is made by off centre turning. The eccentric centres on the revolving centre end are c. 10 to 15mm offset only. The head end is gripped in the chuck and stays there all the way through. I made a softwood practice version to test the looks of the design.

The base has a top recess for earrings. The little arms are for rings and bracelets. The neck can be used for necklaces.

The finished article is completed with sanding sealer followed by melamine.

Geoff Potter

Pictures 29 to 33 from Hamish Stuart.

Hello Alex ,not sure if these are any good for the web but saw your plea for items .All these were made from spare bits of wood that I have been practicing on for a wee while. Have no idea what kind of wood but I’m quite happy with the results. Feel free to put any of these on the site along with any comments .

Regards

Hamish Stuart.

Pictures 34 to 38 from Jeff Buttress.

Attached are my woodturning efforts this week.

The live edge ‘bowl’ is 165mm long x 65mm high from a full laburnum branch at 100 diameter. Due to the small size of the timber I started with I ended up with a spigot rather than a recessed foot. I should have started with a larger diameter log but my lathe doesn’t have the weight to safely hold an unbalanced piece of timber. I will have to leave this type of turning until I have a heavier more robust lathe. I had a bit of a problem sanding the inside wings and finally did these with a bowl sander attachment on an electric drill with the lathe switched off. The two mushrooms were from a yew log I won in the club raffle 70mm diameter x 270mm long and cut in half. I used a hot glue chuck with tailstock support and I’m quite please how these turned out. I did have a bit of a problem with the undercut between the stem and cap, I had a few dig ins!  Finally used 6mm parting tool then very light cuts with spindle gouge but I was very apprehensive during this stage, the second mushroom was a bit better in this area. Once parted off I had a bit of a job getting rid of the centre nib, I left it a bit on the large size for cutting off by hand. I’m going to do a bit more work on the bases of the mushrooms to get a better finish. All 3 pieces finished with sanding sealer then melamine lacquer.

Jeff Buttress

Pictures 39 to 45 from John Ruickbie.

For showtime I decided  to make a segmented bowl using the Indian blanket pattern as described  in the book by Malcolm Tibbets. I have made this design  before but thought it would be something different and had some bits of beech and elm which could be used in strips as they weren’t very much use for any other use. This pattern makes quite a large segment so a large bowl is the result. For the feature ring I used wenge and sycamore  I took a chance with this combination as the wenge bleeds into the sycamore. I was able to finish the outside with a good cut off the tool leaving minimal sanding but some bleeding occurred on the inside. Another error occurred with the block sizing leaving to little room at each end but I carried on regardless. I have included some pictures during the construction showing the multi lamination method of building the block. The final block consists of two half blocks glued together hopefully the pictures will show this.

Regards,

John Ruickbie.

Picture 46 from Martyn Torode.

Had a go at some toadstools today, got some pieces of what I think is cherry from the stick shed so not well seasoned. The biggest one is 7 inches tall and all finished with wax polish.

Hope you’re well.

Martyn Torode.

Picture 47 from Nick Simpson.

This composite was going to be my entry to Showtime.

It is an armistice tribute made entirely from turned wood in the style of WW1 trench art. It is currently on loan to Poppy Scotland and can (in normal times) be seen at their Inverness office.

It is 1: 1.5 scale as judged by the 9pdr shell casing. The platter is about 7” diameter.

The platter and 9 pdr case are sycamore; the rifle shell cases are holly, the fags are pine and the poppies with the ‘Poppy Scotland’ 4 petals are stained Ash.

Finish was by sanding, ebonizing spray then Rustoleum Gun Metal spray cut back with XXXX wire wool.

The candle was lit only for demonstration as it is not in a metal holder.

Thanks for letting me show this piece.

Regards,

Nick Simpson.

Picture 48 from Tony Wilson.

 I sent this to Alec earlier today.I didn’t appreciate you wanted a comment.

Mine would be that these French rolling pins are good for ‘limited’ turners and well received in these times of home baking.The wood was spalted Maple and the finish was ‘Woodsafe’ oil in several layers.

All the best, 

Tony Wilson.

Pictures 49 to 57 from Alec Mutch.

My own entries for the showtime are as follows,

1, A candelabra I made for a church, made from Elm.

2, My flock of birds, made from Poplar for the bodies with heads of various darker woods,      all the bases were burr Elm.

3, A splated Birch bowl with an element of natural edge left in, size, 205 mm in diameter by 150 mm deep.

4, A very large Burr elm bowl I made for a local couple, the wood came from them, it measured 525 mm in diameter by 240 mm deep.

5, A pair of bowling balls turned into a table lamp and a small bowl, the wood is Lignum Vite.

6, A Beech double compartment bowl, getting the 2 hollows identical is quite tricky.

7, An Elm plate with a Pebeo paint rim decoration, the plate was 300 mm in diameter by 50 mm deep.

8, Candle stick made from Beech, turned then cut and re-assembled, design by Stephen Hogbin from Canada.

9, Triple compartment bowl, made from Sycamore in the shape of a clover leaf, size about 250 mm by 250 mm.

All my work is finished using the same procedure, one coat of sanding sealer rubbed back with steel wool, followed by one coat of Melamine buffed to a soft sheen with a paper towel.

Regards to all,

Alec Mutch.

I would like to take this opportunity to thank all of you who took the time to make your work pieces and for sending your pictures to me, I hope this will give you all encouragement to take part in future virtual meetings, after all it’s the only way we can keep in touch at this present time.

Our next virtual meeting will be on the 14th May 2020, that meeting was programmed to be all about making wooden platters, it was being organised by Peter Lawrence. It’s time to start to think about that virtual meeting now, so get your thinking caps on and make something really special for the platters virtual meeting, once made, send your pictures to me and I will upload them to our web site . In the meantime you can send me any pictures of anything else you have made or experienced and we will also accept any pictures from non members who follow us on facebook or indeed this site.

Do remember the clubhouse remains closed.
Showtime virtual meeting 30-04-2020

The showtime meeting scheduled for the 30th April 2020 has now become a virtual meeting, (it will not take place at the clubhouse) we will be treating this meeting on line. We need you all to send in your pictures and some text on the items you would have brought to the showtime meeting, you can send in more than one picture, in fact more the merrier. We had a reasonably good response to the last virtual meeting on Natural edged turnings, we had 44 pictures for that meeting, I want to see at least this amount, preferably more for this virtual meeting, remember it can be of anything you have made turned or otherwise, we are looking for a very good response so please send me your pictures along with a bit of information on each item.

Here are some of the items you brought in for the showtime meeting on 15-02-2018.
These are some of the items you brought in for the showtime meeting on 21-06-2018
Here are some of the item you brought in for our last showtime meeting on 05-09-2019

Get busy in your workshops and produce as many items that you can. we want to see lots of entries.

Send your pictures and text to me by email to a.j.mutch4321@btinternet.com

All entries to be received by Thursday 30th April 2020, and thank you for taking part.

Do remember the clubhouse remains closed.
Chuck maintenance while closed 25-04-2020

Although we have been closed for over a month now, we have still managed to get some useful work done with some of the equipment. Shortly after the lock down was announced Nick Simpson who is tasked with the maintenance brief offered to pick up all the lathe chucks and take them to his premises and do a full service on all of them. In addition to this John Ruickbie has been checking the premises regularily for security reasons.

Here is Nick Simpson’s report on the first of the chucks.

Nick’s News  – Week 2

Servicing HWC Chucks – #1. Nova G2

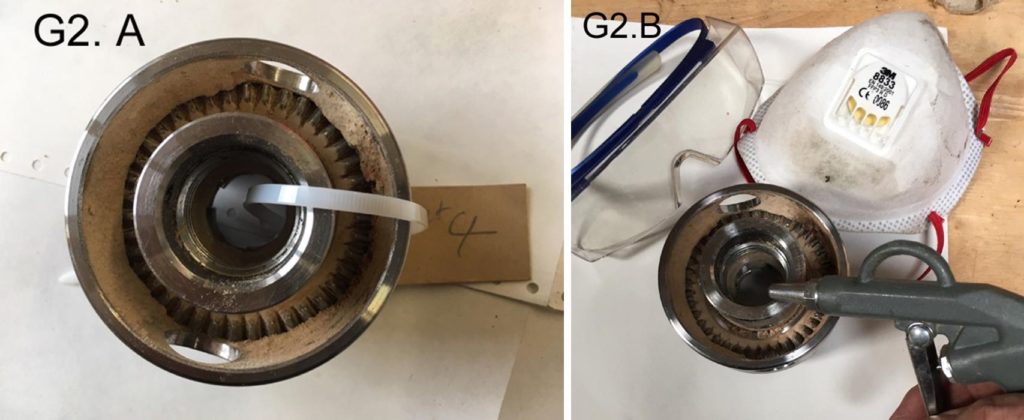
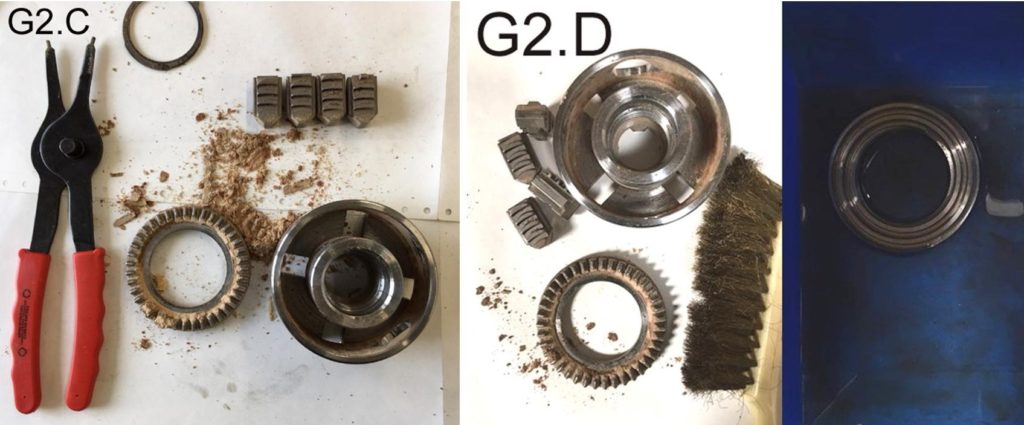
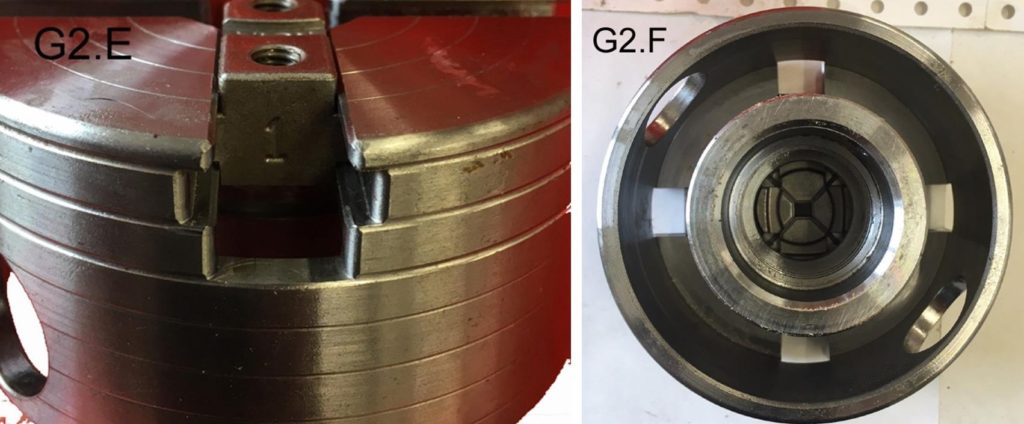
The Nova G2 chuck has an open back and is therefore certain to accumulate dust in all moving areas. This will lead to stiffness and potential jamming. It is important to clean the chuck regularly and re-lubricate. This is a simple process, which is illustrated in the accompanying photographs (G2. A-F).

Picture G2. A. shows the rear view of the chuck when removed from the lathe. There is a large amount of accumulated dust which partially obscures the teeth at the rear of the scroll plate which engage with the chuck key. The scroll is held in place by a circlip which must be exposed by removing the accumulated dust and debris. A simple way to do this is by compressed air jet as shown in G2. B.  PPE is essential with eye protection and a dust mask. The next step is to remove the circlip (G2.C). It is advisable to wear eye protection as the circlip is made of sprung steel and can ping off the pliers unpredictably. Having removed the scroll, the jaw the jaw carriers may be slid out of their corresponding slots in the chuck housing. Each carrier is stamped with a numbers 1-4 (see picture G2.E). For the Nova G2  chuck there is no need to record which slot the individual carrier came from. Now, in a well-ventilated area with nitrile gloves and eye protection, brush off all surfaces with a brass wire brush and then steep the parts in a de-greasing solvent (G2. D). I used paraffin but any solvent will do. Dry the parts on paper towel and leave to fully dry or to speed the process blow with compressed air using the above PPE.

Reassembly is the reverse process with certain caveats. Spray each part with lubricant prior to assembly. My preferred lubricant is PTFE spray, because it is a ‘dry’ lubricant, but any fine oil will do. Do NOT use grease of any grade. With the chuck on its back insert jaw carrier labelled 1 into any slot. (G2.E.). Now insert all the other carriers in order 2-4 into slots in a clockwise sequence. Bring the carriers together so that their inner edges form a square and turn the whole over (G2. F). You can now drop the lubricated scroll onto the jaws and with a little ‘jiggling’ it will engage with the carriers. Now replace the circlip and the job is complete.  JOB DONE.

Having now seen the pictures showing all the dust that has accumulated in the workings of the chuck, I think this servicing was long overdue, and I have to thank Nick on behalf of the whole club members for volunteering to do this work at this time. We will be looking at all the club equipment as soon as we get back to anything like normal to make sure the maintenance on all our equipment is carried out.

I will be doing a post shortly on the Showtime meeting that was due to take place on the 30th April, (that meeting will not happen, but hopefully we can have a virtual meeting). Watch this space.

Do remember the club remains closed.
Project for you all to make a wooden mushroom. 23-04-2020

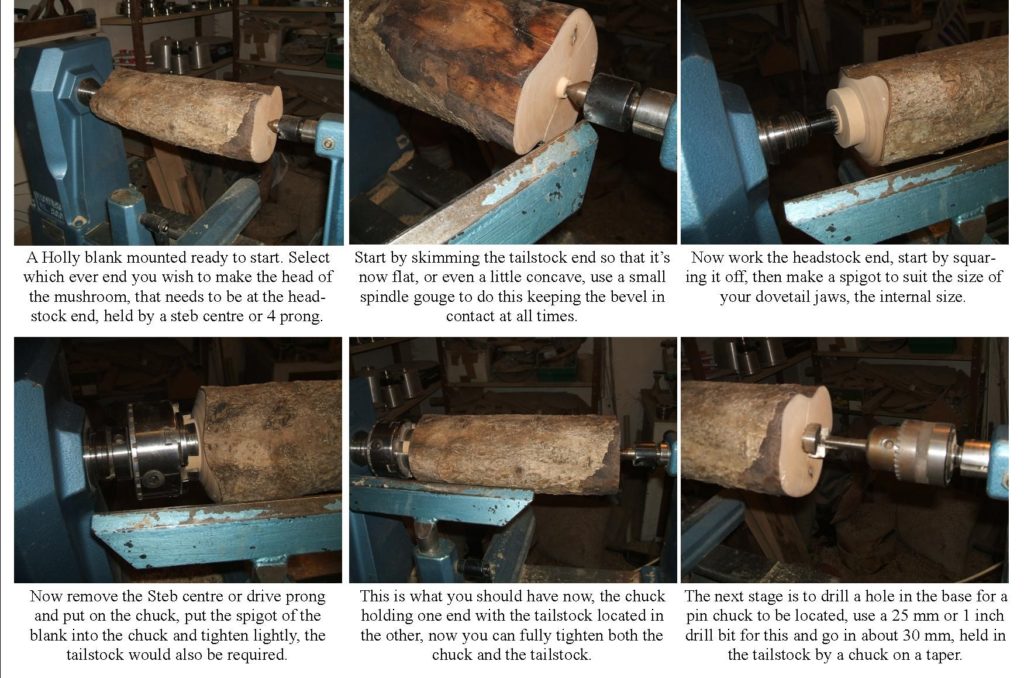
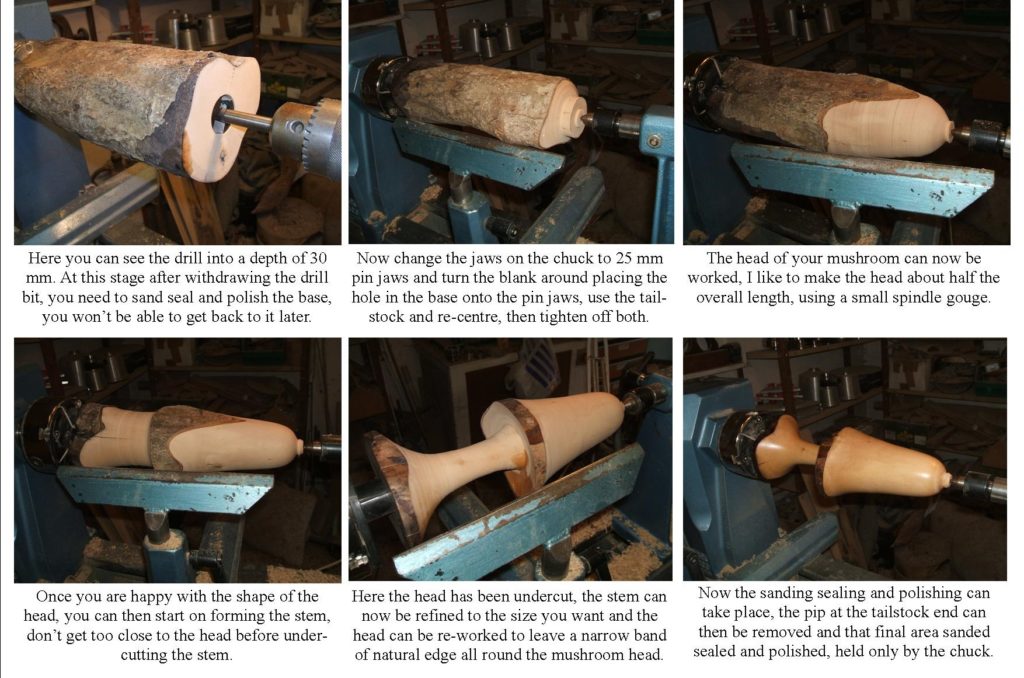
Here is a little project for you all to have a go at, make a wooden mushroom, you don’t need a lot of timber for this project any bit of branch wood will do, even something out of your garden, don’t worry if it ‘s not quite dry or what shape it is, just use what you can. I have put together some pictures with a little text to guide you through the making of a wooden mushroom, I hope it will be helpful to some of you. The mushroom I have made did not require a lot of tools, a thin parting tool along with a couple of spindle gouges, the lathe chuck did have 2 sets of jaws, the standard dovetail jaws and a set of pin jaws, it also used a forstner drill bit and a morse taper drill chuck for the tailstock end.

Using a pin chuck means that you can hold the mushroom by this method to firstly remove the pip at the head of the mushroom without it causing any difficulties this would include the final sanding, sealing and polishing, and secondly there is no need to part the mushroom off when finished, just release the jaws and the mushroom comes off finished.
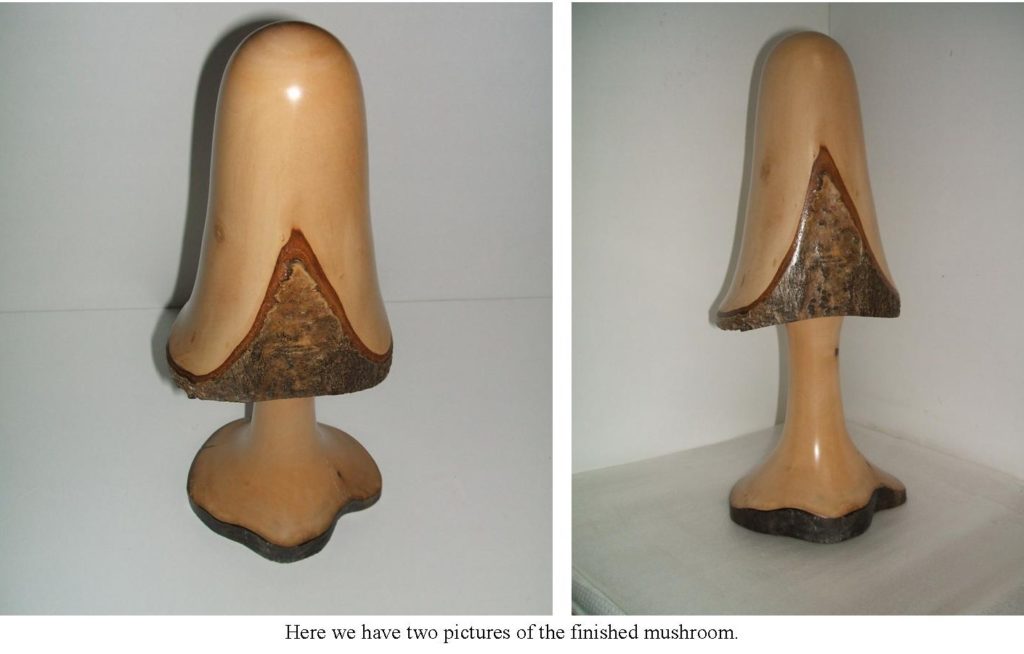
If you don’t have a pin chuck, a screw chuck will also do the same job, as indeed will a hot melt glue chucking system, I have the details of a mushroom made using the hot melt glue method on my web site along with a much more detailed account of how it’s made.

http://www.howtodowoodturning.com/mushrooms

Let me see any that you make. please send me the pictures.

a.j.mutch4321@btinternet.com

Alternative to woodturning 22-04-2020

I’m sure most of us are enjoying the nice weather we are having at the moment even in spite of the lockdown, that is those of us lucky enough to have a garden. I know I have been taking advantage of this fine spell to get my vegetable patch and tunnel greenhouse planted with this years seeds for the coming season. Now it’s on with cutting the grass, and I have a lot of it but the tractor mower makes light work of it. I have received some pictures and text from Nick Simpson that may just assist with your planting, it does also have an element of woodturning involved, so this post is not so much off the usual approach as may at first glance be thought, here is what nick had put through to me,

Nick’s News – Week 1

Seed Pot maker

This is a simple 2-part combination project which is useful and cost-saving for every gardener.

The principle is to produce seed pots from newspaper. These can then be planted directly into the ground and avoid the inevitable ‘check’ in growth that occurs with transfer from plastic pot to ground.
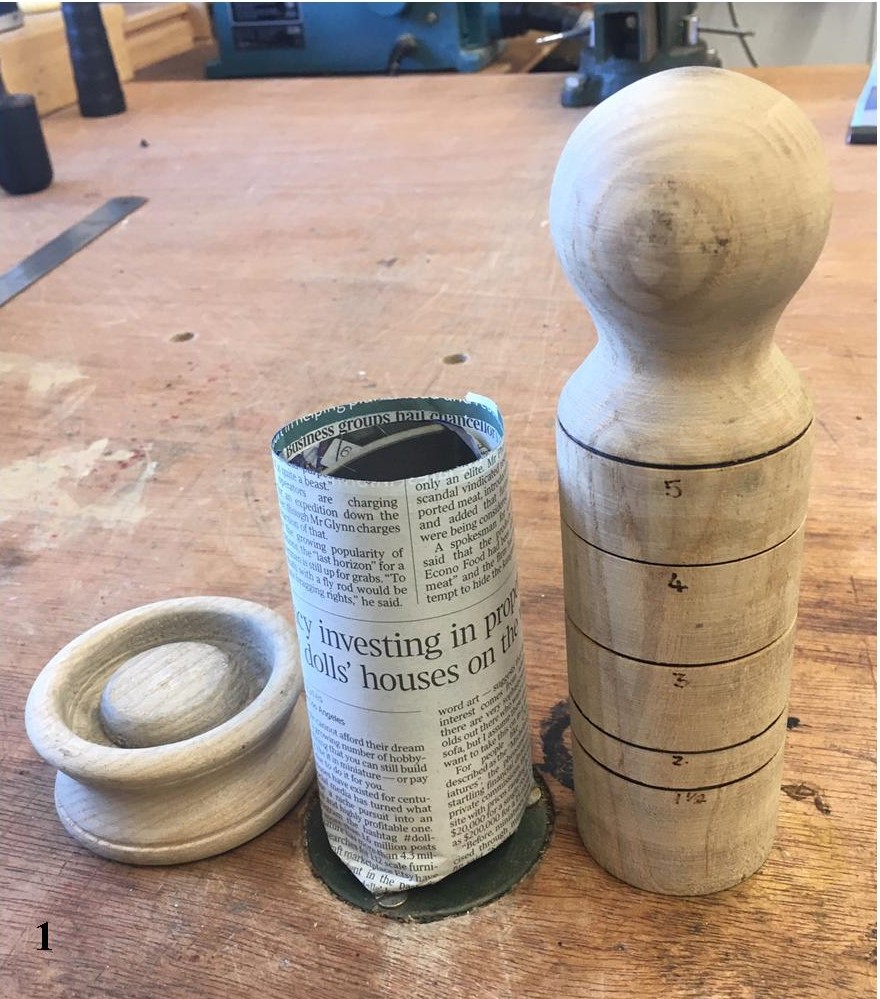
Picture 1 shows the two turned items and one newspaper seed pot. Pictures 2 and 3 show the dimensions of the 2 elements. I prefer to use Ash but any wood including pine will do. The potmaker tool is turned between centres and the base-forming tool is cross-grain. There is a 10mm deep recess with 5mm thick walls at the base of the potmaker tool. This recess and the dome on the base-forming tool form the firm base of the pot. It is important that the potmaker tool has a slight taper so that the pots can be slid off easily.
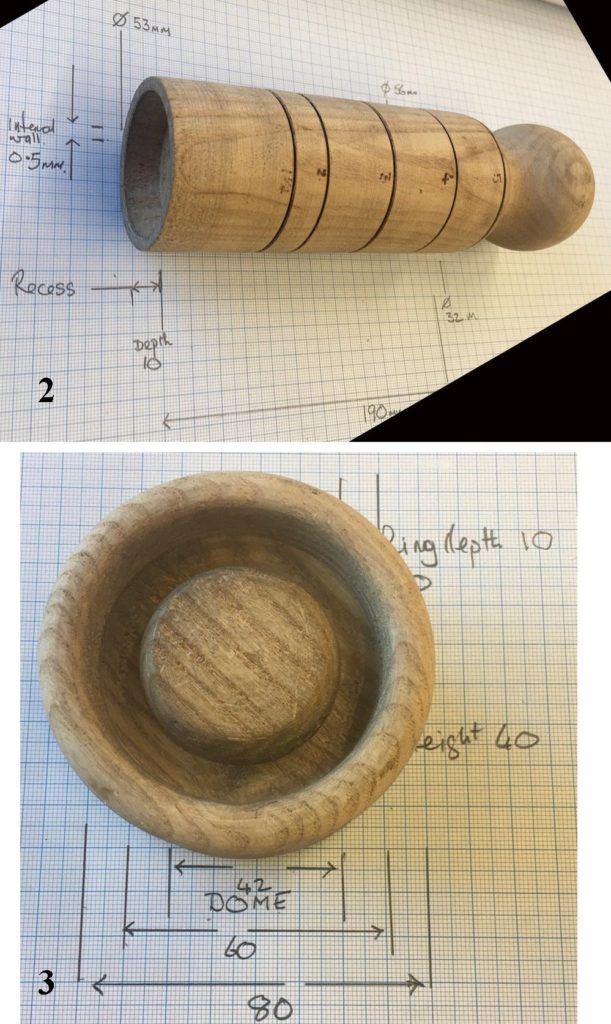
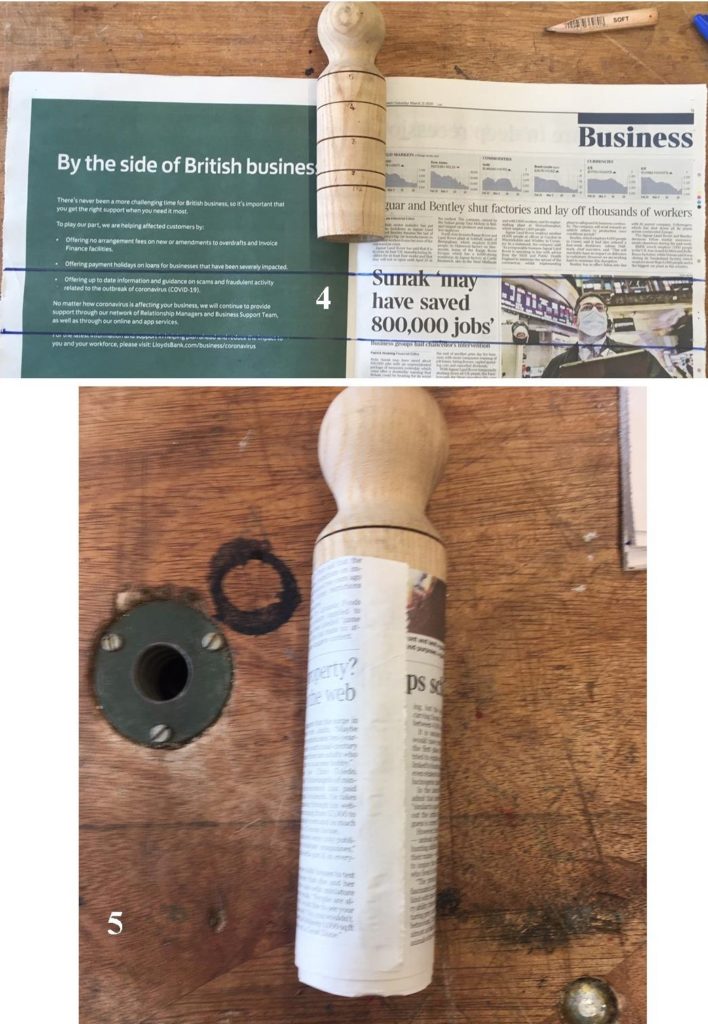
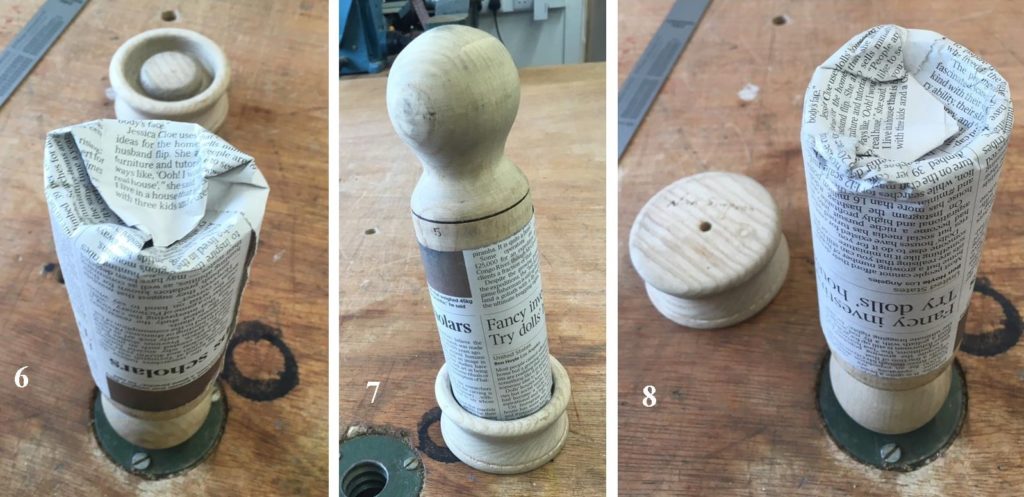
My version of the potmaker tool is marked with scorch lines at 1½ “, 2”,3”, 4” and 5” being the depth of the intended seed pot. The tool is placed on the newspaper as in picture 4. Decide the depth of pot you want and add 1½” inches to turn over to make the bottom of the pot. Draw a line and cut a full width of tabloid newspaper as a strip. Now, roll the strip around the tool as in picture 5 making sure you have the 1 ½” over at the base; a drop of paper glue will hold the flap in place but is not necessary. Fold over the newspaper at the base (picture 6). Now form the base by firmly rotating back and forth in the base-former (picture 7). Picture 8 shows the finished pot ready to be taken off the pot-making tool. The finished item is show in picture 1.

Now fill the pot with seed compost, sow your seed(s) and then water. Store in the normal way and plant out directly into the ground when growth and conditions are right. I like to cut off the base at planting out time but this is not strictly necessary.

I hope you enjoy this and find the tool useful. They make good birthday presents too.

I must add that this is not an original idea. I first saw this in a video by Steve Jones who is a production turner in the Midlands of England and whose wizardry with a skew chisel is a wonder to behold.

Regards to you all, and keep safe,

Nick Simpson.

Here are the pictures that accompany the text,

Read the text and follow the numbers.
Your seed pot should now be ready to be planted.

I thought I would show you what I have been doing over the past 10 days, my veg patch is almost complete, my small veg seed trays are in the greenhouse to germinate, I will harden them off prior to planting out.

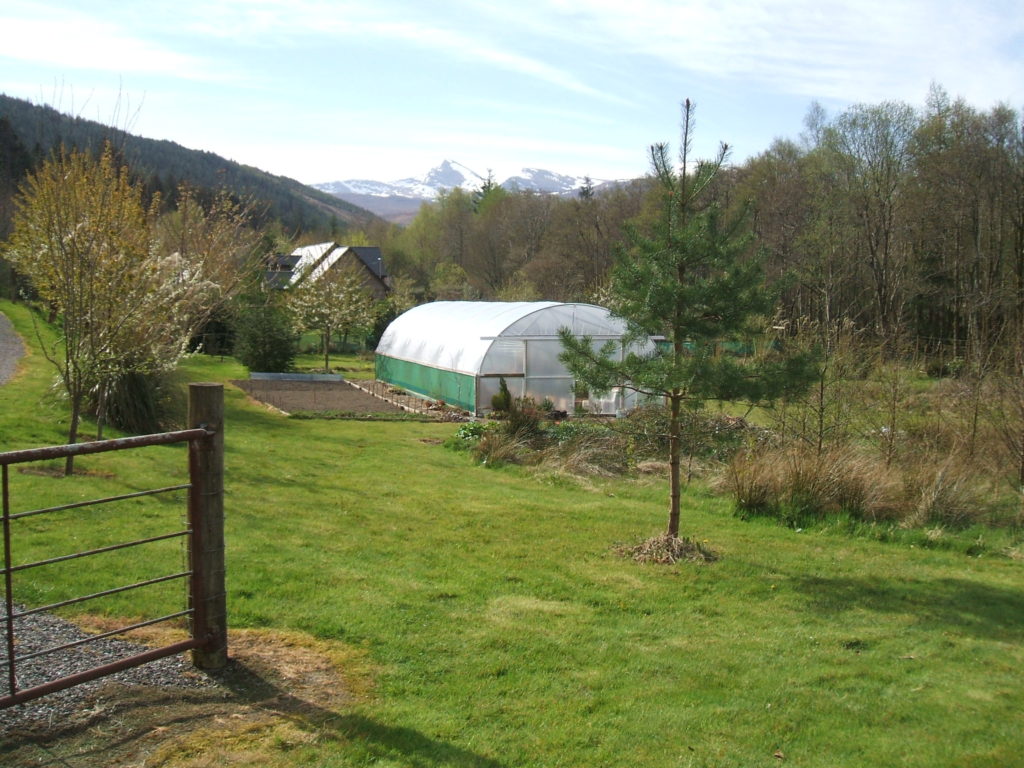
Picture taken this morning, the sun is out, the temperature is good but you can still see the snow that remains on Sgurr Mor. My tunnel is 48 feet long by 18 feet wide, the veg plot being slightly bigger can be seen to the left of the tunnel.

If any of you want to use this space to get anything you are finding difficult to get during this shut down just email me with your request or question and I will post it on.

Regards to you all, and keep safe,

Alec Mutch.

HWC members pictures 19-04-2020

Here are some more of our members pictures that I recently received, they have come from Gordon Leitch and Jeff Buttress. I did receive some of Gordon’s pictures before the post on Natural edges went out, but as these pictures did not have any natural edge element in any of the items he sent me pictures of, I decided to do them as a separate post, and here they are now.

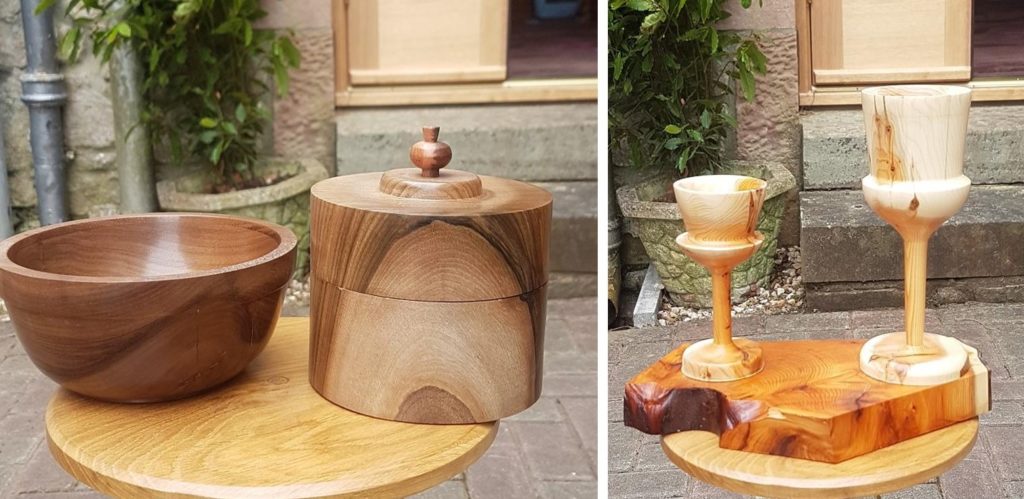
These were the first 2 pictures , the picture on the left has a bowl and a box both made from Walnut, the picture on the right has 2 goblets, both made from Native Yew.

A few days later I also received some more pictures from Gordon Leitch this time of a natural edged bowl, and Gordon had a couple of questions about the item he had made.

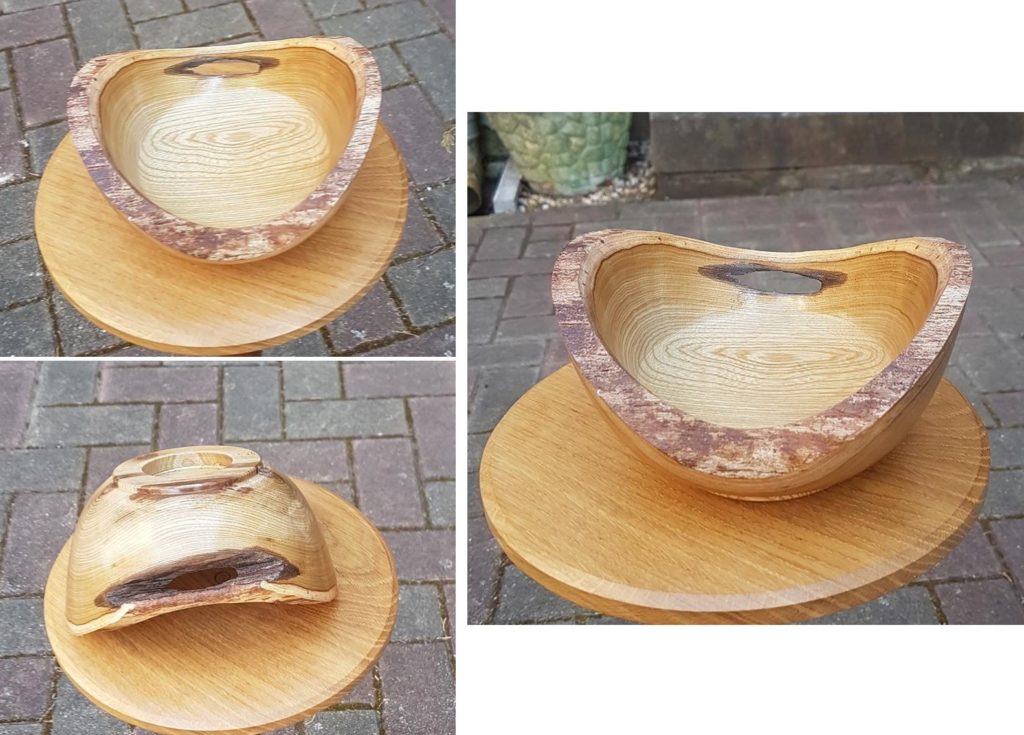
These are the 3 pictures of his Natural edged bowl, Gordon also went on to ask the following.
Evening Alex I am sending you 3 photos of a natural edge bowl I just finished for your thoughts. It is made from a misshapen piece of laburnum,
(A)  Would you have carried on or scrapped piece ?? 
( B) Do you think it looks odd with hole in side. 
 I would appreciate your thoughts.  
Regards Gordon 
Here’s what I think Gordon, I would most certainly have carried on, it would not have been scrapped, do I think it looks odd with the hole in the side? certainly not! I am always looking for odd things or odd shapes to turn into precious artefacts , you have done very well with this piece of work.
These next 5 pictures came in from Jeff Buttress.
Jeff you have done very well with all the items you have made, you would also appear to be very much better at the cleaning up than most of us are, I’ve never seen my workshop this tidy even when I was setting it up.
Here’s what Jeff had to say about his pictures,

Hi Alec
I enjoyed seeing the members work for the live edge bowl work, so much that I decided to have a go. Having had the beginners tuition postponed because of the closure I’ve been trawling you tube for guidance.
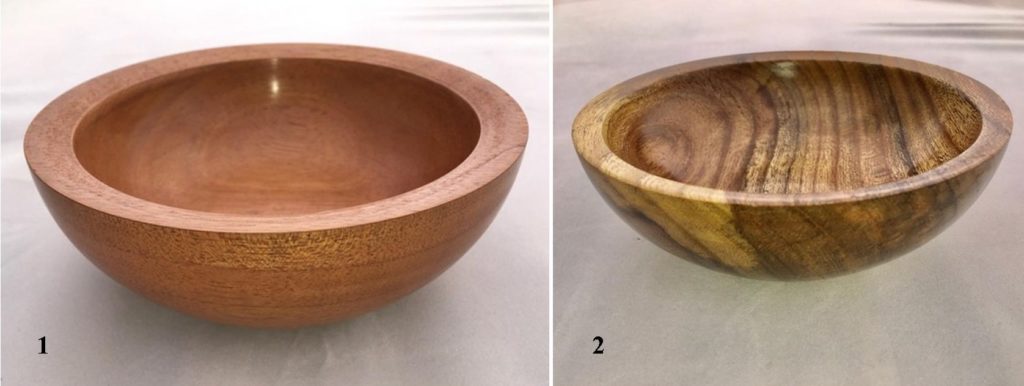
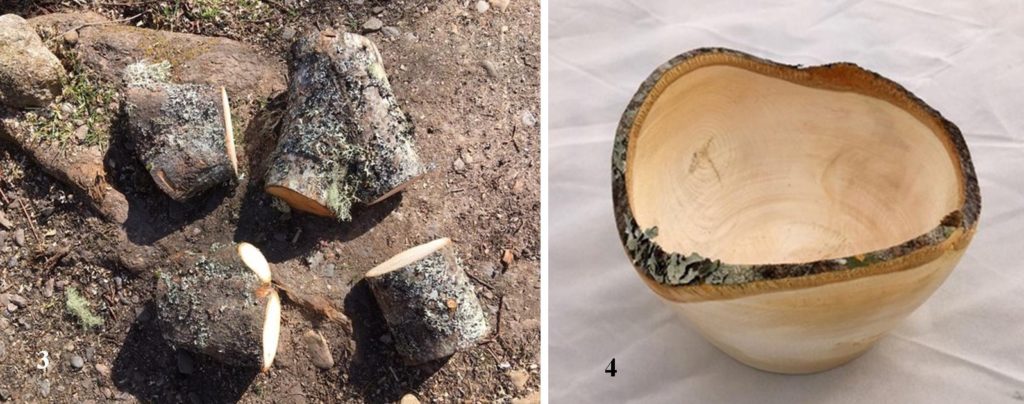
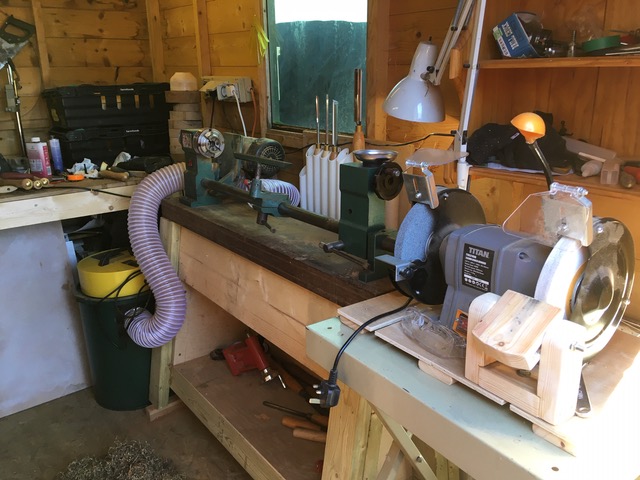
I usually only turn pens but with time on my hands I’m exploring further. My first turned bowl (pic 1) is from a mahogany blank 150 mm dia x 60 deep. I’m quite pleased with the resulting bowl even though the walls are on the thick side at 10mm.  The second piece I tried ( pic 2 )was from a Laburnum blank I prepared myself from a tree taken down about 4 years ago. It started life at 135 mm dia x 50 deep and I ended up with a bowl 128mm dia x 45 mm deep with wall thickness of 7 mm. Both bowls were finished with sanding sealer and Melamine lacquer. The main problem I had was dust instead of shavings with some of the cuts. Today after having been inspired by the club images I decided to have a go at a live edge bowl. I don’t have any seasoned wood suitable for a live edge bowl but I had a lime tree lopped a month ago so found a suitable bit of green wood. I started with a branch joint about 90mm diameter and 120 long. One of the bits in pic 3. I’m really pleased with the result (pic 4) although I have a few issues with it, There are a couple of areas of tear out that I couldn’t get rid of and sanding proved a bit difficult, just kept clogging up. I will see how well it dries and will possibly be able to remount it and sand it and add a finish coat. Pic 5 is a view of my woodturning shed with the 1960’s Tyme lathe I rebuilt.
Regards,
Jeff Buttress.

Thank’s to Gordon and Jeff for sharing their work and thoughts with us all I hope this will inspire some more of you to send in some pictures, but do remember to give me a few details along with them.

Also remember that our clubhouse remains closed, the situation will be reviewed after we see what the government does on the 7th May, in the meantime stay safe and avoid this virus.

Report on our virtual meeting 16-04-2020 working with natural edges.

As you are all aware our normal meeting would have been tonight 16th April 2020, as this did not happen we asked you to make this a virtual meeting, treating the meeting as if it had happened. The subject of the meeting was working with natural edges or inclusions and we asked you to make something along those lines and have it finished for the 16th April, we then asked you to send some pictures of what you had made for inclusion on our web site. I am very pleased to report that 10 members have done exactly what we wanted you to do and sent a total of 44 pictures along with some text, the best way to show all these is with a picture gallery, the text I will deal with separately, I will give the name of the member followed by a number system to identify whose pictures belong to whom, these will all be listed here and the pictures will follow.

Pictures 1 to 6 are from Alan Ross. Thanks for giving us something to target our efforts on.
Find attached photos of live edge bowl I have had a go at making.
dia- 150mm x 80mm high.
Made from a birch log with three branches on it.
Finished with sanding sealer and sanded to 400 grit. Three coats of melamine lacquer,   buffed with ‘cut and paste’ then polished with Wood wax 22
Alan Ross (Nairn) .

Pictures 7 to 11 are from Dave Hutcheson.

Hope you are all well and staying safe. Here’s a hollow form I made today.This unusual blank came straight out of the firewood pile so required a wee bit of thinking as how to approach it. It’s a natural edged hollow form in burr elm and it’s finished with Liberon finishing oil. It measures 130mm wide by 95mm high. The branch inclusion only became apparent once turning was underway but I think it adds to the overall effect. 

Cheers Dave Hutcheson 

Pictures 12 to 14 are from Dave Line.

Please find attached Pictures of a couple of natural edge bowls as requested by Geoff.The 1st I made today is cross grain, it’s 150mm Dia by 90mm high. I don’t know what kind of wood it is. I picked it up a couple of years ago when I came across someone chopping a tree down in his garden.The second 2 are pictures of end grain turning I made a while back, again I don’t know what wood it is, I got it from you about a year ago. It is about 200mm high by about 140mm Dia.

Regards Dave Line.

Pictures 15 to 19 are from David Hobson.

The Bowl is made from Cherry

Finished with sanding sealer ,Yorkshire Grit and Liberon liquid wax

Size  230. X200 x 80.

David Hobson

Pictures 20 to 24 are from Errol Levings.

Hope the attached will be of interest.
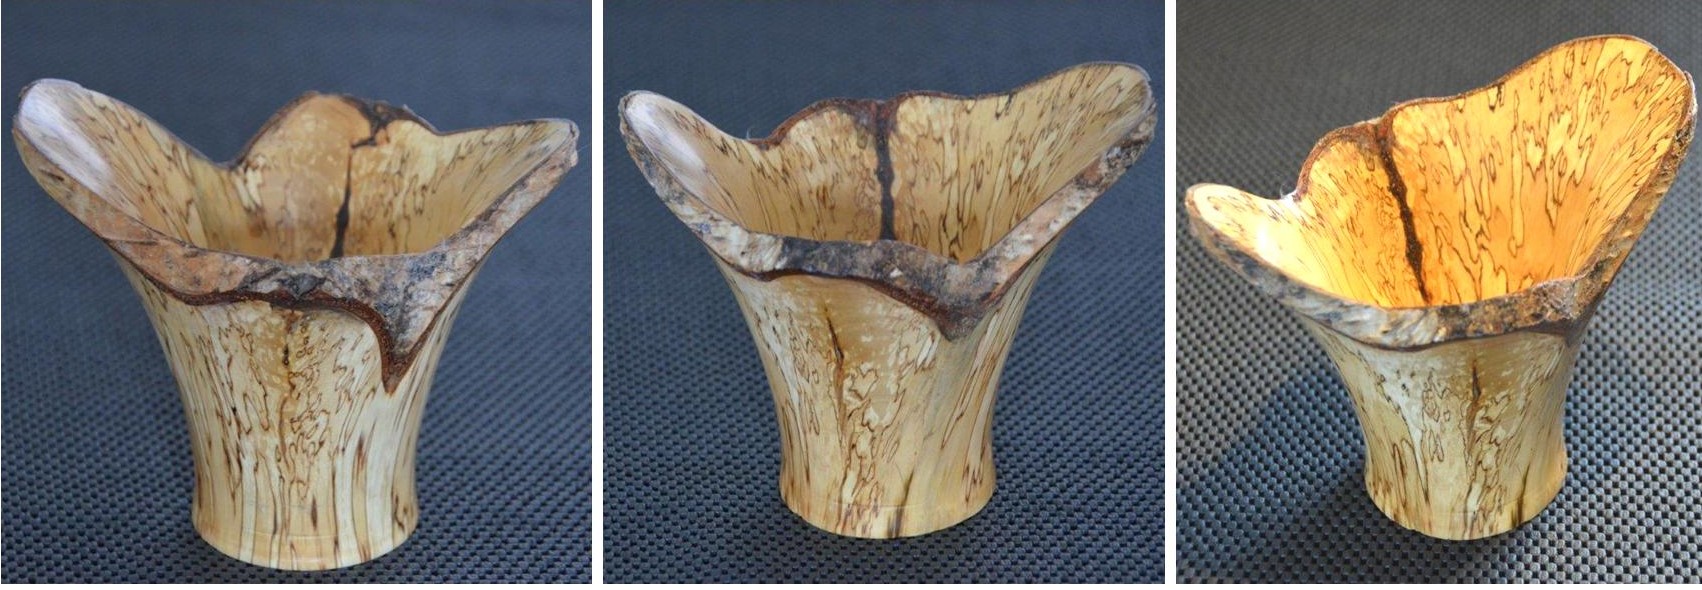
As you can see, a very spalted piece of silver birch crotch of too small an angle between branches, so bark is included very deeply into the vase.  Quite punky and difficult to avoid the soft bits breaking out – lots of sanding sealer and CA glue to harden them. Did not dare to  make either a spigot or tenon, so sized bottom to fit direct into 965 mm chuck.  Angle of bottom could have been slightly better to avoid marking by the chuck, despite several layers of masking tape to cushion the re-chuck.  Also there had been some movement of the wood so no longer fully concentric.

Thank goodness we all live in our wide open environment and have our workshops as part of our “home.”
Kind regards
Errol Levings.

Pictures 25 & 26 are from Geoff Potter.

Here’s my submission of a natural edge bowl.
The small bowl is made from wood which I won in the Club’s fortnightly raffle and it is Laburnum I believe. The bowl was finished with a 400 grit abrasive, sanding seal and a melomine finish – inside and out. The bowl measures 15 by 7 cm.
Laburnum wood is highly coloured, retains its bark well and seems to produce a very glossy smooth finish.

Geoff Potter

Pictures 27 to 30 are from Hamish Stuart.

Hope you are all well and staying safe. Had a wee play this afternoon don’t know if it’s any good to you but thought I would send it anyway. Finished with melamine 

Hamish Stuart.

Pictures 31 to 34 are from John Ruickbie.

I decided  to make a natural edge clock for this occasion and wanted to change from the usual form. I used the first slice from a log the outer one with the bark on it. The circumference is important if it is too  small the clock face resess will be too deep as in the first one I tried which  was made of elm. The second attempt was made with sycamore and has a much shallower face. I also used a lighter base which improved the overall effect. I have included both pictures.

John Ruickbie.

Pictures 35 & 36 are from Nick Simpson.

Here are 2 natural edge pieces now that my workshop is up and running.The first is one of my own sycamore trees from Northumberland. It is a section of sound wood from a rotted-back section of branch at the trunk. It measures 8” by 4”. The damaged edges have been textured by burr and then scorched and wire-brushed. Finish was by sanding sealer (after scorching!) and Renaissance wax.

The vase is from a Yew branch in which the natural edge section was simply the irregularity characteristic of yew but the bark couldn’t be retained.. It is hollowed to 8mm but heavier at the base and stands 6” tall. Finished with 10-400 mirca, sanding sealer and Renaissance wax, which I like because it resists fingermarks.

Best wishes

Nick Simpson.

Pictures 37 to 44 are from me, Alec Mutch.

They show a natural edged bowl I made some time ago from a piece of Laburnum, it measured about 200 mm in length and just over 100 mm in height. The finish was my normal finish of Sanding sealer followed by a coat of Melamine and then buffed to a soft sheen. I like to use some weird shapes of blanks, as you will see it was made from a branch intersection.

Alec Mutch.

I would like to take this opportunity to thank all of you who took the time to make your items and more so to then send them to me for this post, we will be repeating this process for every meeting we have to miss due to this Virus, the next meeting would be on the 30th April 2020 and that will also be a Virtual meeting, the programme for that meeting is a Showtime meeting, it would normally be handled by myself. You can start to think of what you might make for this meeting, just imagine you will be there and send me the pictures of what you would have taken along for the members to see, remember there is no actual criteria for this meeting, just make whatever you like and send me the pictures and the text of course, pictures for this to be in by the 29th April. This should not stop you sending me any other pictures to upload between now and then, so keep sending me your pictures.

Remember the club house is still closed, you will be notified when we will re-start our meetings again, but in the meantime I hope you all stay safe from this deadly virus.